

Published: Mar 14, 2023 by Isaac Johnson
Recently, quite haphazardly, I discovered my secondary test cluster was operating entirely over the Wifi NIC. I realized this was both inefficient and problematic as my wifi router can be spotty in the basement. This provided an opportune time to update the Ansible playbooks to properly handle List and Dictionary variables while I respun the cluster.
We’ll show some basic variables in existing Playbooks (like GlusterFS) then update our K3s respin Playbook to make it more dynamic. We’ll then add Rancher to the cluster for good measure and wrap by making a new Playbook for adding Datadog Cluster agents via AWX/Ansible.
Testing with Gluster Playbook
I’ll update the glusterFS playbook first to take in some list variables with names
Then I’ll change from hardcoded IPs to using the list I created above
builder@DESKTOP-QADGF36:~/Workspaces/ansible-playbooks$ git diff glusterfs.yaml
diff --git a/glusterfs.yaml b/glusterfs.yaml
index 8f08296..9645b94 100644
--- a/glusterfs.yaml
+++ b/glusterfs.yaml
@@ -5,11 +5,10 @@
   tasks:
   - name: Set IPTables entry (if Firewall enabled)
     ansible.builtin.shell: |
-      iptables -I INPUT -p all -s 192.168.1.205 -j ACCEPT
-      iptables -I INPUT -p all -s 192.168.1.159 -j ACCEPT
-      iptables -I INPUT -p all -s 192.168.1.81 -j ACCEPT
+      iptables -I INPUT -p all -s  -j ACCEPT
     become: true
     ignore_errors: True
+    loop: ""

   - name: Install glusterfs server
     ansible.builtin.shell: |
@@ -36,11 +35,12 @@
   tasks:
   - name: GlusterFS Peer Probe
     ansible.builtin.shell: |
-       gluster peer probe 192.168.1.81
-       gluster peer probe 192.168.1.159
-       gluster peer probe 192.168.1.205
+       gluster peer probe
+       gluster peer probe
+       gluster peer probe
     become: true
     ignore_errors: True
+    loop: ""

   - name: GlusterFS Peer Status
     ansible.builtin.shell: |
@@ -49,7 +49,7 @@

   - name: Create GV0 Volume
     ansible.builtin.shell: |
-       gluster volume create gv0 replica 3 192.168.1.81:/mnt/glusterfs/brick1/gv0 192.168.1.159:/mnt/glusterfs/brick1/gv0 192.168.1.205:/mnt/glusterfs/brick1/gv0
+       gluster volume create gv0 replica 3 :/mnt/glusterfs/brick1/gv0 :/mnt/glusterfs/brick1/gv0 :/mnt/glusterfs/brick1/gv0
     become: true
:...skipping...
diff --git a/glusterfs.yaml b/glusterfs.yaml
index 8f08296..9645b94 100644
--- a/glusterfs.yaml
+++ b/glusterfs.yaml
@@ -5,11 +5,10 @@
   tasks:
   - name: Set IPTables entry (if Firewall enabled)
     ansible.builtin.shell: |
-      iptables -I INPUT -p all -s 192.168.1.205 -j ACCEPT
-      iptables -I INPUT -p all -s 192.168.1.159 -j ACCEPT
-      iptables -I INPUT -p all -s 192.168.1.81 -j ACCEPT
+      iptables -I INPUT -p all -s  -j ACCEPT
     become: true
     ignore_errors: True
+    loop: ""

   - name: Install glusterfs server
     ansible.builtin.shell: |
@@ -36,11 +35,12 @@
   tasks:
   - name: GlusterFS Peer Probe
     ansible.builtin.shell: |
-       gluster peer probe 192.168.1.81
-       gluster peer probe 192.168.1.159
-       gluster peer probe 192.168.1.205
+       gluster peer probe
+       gluster peer probe
+       gluster peer probe
     become: true
     ignore_errors: True
+    loop: ""

   - name: GlusterFS Peer Status
     ansible.builtin.shell: |
@@ -49,7 +49,7 @@

   - name: Create GV0 Volume
     ansible.builtin.shell: |
-       gluster volume create gv0 replica 3 192.168.1.81:/mnt/glusterfs/brick1/gv0 192.168.1.159:/mnt/glusterfs/brick1/gv0 192.168.1.205:/mnt/glusterfs/brick1/gv0
+       gluster volume create gv0 replica 3 :/mnt/glusterfs/brick1/gv0 :/mnt/glusterfs/brick1/gv0 :/mnt/glusterfs/brick1/gv0
     become: true

   - name: Start GV0 Volume
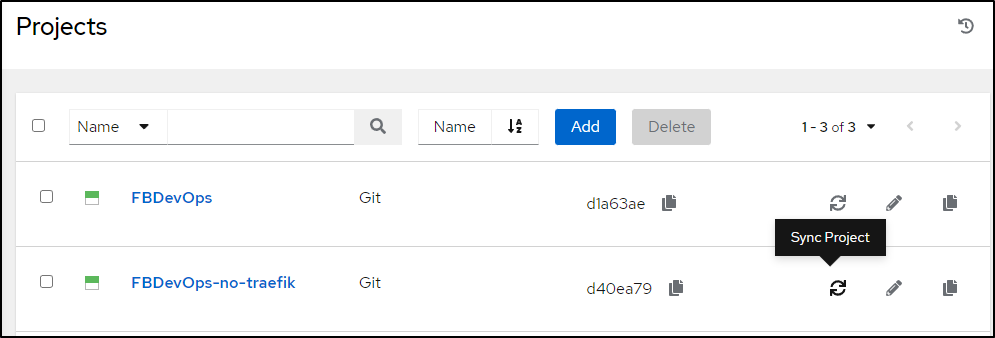
To test, I’ll sync the project
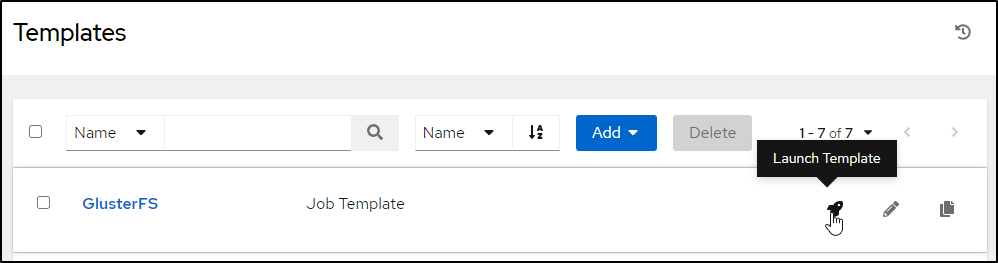
Then fire the updated playbook
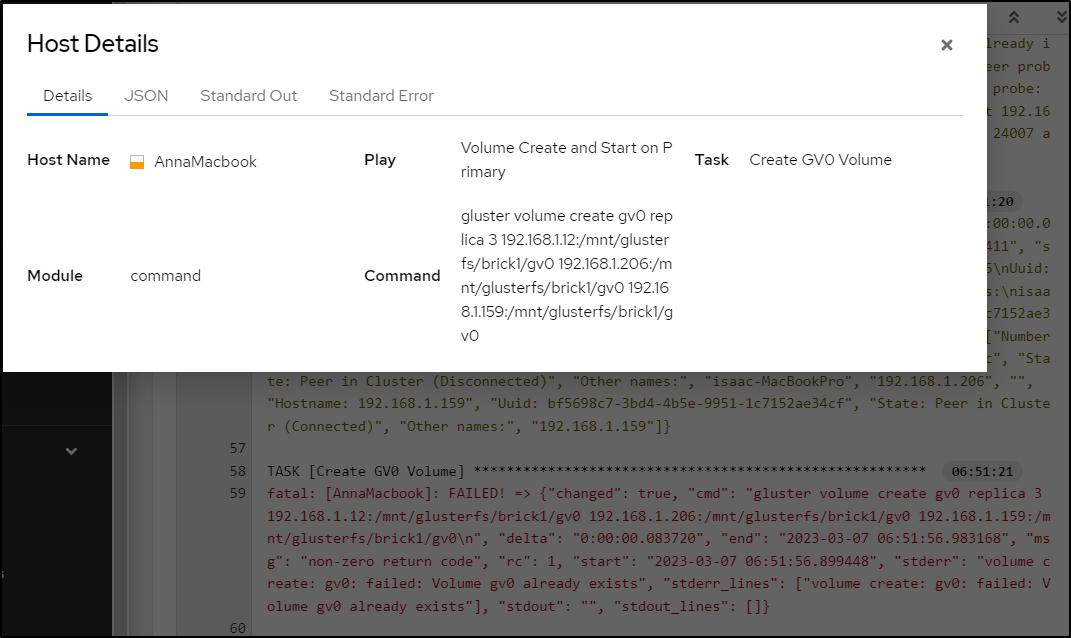
It only failed because I had already set the volume, but we can see it properly setup the volume create command
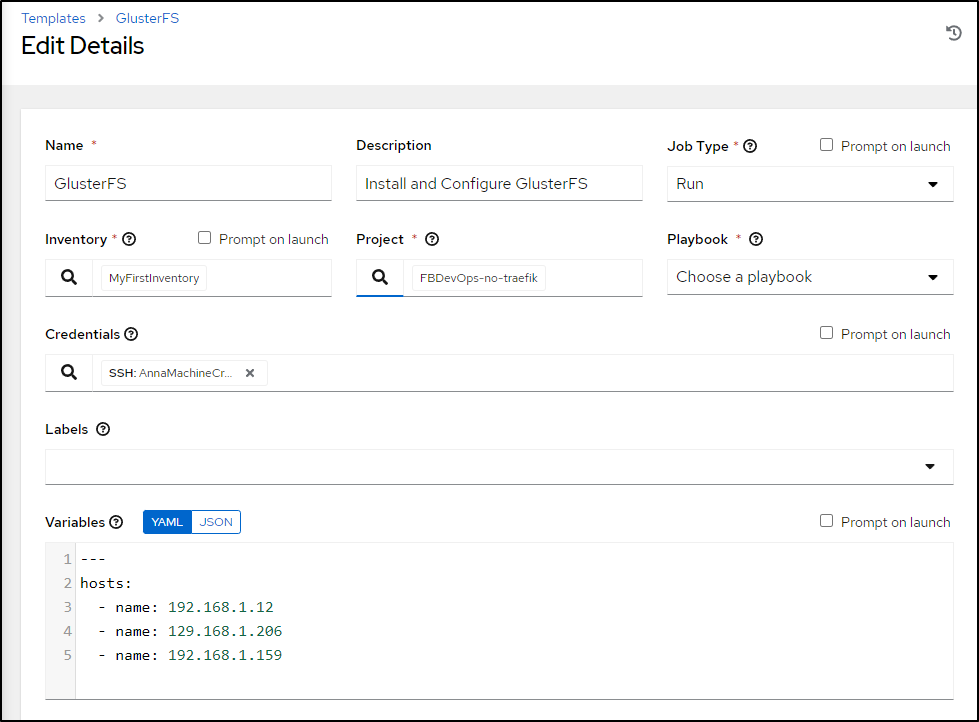
Updating the main playbook
I’ll add a YAML block with the same hosts (though I’ll just use the first) and also the external ingress
---
k3sversion: v1.23.10%2Bk3s1
hosts:
  - name: 192.168.1.12
  - name: 192.168.1.206
  - name: 192.168.1.159
extingress:
  ip: 73.242.50.46
  port: 25460
To be clear, the first block (hosts) is a list/array so items should be referenced as hosts[x].name wheras extingress is a dictionary/hash which means we use extingress["ip"] or extingress.ip in the code.

I changed both k3s reload playbooks (Traefik and Istio)
$ git diff reloadk3s.yaml
diff --git a/reloadk3s.yaml b/reloadk3s.yaml
index 3a6e076..ff3a78f 100644
--- a/reloadk3s.yaml
+++ b/reloadk3s.yaml
@@ -57,7 +57,7 @@

   - name: Install K3s
     ansible.builtin.shell: |
-      curl -sfL https://get.k3s.io | INSTALL_K3S_VERSION="v1.23.10%2Bk3s1" K3S_KUBECONFIG_MODE="644" INSTALL_K3S_EXEC="--tls-san 73.242.50.46" sh -
+      curl -sfL https://get.k3s.io | INSTALL_K3S_VERSION="" K3S_KUBECONFIG_MODE="644" INSTALL_K3S_EXEC="--tls-san " sh -
     become: true
     args:
       chdir: /tmp
@@ -72,7 +72,7 @@

   - name: Output Kubeconfig
     ansible.builtin.shell: |
-      cat /etc/rancher/k3s/k3s.yaml | sed 's/127.0.0.1/192.168.1.81/g' | base64 -w 0
+      cat /etc/rancher/k3s/k3s.yaml | sed 's/127.0.0.1//g' | base64 -w 0
     register: kubeconfig
     become: true
     args:
@@ -87,8 +87,8 @@

   - name: Prep Config
     ansible.builtin.shell: |
-      cat /etc/rancher/k3s/k3s.yaml | sed 's/127.0.0.1:[0-9]*/73.242.50.46:25460/g' > /tmp/mac81-ext
-      cat /etc/rancher/k3s/k3s.yaml | sed 's/127.0.0.1/192.168.1.81/g' > /tmp/mac81-int
+      cat /etc/rancher/k3s/k3s.yaml | sed 's/127.0.0.1:[0-9]*/:/g' > /tmp/mac81-ext
+      cat /etc/rancher/k3s/k3s.yaml | sed 's/127.0.0.1//g' > /tmp/mac81-int
     register: kubeconfig
     args:
       chdir: /tmp
@@ -140,4 +140,4 @@

   - name: Install k3s Agent
     ansible.builtin.shell: |
-      curl -sfL https://get.k3s.io | INSTALL_K3S_VERSION="v1.23.10%2Bk3s1" K3S_URL=https://192.168.1.81:6443 K3S_TOKEN= sh -
+      curl -sfL https://get.k3s.io | INSTALL_K3S_VERSION="" K3S_URL=https://:6443 K3S_TOKEN= sh -
and
builder@DESKTOP-QADGF36:~/Workspaces/ansible-playbooks$ git diff reloadk3s-notraefik.yml
diff --git a/reloadk3s-notraefik.yml b/reloadk3s-notraefik.yml
index b9d716a..75cab79 100644
--- a/reloadk3s-notraefik.yml
+++ b/reloadk3s-notraefik.yml
@@ -57,7 +57,7 @@

   - name: Install K3s
     ansible.builtin.shell: |
-      curl -sfL https://get.k3s.io | INSTALL_K3S_VERSION="v1.23.10%2Bk3s1" K3S_KUBECONFIG_MODE="644" INSTALL_K3S_EXEC="--no-deploy traefik --tls-san 73.242.50.46" sh -
+      curl -sfL https://get.k3s.io | INSTALL_K3S_VERSION="" K3S_KUBECONFIG_MODE="644" INSTALL_K3S_EXEC="--no-deploy traefik --tls-san " sh -
     become: true
     args:
       chdir: /tmp
@@ -72,7 +72,7 @@

   - name: Output Kubeconfig
     ansible.builtin.shell: |
-      cat /etc/rancher/k3s/k3s.yaml | sed 's/127.0.0.1/192.168.1.81/g' | base64 -w 0
+      cat /etc/rancher/k3s/k3s.yaml | sed 's/127.0.0.1//g' | base64 -w 0
     register: kubeconfig
     become: true
     args:
@@ -87,8 +87,8 @@

   - name: Prep Config
     ansible.builtin.shell: |
-      cat /etc/rancher/k3s/k3s.yaml | sed 's/127.0.0.1:[0-9]*/73.242.50.46:25460/g' > /tmp/mac81-ext
-      cat /etc/rancher/k3s/k3s.yaml | sed 's/127.0.0.1/192.168.1.81/g' > /tmp/mac81-int
+      cat /etc/rancher/k3s/k3s.yaml | sed 's/127.0.0.1:[0-9]*/:/g' > /tmp/mac81-ext
+      cat /etc/rancher/k3s/k3s.yaml | sed 's/127.0.0.1//g' > /tmp/mac81-int
     register: kubeconfig
     args:
       chdir: /tmp
@@ -140,4 +140,4 @@

   - name: Install k3s Agent
     ansible.builtin.shell: |
-      curl -sfL https://get.k3s.io | INSTALL_K3S_VERSION="v1.23.10%2Bk3s1" K3S_URL=https://192.168.1.81:6443 K3S_TOKEN= sh -
+      curl -sfL https://get.k3s.io | INSTALL_K3S_VERSION="" K3S_URL=https://:6443 K3S_TOKEN= sh -
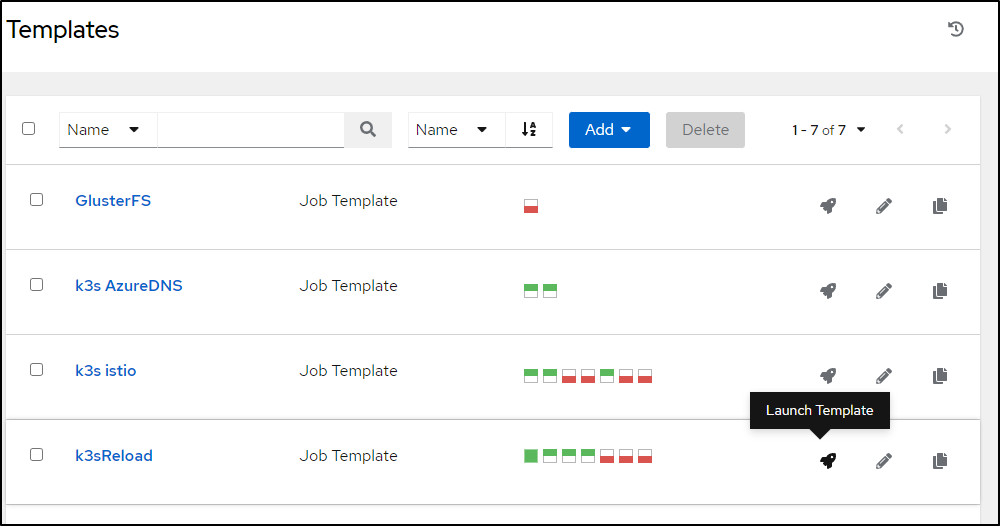
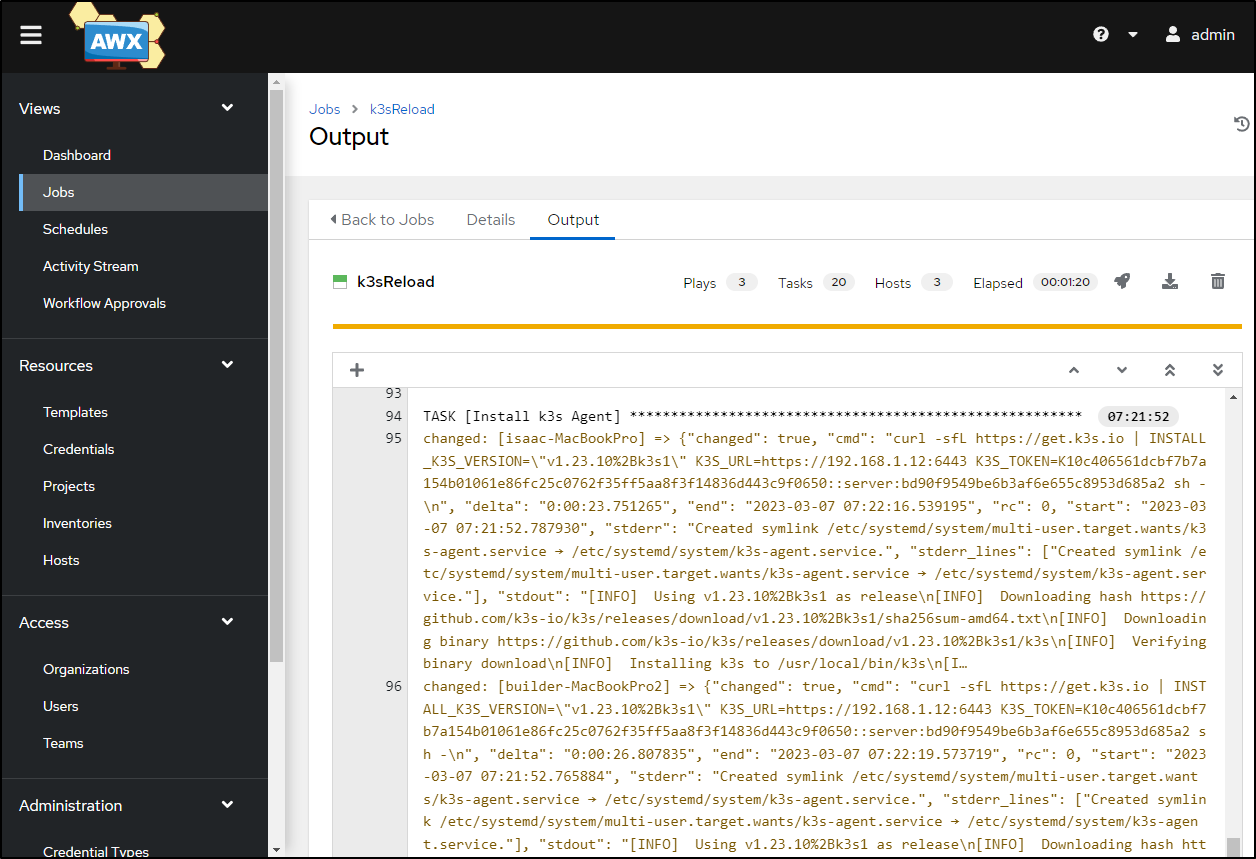
Now I can update the projects and fire off a template
We can see that was successful
And if I pull a fresh AKV stored Kubeconfig I should see the updated localIP (192.168.1.12) instead of the former (192.168.1.81)
builder@DESKTOP-QADGF36:~/Workspaces/jekyll-blog$ cp ~/.kube/config ~/.kube/config.bak && az keyvault secret show --vault-name idjakv --name k3sremoteconfig | jq -r .value > ~/.kube/config
builder@DESKTOP-QADGF36:~/Workspaces/jekyll-blog$ kubectx mac81
Switched to context "mac81".
builder@DESKTOP-QADGF36:~/Workspaces/jekyll-blog$ kubectl get nodes
NAME                  STATUS   ROLES                  AGE     VERSION
anna-macbookair       Ready    control-plane,master   4m51s   v1.23.10+k3s1
builder-macbookpro2   Ready    <none>                 4m7s    v1.23.10+k3s1
isaac-macbookpro      Ready    <none>                 4m10s   v1.23.10+k3s1
Hmm.. that did not work
$ cat ~/.kube/config | grep 192.168.1
    server: https://192.168.1.78:6443
    server: https://192.168.1.81:6443
The problem lies in the perl that updates kubeconfig
#!/bin/perl
#

my ($combined,$newint,$output) = @ARGV;

open(FILEH,"$combined");
@filec = <FILEH>;
close(FILEH);

my $newcad=`cat $newint | grep 'certificate-authority-data' | sed 's/^.*: //'`;
my $clientcertdata=`cat $newint | grep 'client-certificate-data' | sed 's/^.*: //'`;
my $clientkeydata=`cat $newint | grep 'client-key-data' | sed 's/^.*: //'`;

for (my $i = 0; $i < scalar(@filec); $i += 1)
{
	#	print "$i\n";

	#  certificate-authority-data
	if (($filec[$i] =~ /server: https:\/\/73.242.50.46:25460/)||($filec[$i] =~ /server: https:\/\/192.168.1.81:6443/))
	{
		#print $filec[($i - 1)];
		$filec[($i - 1)] =~ s/^(.*)data: .*/\1data: /;
		chomp($filec[($i - 1)]);
		#	print $filec[($i - 1)] . $newcad;
	        $filec[($i - 1)] .= $newcad;
	}
	# client cert and key data
	if ($filec[$i] =~ /^- name: mac81/) {
	    $filec[$i+2] =~ s/^(.*)data: .*/\1data: /;
	    chomp($filec[$i+2]);
	    $filec[$i+2] .= $clientcertdata;
	    $filec[$i+3] =~ s/^(.*)data: .*/\1data: /;
	    chomp($filec[$i+3]);
	    $filec[$i+3] .= $clientkeydata;
        }
}

# print updated file
open(FILEO,">$output");
foreach my $line (@filec)
{
   print FILEO $line;
}
close(FILEO);

exit 0;
It rather assumes we never change the external blocks and just insert the new data.
Instead, I’ll check for old and new, then update the IPs and Ports if changed
#!/bin/perl
#

my ($combined,$newint,$output,$newLocal,$newRemote,$newPort) = @ARGV;

open(FILEH,"$combined");
@filec = <FILEH>;
close(FILEH);

my $newcad=`cat $newint | grep 'certificate-authority-data' | sed 's/^.*: //'`;
my $clientcertdata=`cat $newint | grep 'client-certificate-data' | sed 's/^.*: //'`;
my $clientkeydata=`cat $newint | grep 'client-key-data' | sed 's/^.*: //'`;

for (my $i = 0; $i < scalar(@filec); $i += 1)
{
	#	print "$i\n";

	#  certificate-authority-data
	if (($filec[$i] =~ /server: https:\/\/73.242.50.46:25460/)||($filec[$i] =~ /server: https:\/\/192.168.1.81:6443/)||($filec[$i] =~ /server: https:\/\/$newRemote:$newPort/)||($filec[$i] =~ /server: https:\/\/$newLocal:6443/))
	{
		#print $filec[($i - 1)];
		$filec[($i - 1)] =~ s/^(.*)data: .*/\1data: /;
		chomp($filec[($i - 1)]);
		#	print $filec[($i - 1)] . $newcad;
	        $filec[($i - 1)] .= $newcad;
		# Now fix the Server IP and Ports if we changed
		if ($filec[$i] =~ /server: https:\/\/192/) {
			$filec[$i] =~ s/https:\/\/.*/https:\/\/$newLocal:6443/;
		} else {
			$filec[$i] =~ s/https:\/\/.*/https:\/\/$newRemote:$newPort/;
		}
	}
	# client cert and key data
	if ($filec[$i] =~ /^- name: mac81/) {
	    $filec[$i+2] =~ s/^(.*)data: .*/\1data: /;
	    chomp($filec[$i+2]);
	    $filec[$i+2] .= $clientcertdata;
	    $filec[$i+3] =~ s/^(.*)data: .*/\1data: /;
	    chomp($filec[$i+3]);
	    $filec[$i+3] .= $clientkeydata;
        }
}

# print updated file
open(FILEO,">$output");
foreach my $line (@filec)
{
   print FILEO $line;
}
close(FILEO);

exit 0;
Because I’m now adding three new vars
my ($combined,$newint,$output,$newLocal,$newRemote,$newPort) = @ARGV;
I’ll need to update my playbooks to accomodate
builder@DESKTOP-QADGF36:~/Workspaces/ansible-playbooks$ git diff
diff --git a/reloadk3s-notraefik.yml b/reloadk3s-notraefik.yml
index 75cab79..a849e2e 100644
--- a/reloadk3s-notraefik.yml
+++ b/reloadk3s-notraefik.yml
@@ -112,7 +112,7 @@
   - name: Update Combined
     ansible.builtin.shell: |
       az keyvault secret show --vault-name idjakv --name k3sremoteconfig | jq -r .value > /tmp/existing.yaml
-      perl /tmp/updateKConfigs.pl /tmp/existing.yaml /tmp/mac81-int /tmp/updated.yaml
+      perl /tmp/updateKConfigs.pl /tmp/existing.yaml /tmp/mac81-int /tmp/updated.yaml
       az keyvault secret set --vault-name idjakv --name k3sremoteconfig --file /tmp/updated.yaml || true
     register: kubeconfigall
     become: true
diff --git a/reloadk3s.yaml b/reloadk3s.yaml
index ff3a78f..01e3d24 100644
--- a/reloadk3s.yaml
+++ b/reloadk3s.yaml
@@ -112,7 +112,7 @@
   - name: Update Combined
     ansible.builtin.shell: |
       az keyvault secret show --vault-name idjakv --name k3sremoteconfig | jq -r .value > /tmp/existing.yaml
-      perl /tmp/updateKConfigs.pl /tmp/existing.yaml /tmp/mac81-int /tmp/updated.yaml
+      perl /tmp/updateKConfigs.pl /tmp/existing.yaml /tmp/mac81-int /tmp/updated.yaml
       az keyvault secret set --vault-name idjakv --name k3sremoteconfig --file /tmp/updated.yaml || true
     register: kubeconfigall
     become: true
diff --git a/updateKConfigs.pl b/updateKConfigs.pl
index 7125323..676dace 100644
--- a/updateKConfigs.pl
+++ b/updateKConfigs.pl
@@ -1,7 +1,7 @@
I’ll update the Project in AWX as before and launch a fresh Template Job
And when done, I can test to see the latest IPs
builder@DESKTOP-QADGF36:~/Workspaces/jekyll-blog$ cp ~/.kube/config ~/.kube/config.bak2 && az keyvault secret show --vault-name idjakv --name k3sremoteconfig | jq -r .value > ~/.kube/config
builder@DESKTOP-QADGF36:~/Workspaces/jekyll-blog$ kubectx mac81
Switched to context "mac81".
builder@DESKTOP-QADGF36:~/Workspaces/jekyll-blog$ kubectl get nodes
NAME                  STATUS   ROLES                  AGE     VERSION
anna-macbookair       Ready    control-plane,master   2m52s   v1.23.10+k3s1
builder-macbookpro2   Ready    <none>                 2m12s   v1.23.10+k3s1
isaac-macbookpro      Ready    <none>                 2m25s   v1.23.10+k3s1
builder@DESKTOP-QADGF36:~/Workspaces/jekyll-blog$ cat ~/.kube/config | grep 192.168.1
    server: https://192.168.1.78:6443
    server: https://192.168.1.12:6443
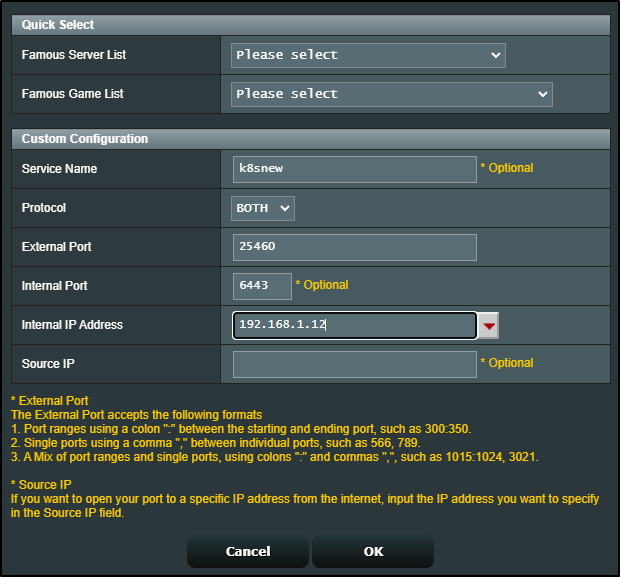
I realized external traffic was routing to the WIFI IP as well
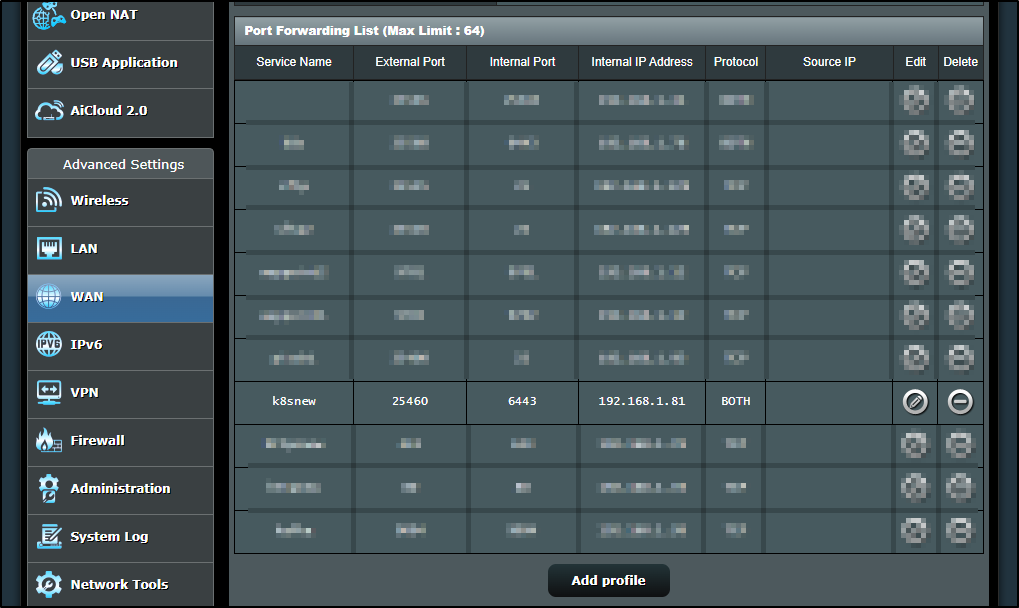
I corrected that as well
Rancher
In case you are following along doing the steps; I added Rancher to the primary with the idea I could create ansible playbooks to add new clusters to my primary Rancher instance with AWX. However, because of Ingress controller limitations, I stopped short of getting _new_ clusters added. This still shows a good how-to on adding Rancher, but not on successfully adding additional clusters
I wanted to add Rancher to help manage the cluster. It’s actually pretty easy with helm.
First, I need an R53 record
$ cat r53-rancher.json
{
  "Comment": "CREATE rancher fb.s A record ",
  "Changes": [
    {
      "Action": "CREATE",
      "ResourceRecordSet": {
        "Name": "rancher.freshbrewed.science",
        "Type": "A",
        "TTL": 300,
        "ResourceRecords": [
          {
            "Value": "73.242.50.46"
          }
        ]
      }
    }
  ]
}
$ aws route53 change-resource-record-sets --hosted-zone-id Z39E8QFU0F9PZP --change-batch file://r53-rancher.json

An error occurred (InvalidChangeBatch) when calling the ChangeResourceRecordSets operation: [Tried to create resource record set [name='rancher.freshbrewed.science.', type='A'] but it already exists]
I had forgotten that I set this up once before and the A record was already there.
I’ll add the Rancher stable repo and update
$ helm repo add rancher-stable https://releases.rancher.com/server-charts/stable
"rancher-stable" has been added to your repositories

$ helm repo update rancher-stable
Hang tight while we grab the latest from your chart repositories...
...Successfully got an update from the "rancher-stable" chart repository
Update Complete. ⎈Happy Helming!⎈
I’ll now install in my main cluster
$ helm install rancher rancher-stable/rancher --create-namespace --namespace cattle-system --set hostname=rancher.freshbrewed.science --set bootstrapPassword=moom
oomoomoo --set ingress.tls.source=letsEncrypt --set letsEncrypt.email=isaac.johnson@gmail.com --set letsEncrypt.ingress.class=nginx
NAME: rancher
LAST DEPLOYED: Sat Mar 11 10:38:38 2023
NAMESPACE: cattle-system
STATUS: deployed
REVISION: 1
TEST SUITE: None
NOTES:
Rancher Server has been installed.

NOTE: Rancher may take several minutes to fully initialize. Please standby while Certificates are being issued, Containers are started and the Ingress rule comes up.

Check out our docs at https://rancher.com/docs/

If you provided your own bootstrap password during installation, browse to https://rancher.freshbrewed.science to get started.

If this is the first time you installed Rancher, get started by running this command and clicking the URL it generates:

---
echo https://rancher.freshbrewed.science/dashboard/?setup=$(kubectl get secret --namespace cattle-system bootstrap-secret -o go-template='{{.data.bootstrapPassword|base64decode}}')
---

To get just the bootstrap password on its own, run:

---
kubectl get secret --namespace cattle-system bootstrap-secret -o go-template='{{.data.bootstrapPassword|base64decode}}{{ "\n" }}'
---


Happy Containering!
I can see it very quickly got the TLS cert
$ kubectl get cert -n cattle-system
NAME                  READY   SECRET                AGE
tls-rancher-ingress   True    tls-rancher-ingress   36s
I could see the pods slowly come up
$ kubectl get pods -n cattle-system
NAME                       READY   STATUS      RESTARTS   AGE
rancher-85dbd69598-cwx7l   1/1     Running     0          2m44s
rancher-85dbd69598-k47vw   1/1     Running     0          2m45s
rancher-85dbd69598-r6gdg   1/1     Running     0          2m44s
helm-operation-rrzp8       0/2     Completed   0          63s
helm-operation-vttvz       2/2     Running     0          8s
$ kubectl get pods -n cattle-system
NAME                               READY   STATUS      RESTARTS   AGE
rancher-85dbd69598-cwx7l           1/1     Running     0          3m49s
rancher-85dbd69598-k47vw           1/1     Running     0          3m50s
rancher-85dbd69598-r6gdg           1/1     Running     0          3m49s
helm-operation-rrzp8               0/2     Completed   0          2m8s
helm-operation-vttvz               0/2     Completed   0          73s
rancher-webhook-69bb6bc7cf-ccvz7   1/1     Running     0          53s
helm-operation-g2hlc               0/2     Completed   0          60s
The first time through, I had an issue

This was because the guide didn’t suggest setting the Rancher ingressClass (--set ingress.ingressClassName=nginx), only the LE ingressclass (--set letsEncrypt.ingress.class=nginx).
A quick helm update fixed that
$ helm upgrade rancher rancher-stable/rancher --create-namespace --namespace cattle-system --set hostname=rancher.freshbrewed.science --set bootstrapPassword=moomoomoomoo --set ingress.tls.source=letsEncrypt --set letsEncrypt.email=isaac.johnson@gmail.com --set letsEncrypt.ingress.class=nginx --set ingress.ingressClassName=nginx
I could now log in to Rancher
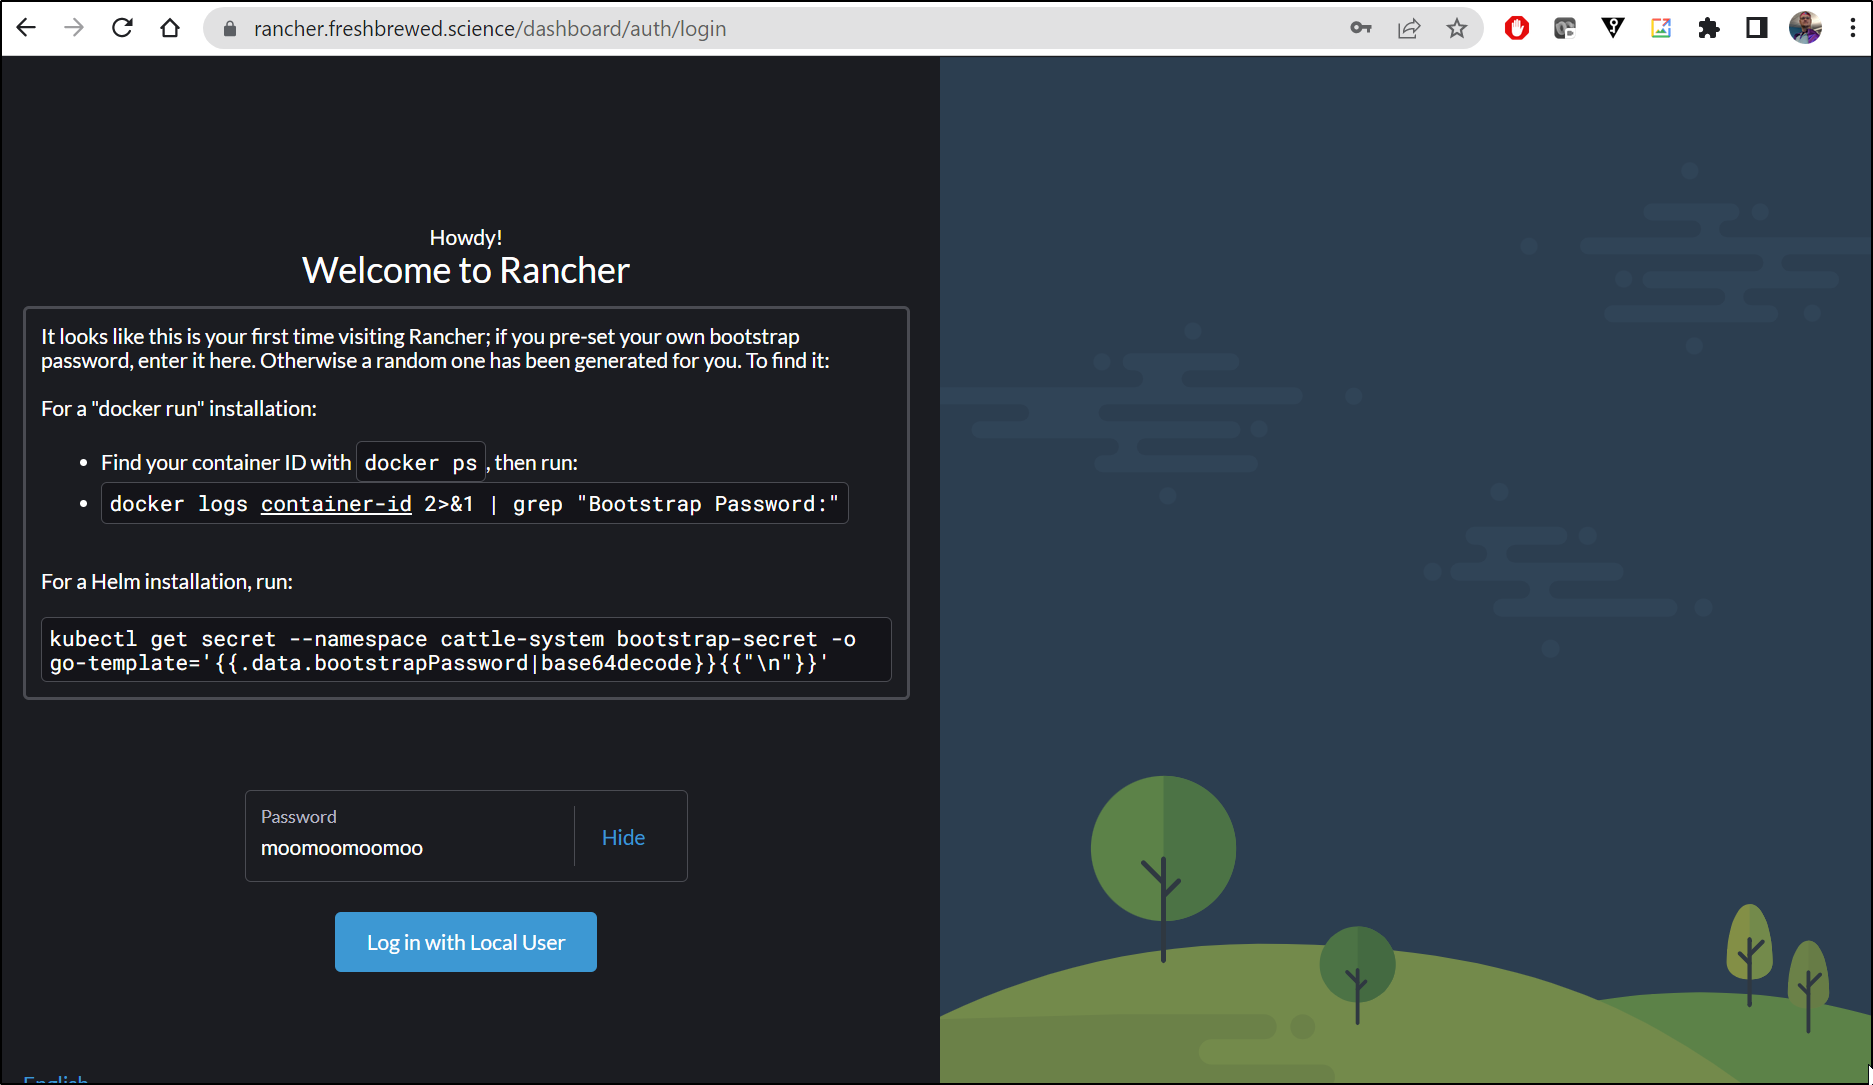
And we of course can fetch the password using that Kubectl command as well
$ kubectl get secret --namespace cattle-system bootstrap-secret -o go-template='{{.data.bootstrapPassword|base64decode}}{{"\n"}}'
moomoomoomoo
After a quick EULA screen
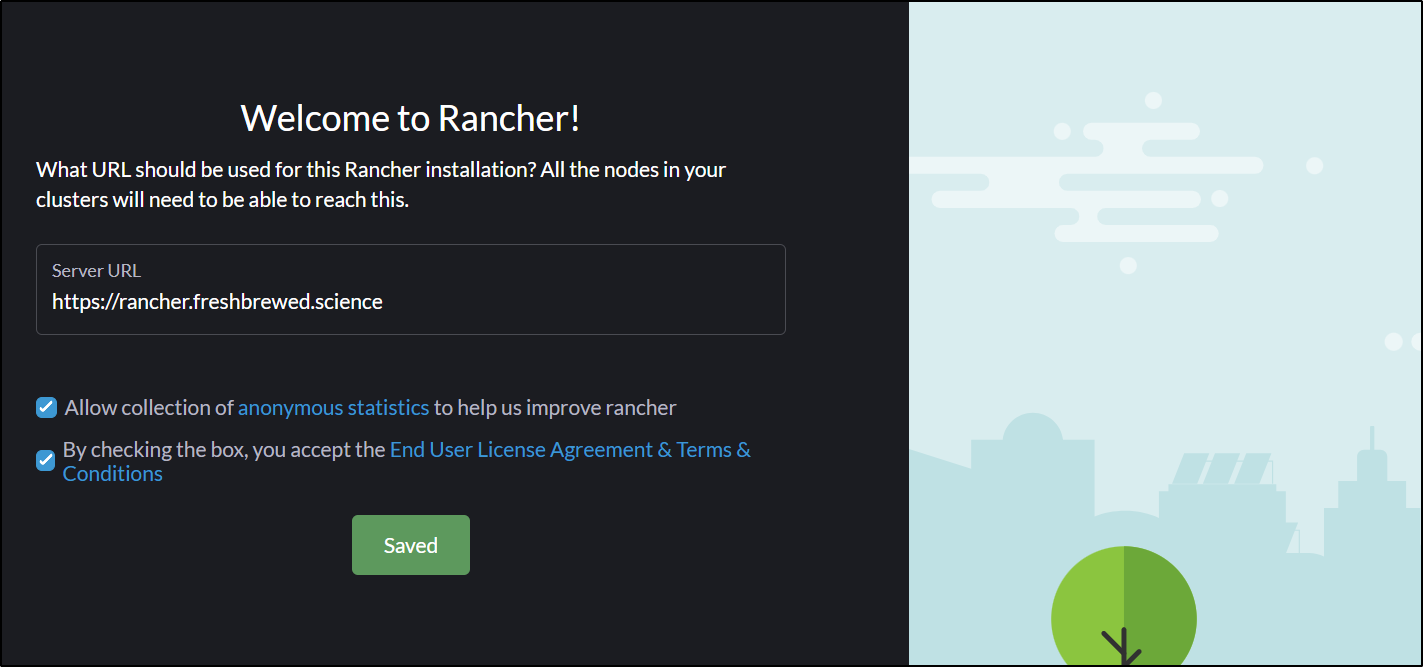
We are in to Rancher
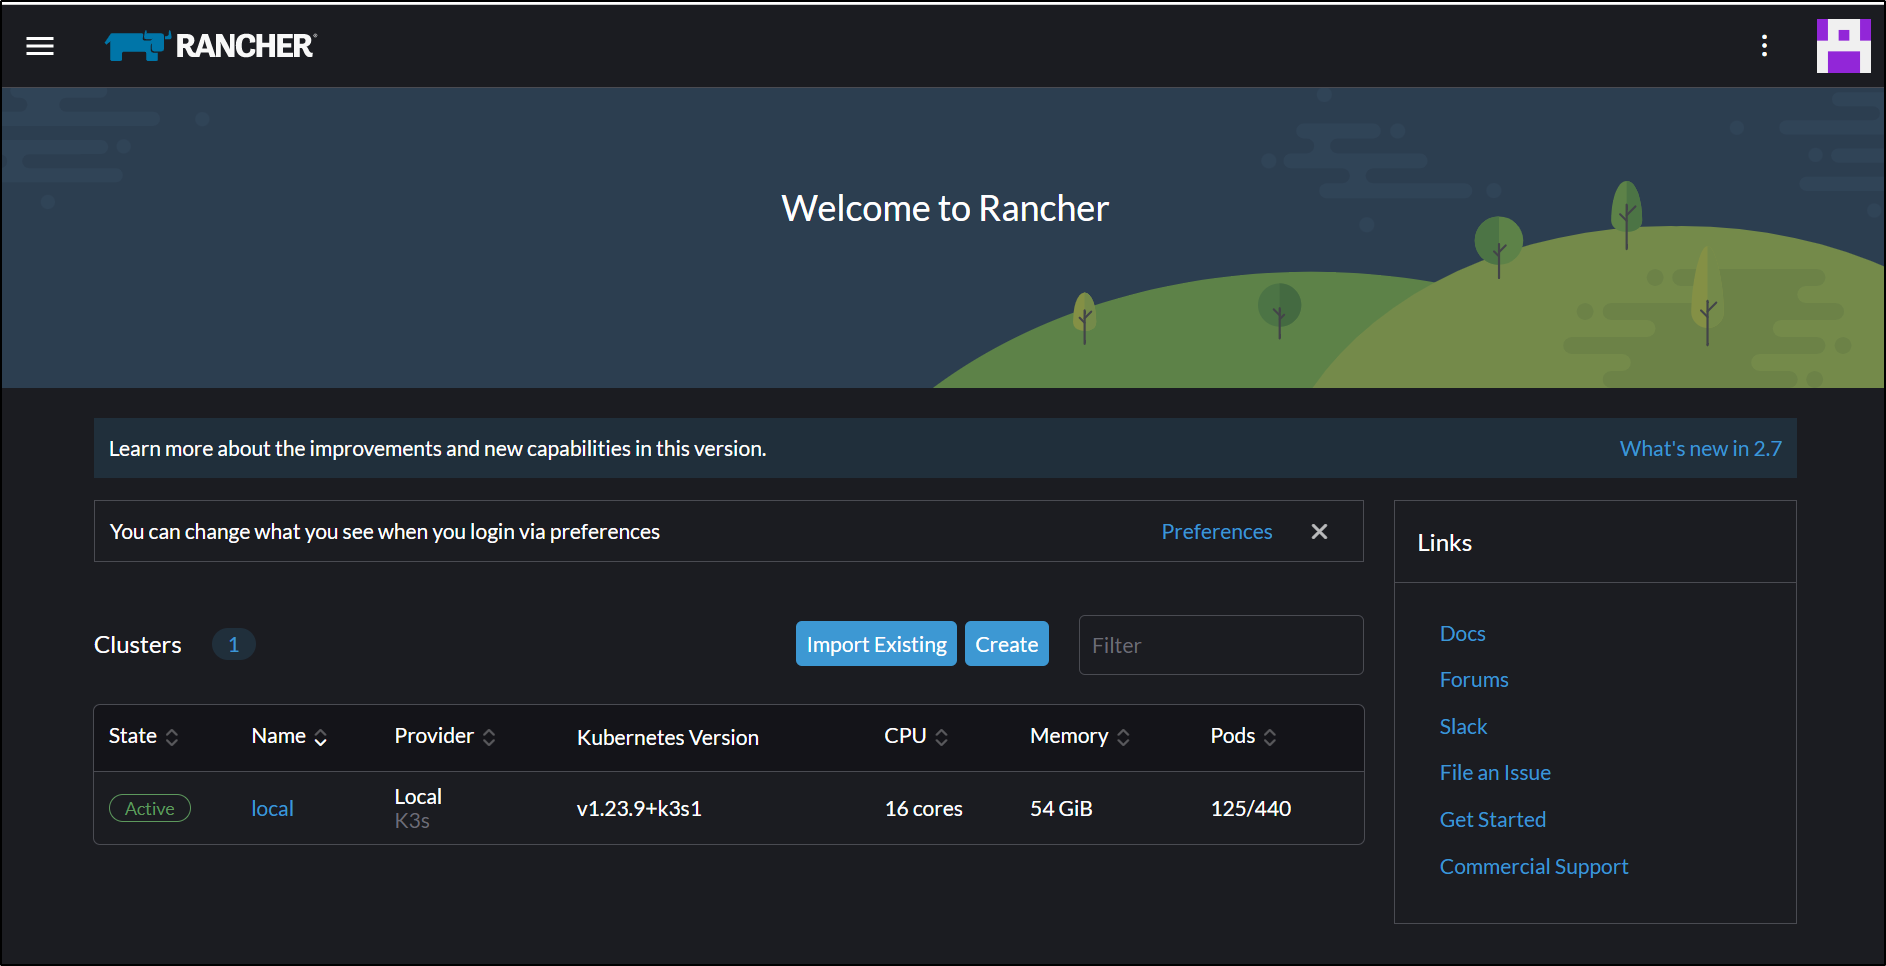
Where I’ll go to Account and API Keys
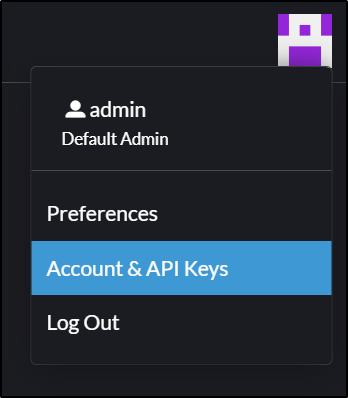
and then Change password
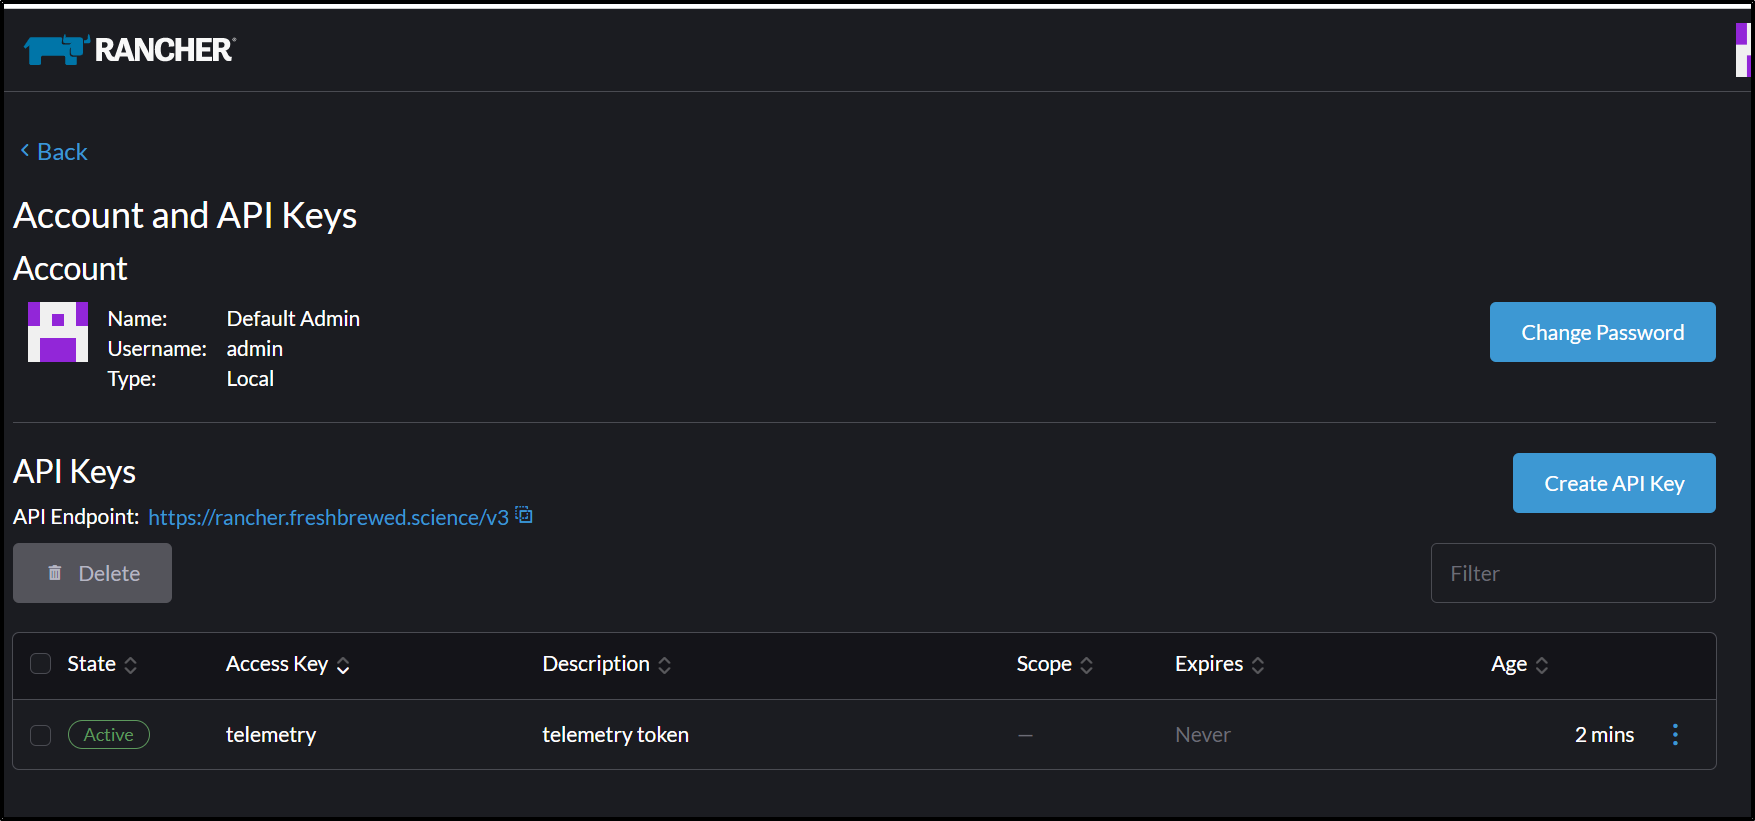
and save

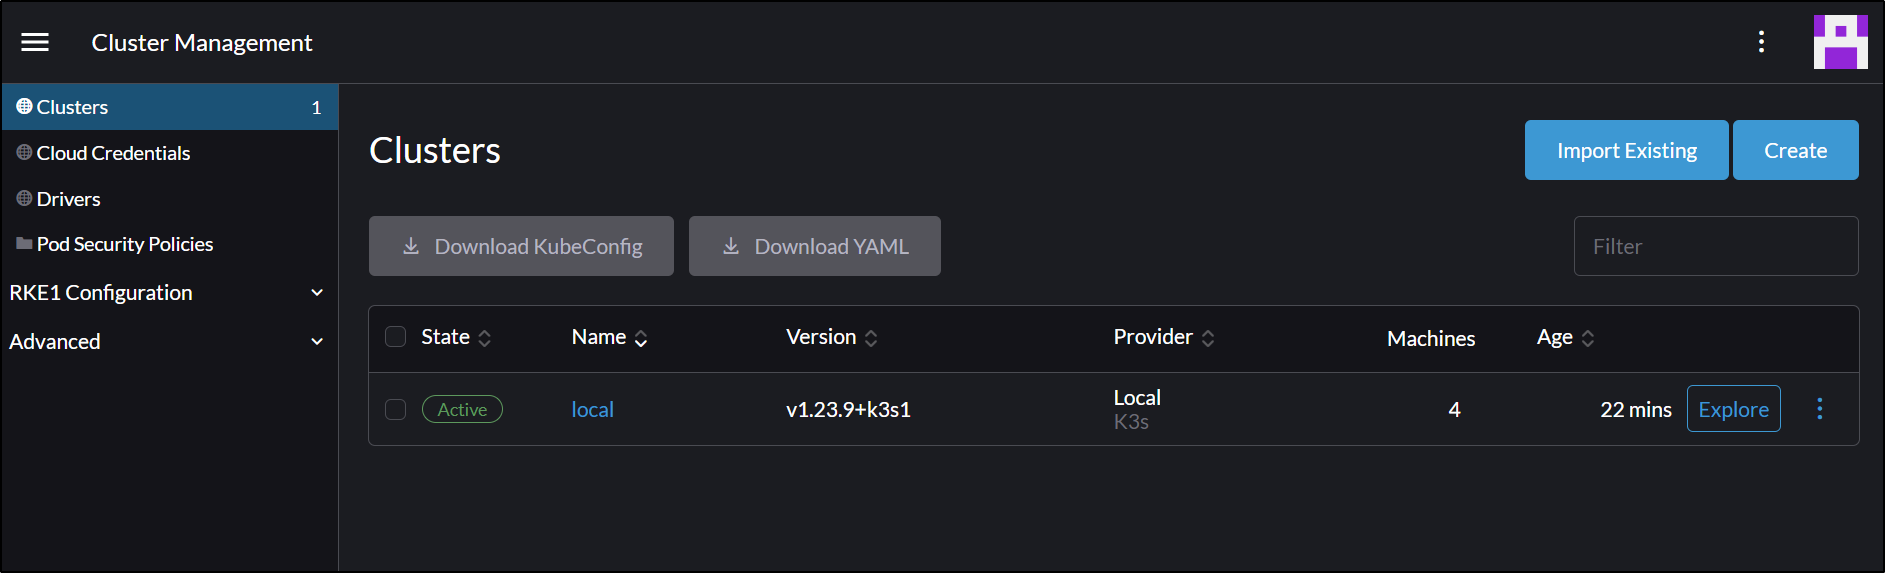
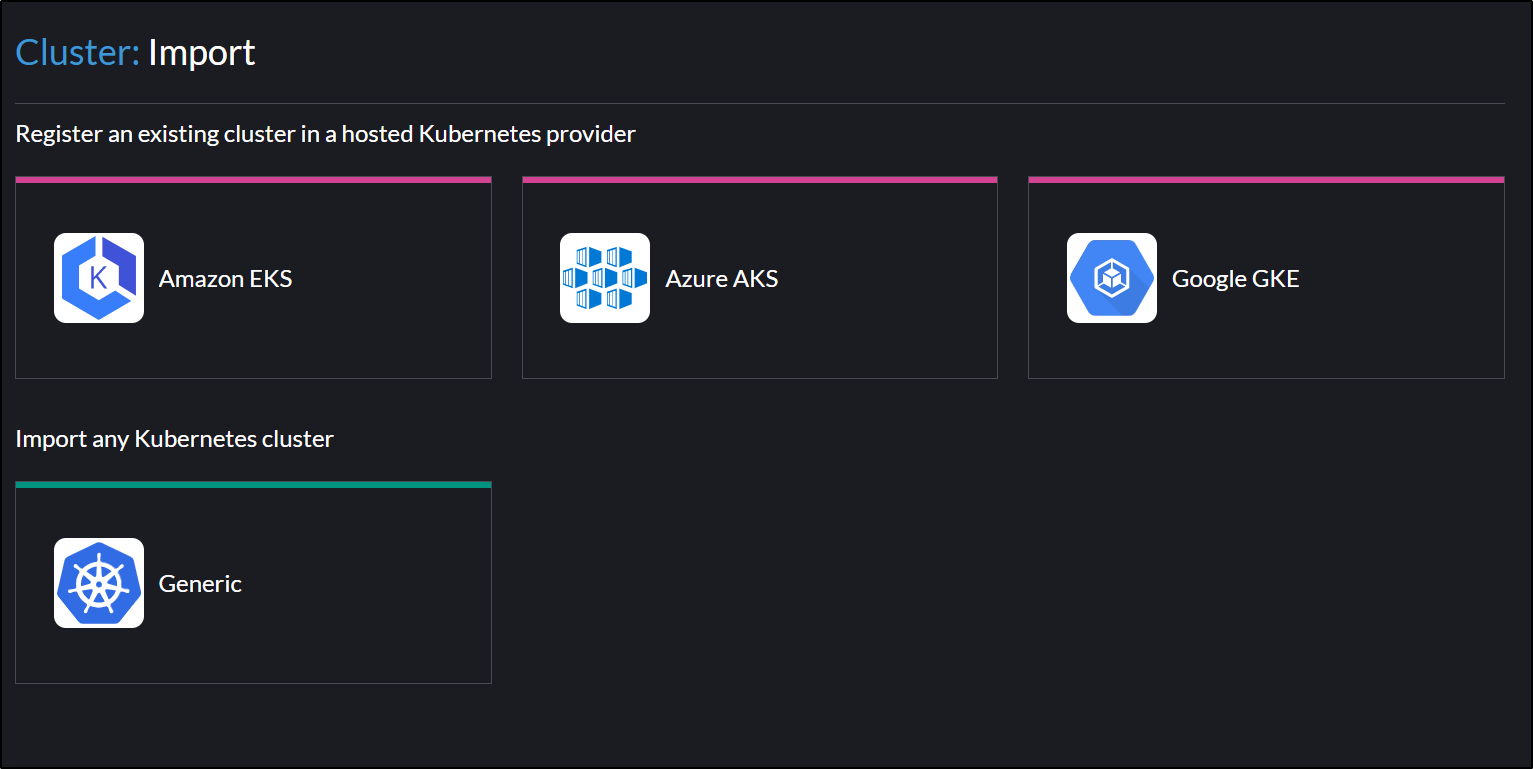
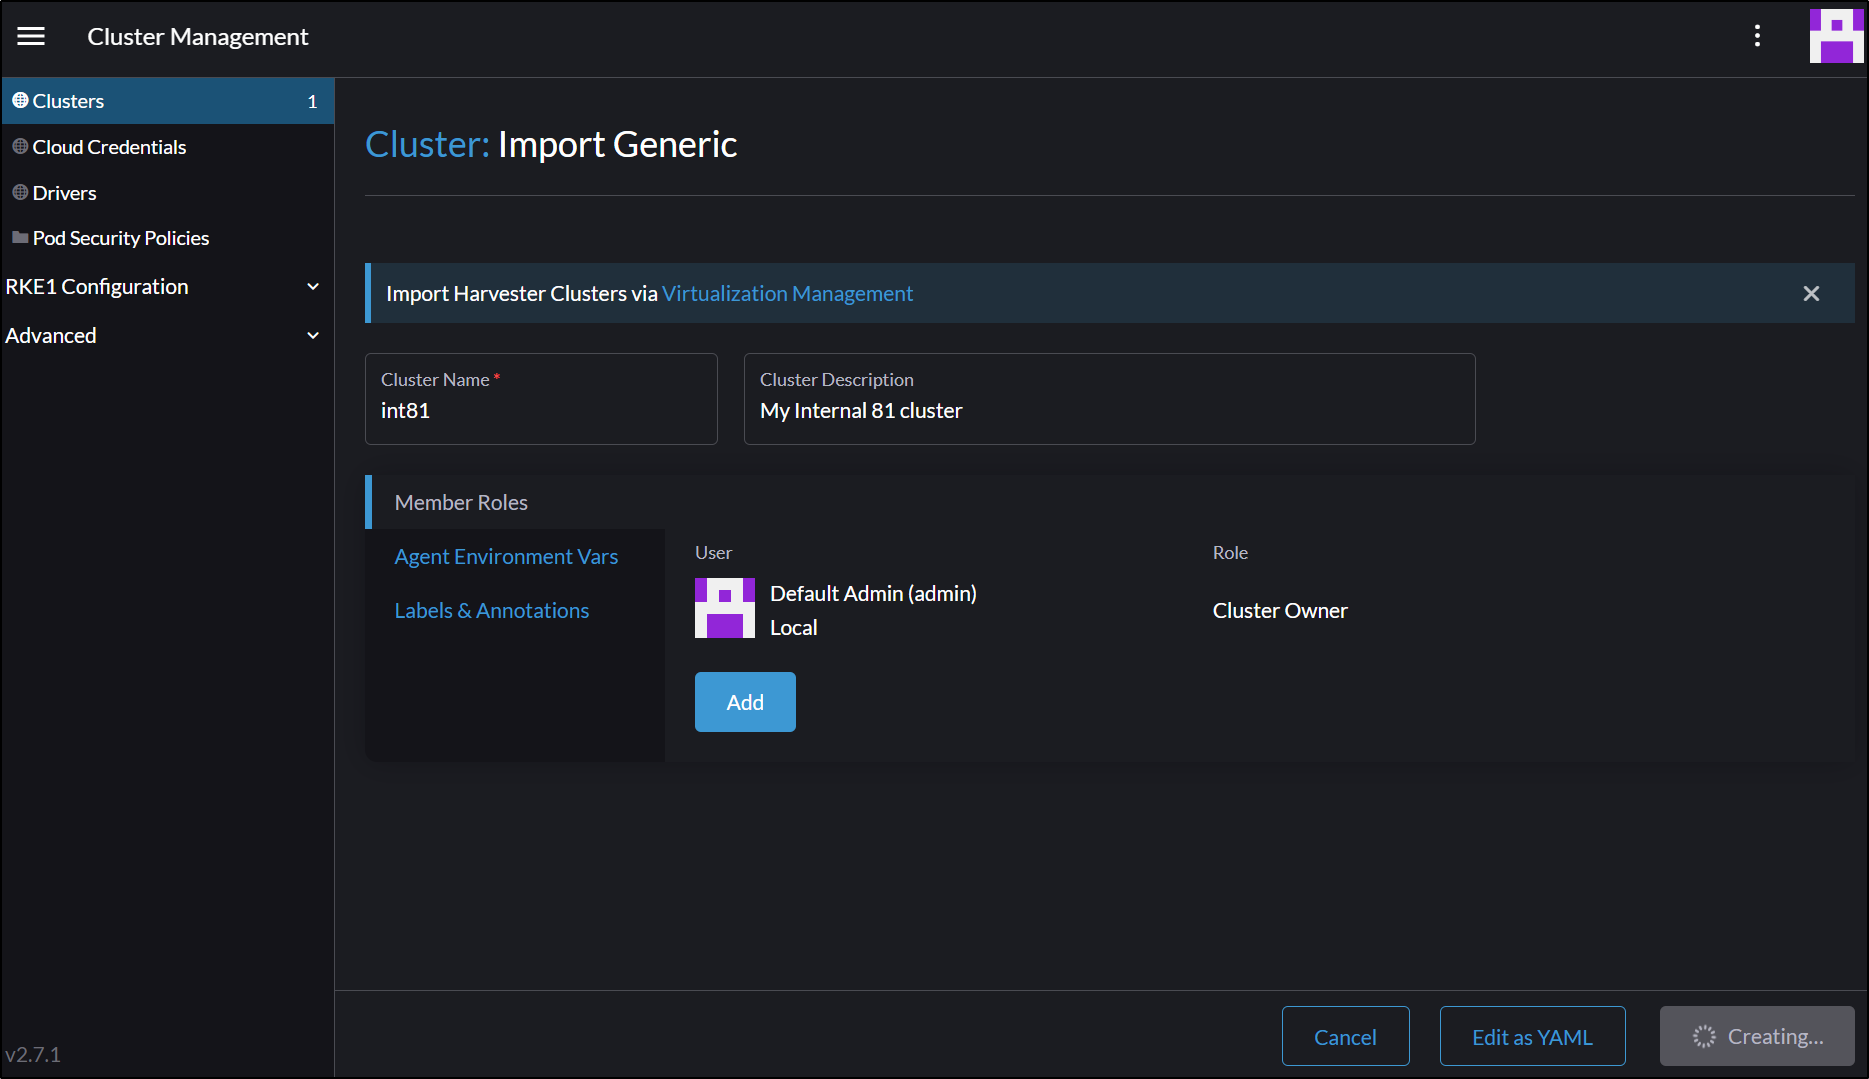
Next, I’ll Import an existing cluster
And choose Generic
I’ll be adding the internal local cluster settings as Rancher, being in a sister cluster in the same network, can see the internal IPs
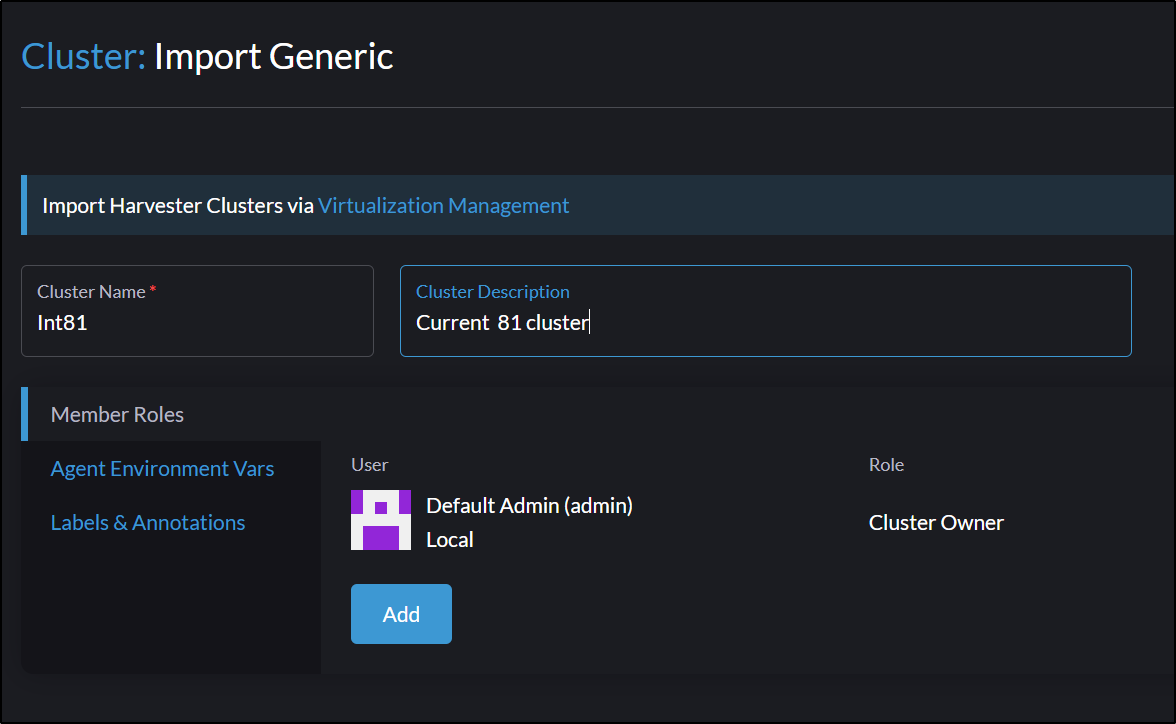
And I’ll setup the name and click create
I can now click on the details to get the import commands
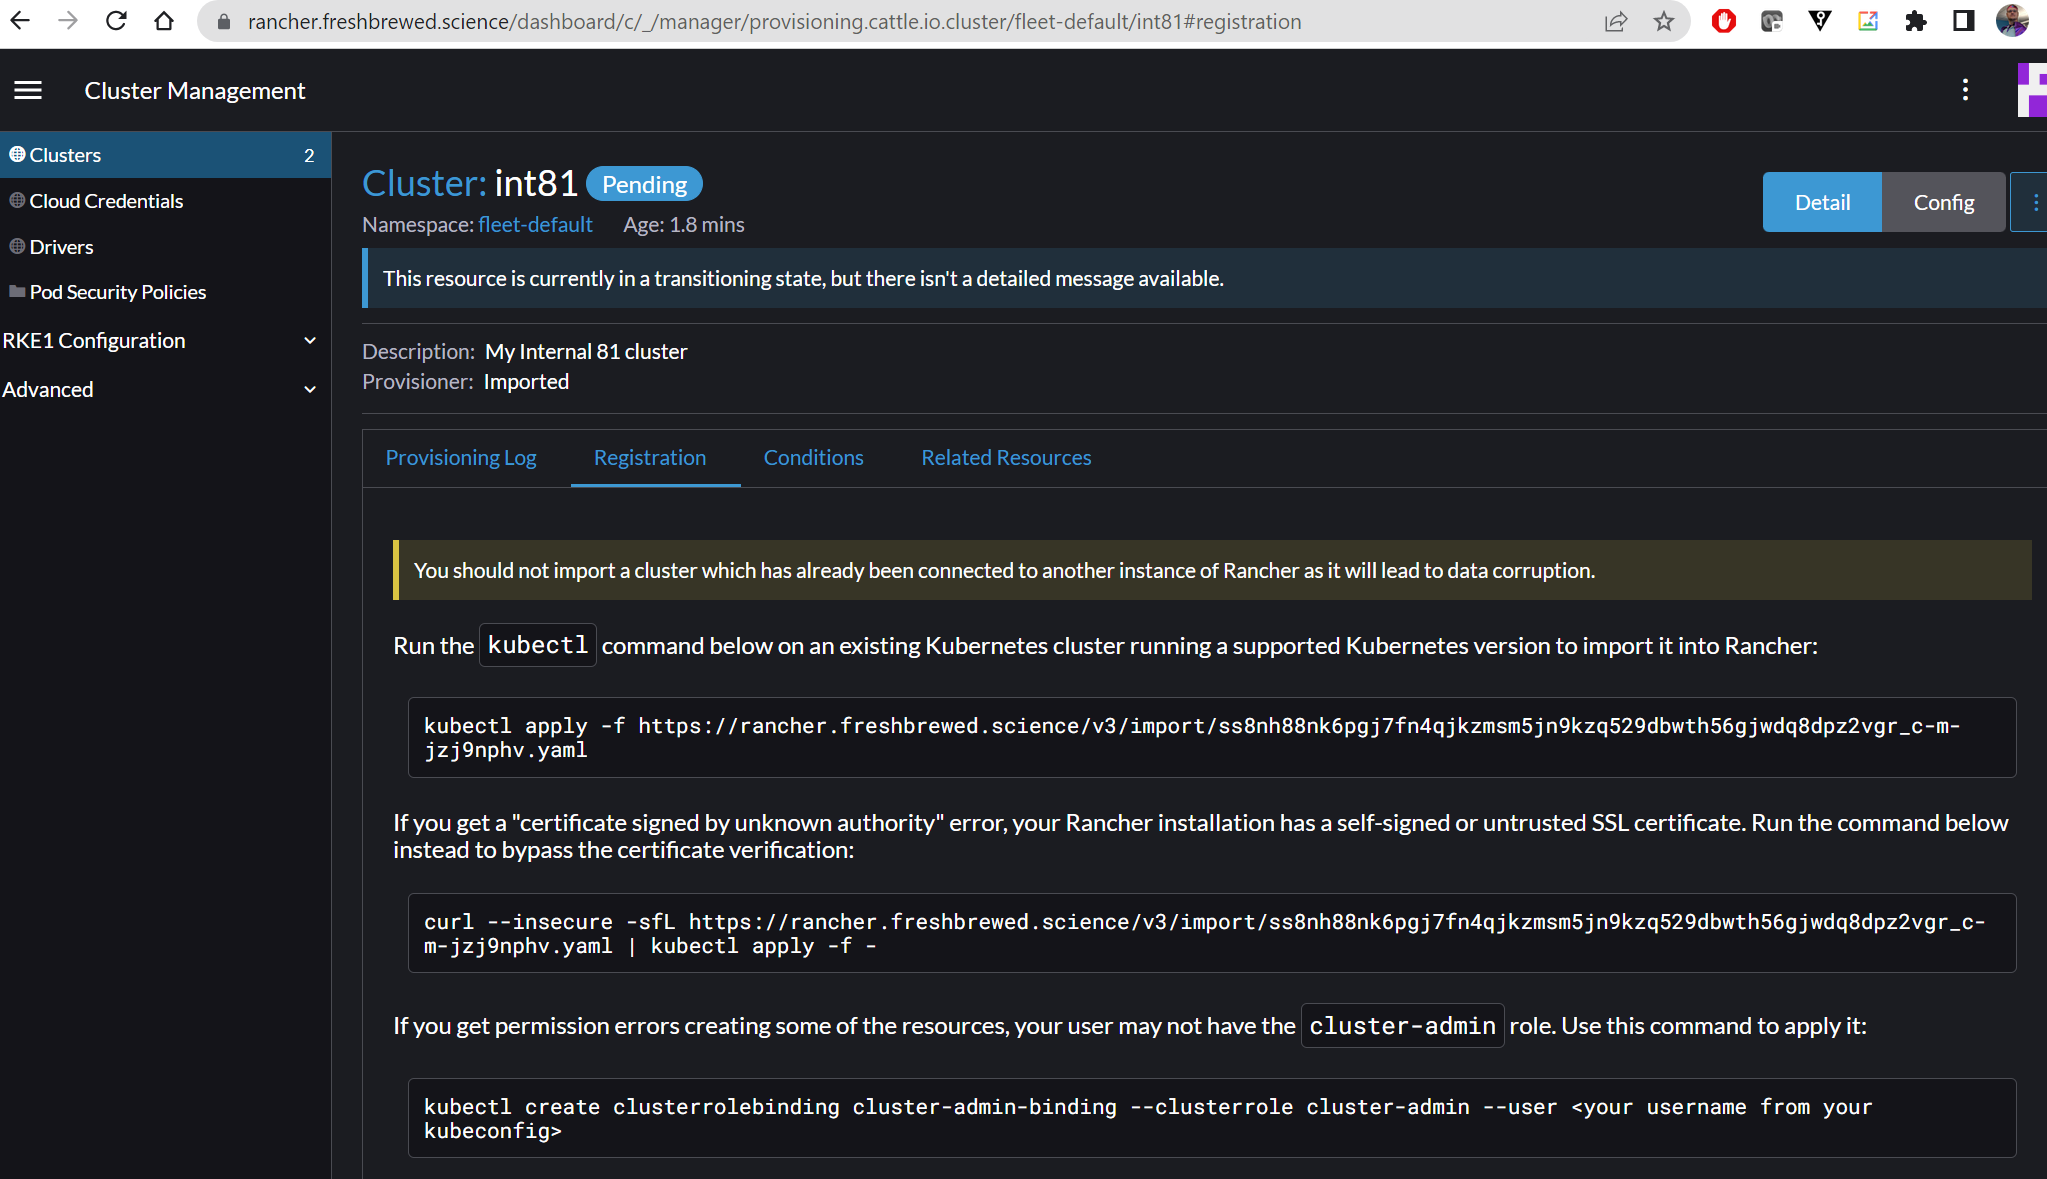
Which i’ll apply to the Mac81 cluster
$ kubectx ext81
Switched to context "ext81".
$ kubectl get nodes
NAME                  STATUS   ROLES                  AGE    VERSION
builder-macbookpro2   Ready    <none>                 3d5h   v1.23.10+k3s1
anna-macbookair       Ready    control-plane,master   3d5h   v1.23.10+k3s1
isaac-macbookpro      Ready    <none>                 3d5h   v1.23.10+k3s1
$ kubectl apply -f https://rancher.freshbrewed.science/v3/import/ss8nh88nk6pgj7fn4qjkzmsm5jn9kzq529dbwth56gjwdq8dpz2vgr_c-m-jzj9nphv.yaml
clusterrole.rbac.authorization.k8s.io/proxy-clusterrole-kubeapiserver created
clusterrolebinding.rbac.authorization.k8s.io/proxy-role-binding-kubernetes-master created
namespace/cattle-system created
serviceaccount/cattle created
clusterrolebinding.rbac.authorization.k8s.io/cattle-admin-binding created
secret/cattle-credentials-eed3724 created
clusterrole.rbac.authorization.k8s.io/cattle-admin created
Warning: spec.template.spec.affinity.nodeAffinity.requiredDuringSchedulingIgnoredDuringExecution.nodeSelectorTerms[0].matchExpressions[0].key: beta.kubernetes.io/os is deprecated since v1.14; use "kubernetes.io/os" instead
deployment.apps/cattle-cluster-agent created
service/cattle-cluster-agent created
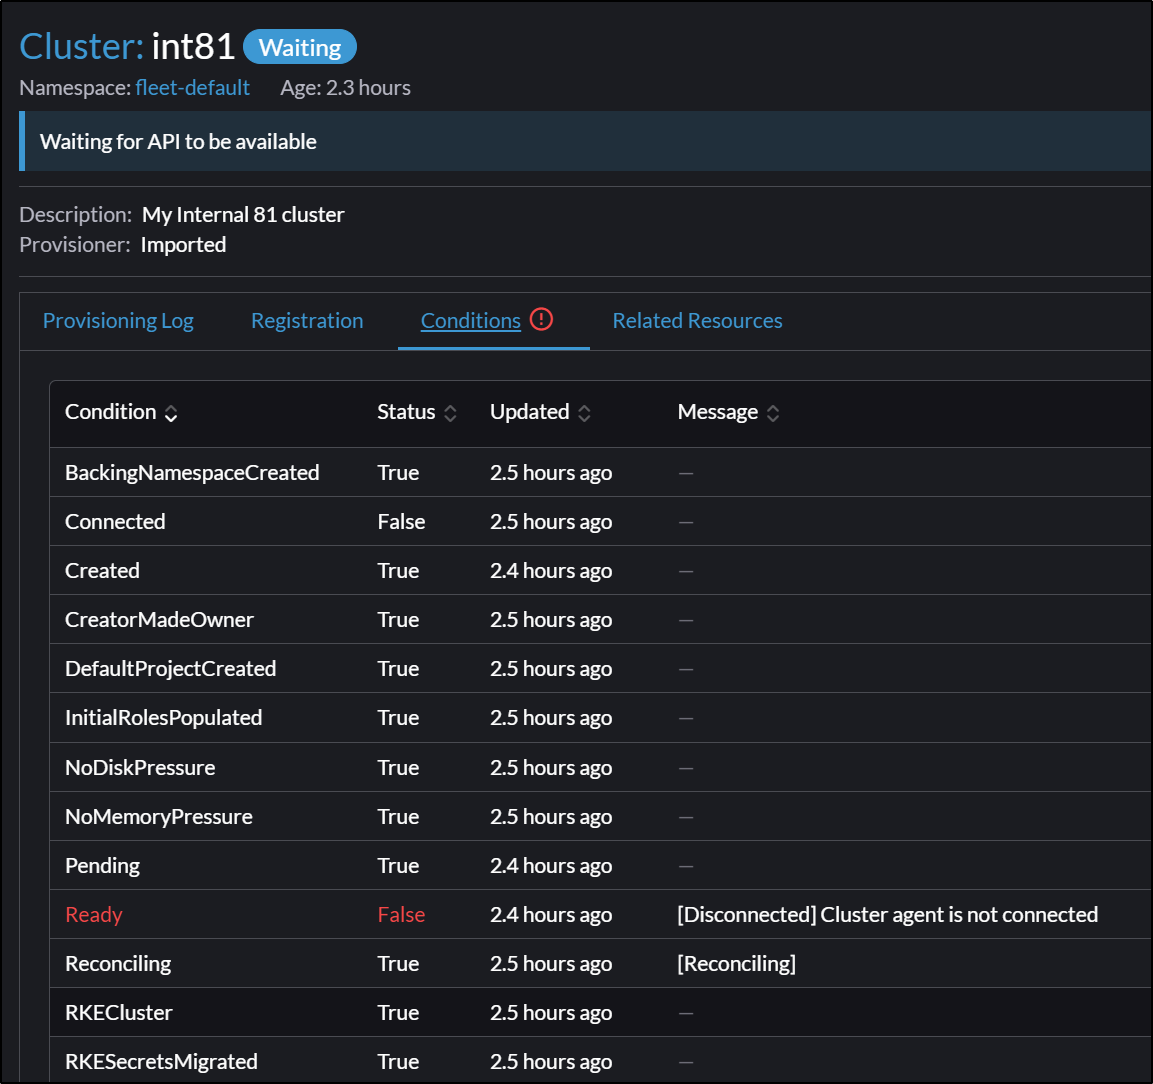
However, I see errors
I then tried to swap to the insecure
$ kubectl delete -f https://rancher.freshbrewed.science/v3/import/ss8nh88nk6pgj7fn4qjkzmsm5jn9kzq529dbwth56gjwdq8dpz2vgr_c-m-jzj9nphv.yaml
clusterrole.rbac.authorization.k8s.io "proxy-clusterrole-kubeapiserver" deleted
clusterrolebinding.rbac.authorization.k8s.io "proxy-role-binding-kubernetes-master" deleted
namespace "cattle-system" deleted
serviceaccount "cattle" deleted
clusterrolebinding.rbac.authorization.k8s.io "cattle-admin-binding" deleted
secret "cattle-credentials-eed3724" deleted
clusterrole.rbac.authorization.k8s.io "cattle-admin" deleted
deployment.apps "cattle-cluster-agent" deleted
service "cattle-cluster-agent" deleted

$ curl --insecure -sfL https://rancher.freshbrewed.science/v3/import/ss8nh88nk6pgj7fn4qjkzmsm5jn9kzq529dbwth56gjwdq8dpz2vgr_c-m-jzj9nphv.yaml | kubectl apply -f -
clusterrole.rbac.authorization.k8s.io/proxy-clusterrole-kubeapiserver created
clusterrolebinding.rbac.authorization.k8s.io/proxy-role-binding-kubernetes-master created
namespace/cattle-system created
serviceaccount/cattle created
clusterrolebinding.rbac.authorization.k8s.io/cattle-admin-binding created
secret/cattle-credentials-eed3724 created
clusterrole.rbac.authorization.k8s.io/cattle-admin created
Warning: spec.template.spec.affinity.nodeAffinity.requiredDuringSchedulingIgnoredDuringExecution.nodeSelectorTerms[0].matchExpressions[0].key: beta.kubernetes.io/os is deprecated since v1.14; use "kubernetes.io/os" instead
deployment.apps/cattle-cluster-agent created
service/cattle-cluster-agent created
Both situations seem to fail because Layer4 websockets isn’t supported through my basic NGinx ingress controller
$ kubectl logs cattle-cluster-agent-68ff989dbd-nqllv -n cattle-system

time="2023-03-11T20:20:03Z" level=error msg="Remotedialer proxy error" error="websocket: bad handshake"
time="2023-03-11T20:20:13Z" level=info msg="Connecting to wss://rancher.freshbrewed.science/v3/connect/register with token starting with ss8nh88nk6pgj7fn4qjkzmsm5jn"
time="2023-03-11T20:20:13Z" level=info msg="Connecting to proxy" url="wss://rancher.freshbrewed.science/v3/connect/register"
time="2023-03-11T20:20:13Z" level=error msg="Failed to connect to proxy. Response status: 400 - 400 Bad Request. Response body: websocket: the client is not using the websocket protocol: 'upgrade' token not found in 'Connection' headerError during upgrade for host [c-m-jzj9nphv]: websocket: the client is not using the websocket protocol: 'upgrade' token not found in 'Connection' header" error="websocket: bad handshake"
time="2023-03-11T20:20:13Z" level=error msg="Remotedialer proxy error" error="websocket: bad handshake"
time="2023-03-11T20:20:23Z" level=info msg="Connecting to wss://rancher.freshbrewed.science/v3/connect/register with token starting with ss8nh88nk6pgj7fn4qjkzmsm5jn"
time="2023-03-11T20:20:23Z" level=info msg="Connecting to proxy" url="wss://rancher.freshbrewed.science/v3/connect/register"
time="2023-03-11T20:20:23Z" level=error msg="Failed to connect to proxy. Response status: 400 - 400 Bad Request. Response body: websocket: the client is not using the websocket protocol: 'upgrade' token not found in 'Connection' headerError during upgrade for host [c-m-jzj9nphv]: websocket: the client is not using the websocket protocol: 'upgrade' token not found in 'Connection' header" error="websocket: bad handshake"
time="2023-03-11T20:20:23Z" level=error msg="Remotedialer proxy error" error="websocket: bad handshake"
Add Datadog Cluster Agents in Ansible.
First, I’ll want to save my API Key and App Key to a secret store. Here, I’ll use the AKV I’ve used for other playbooks
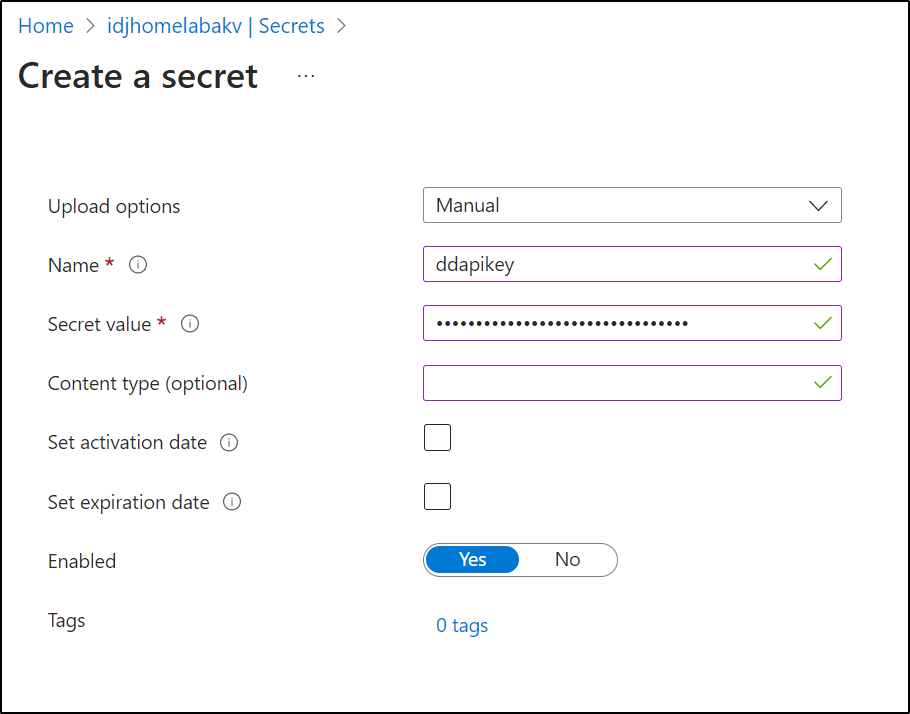
and the App Key
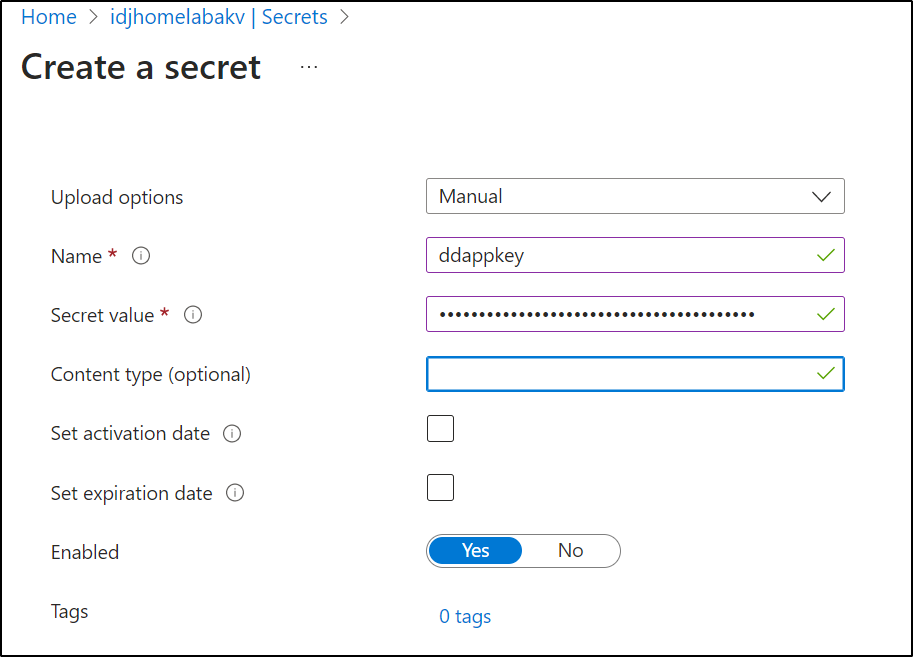
Arguably, I could just leave the App key in the playbook or pass it in as a variable as it’s used as an identifier not for access.
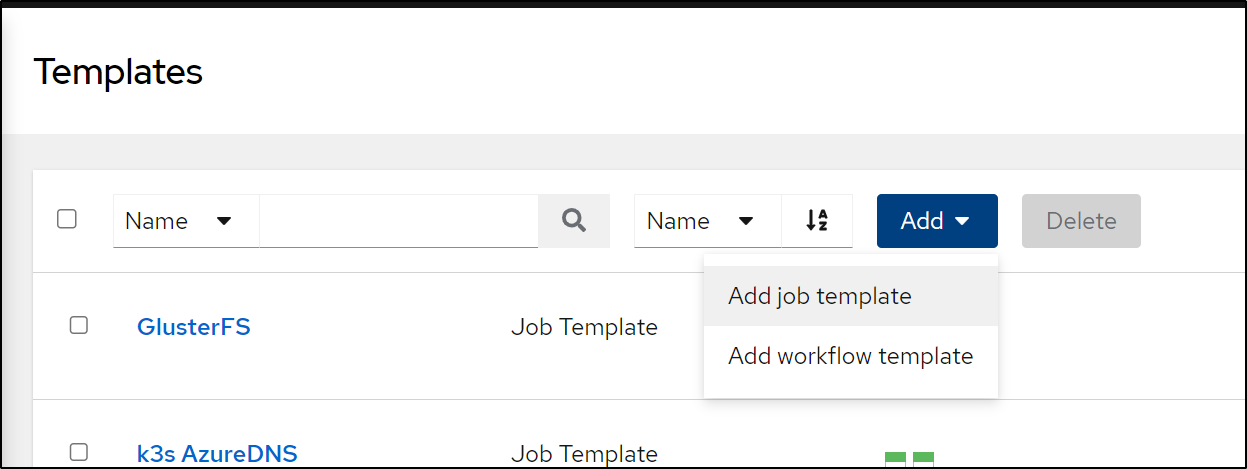
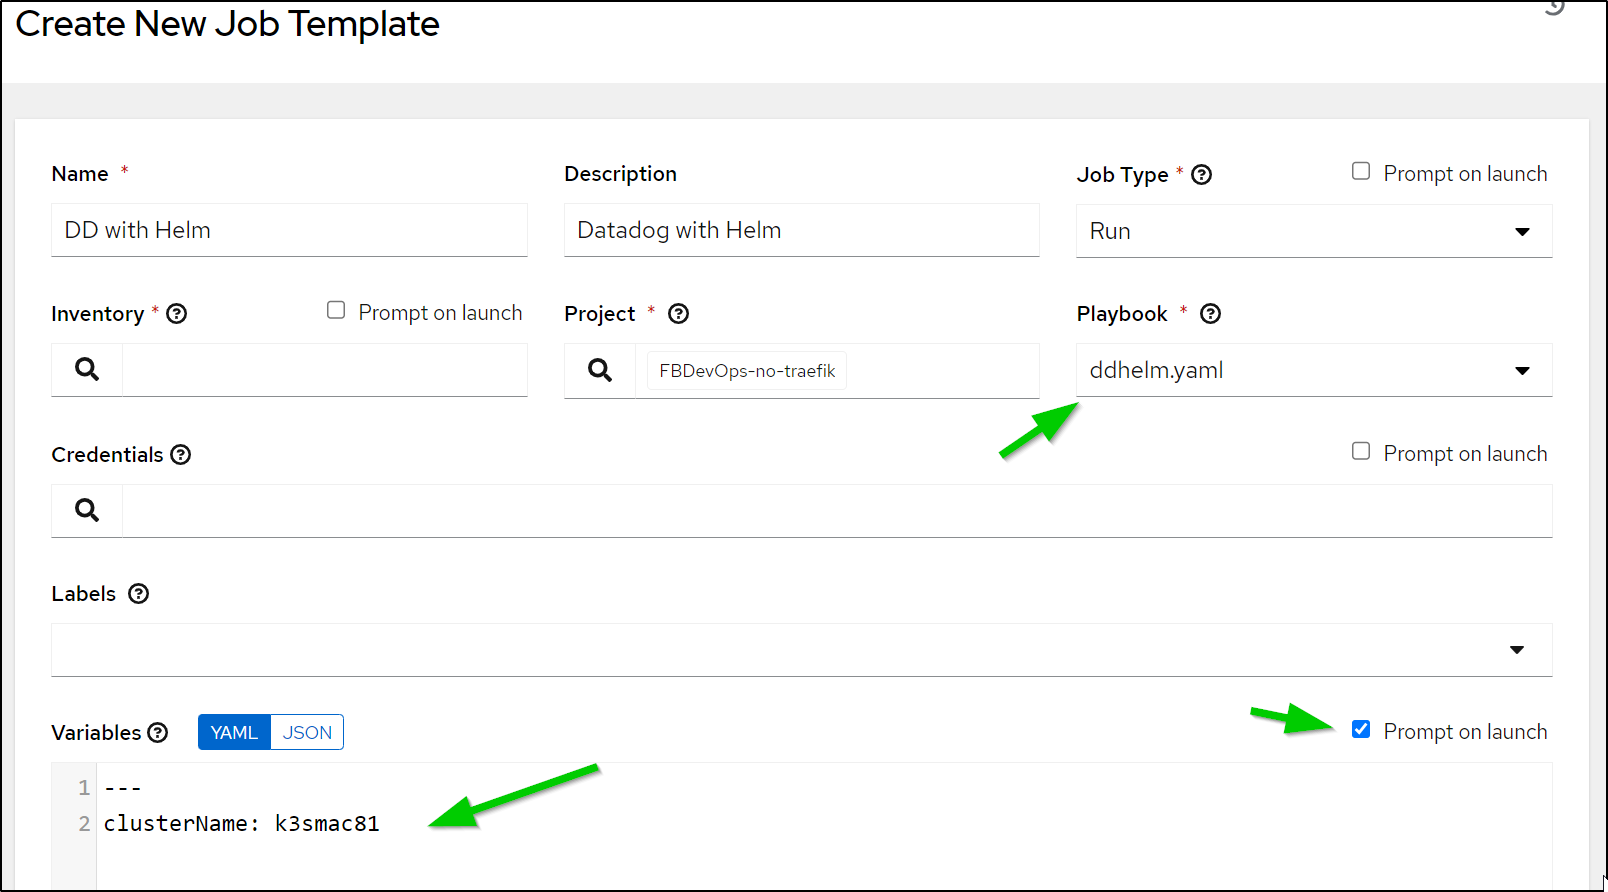
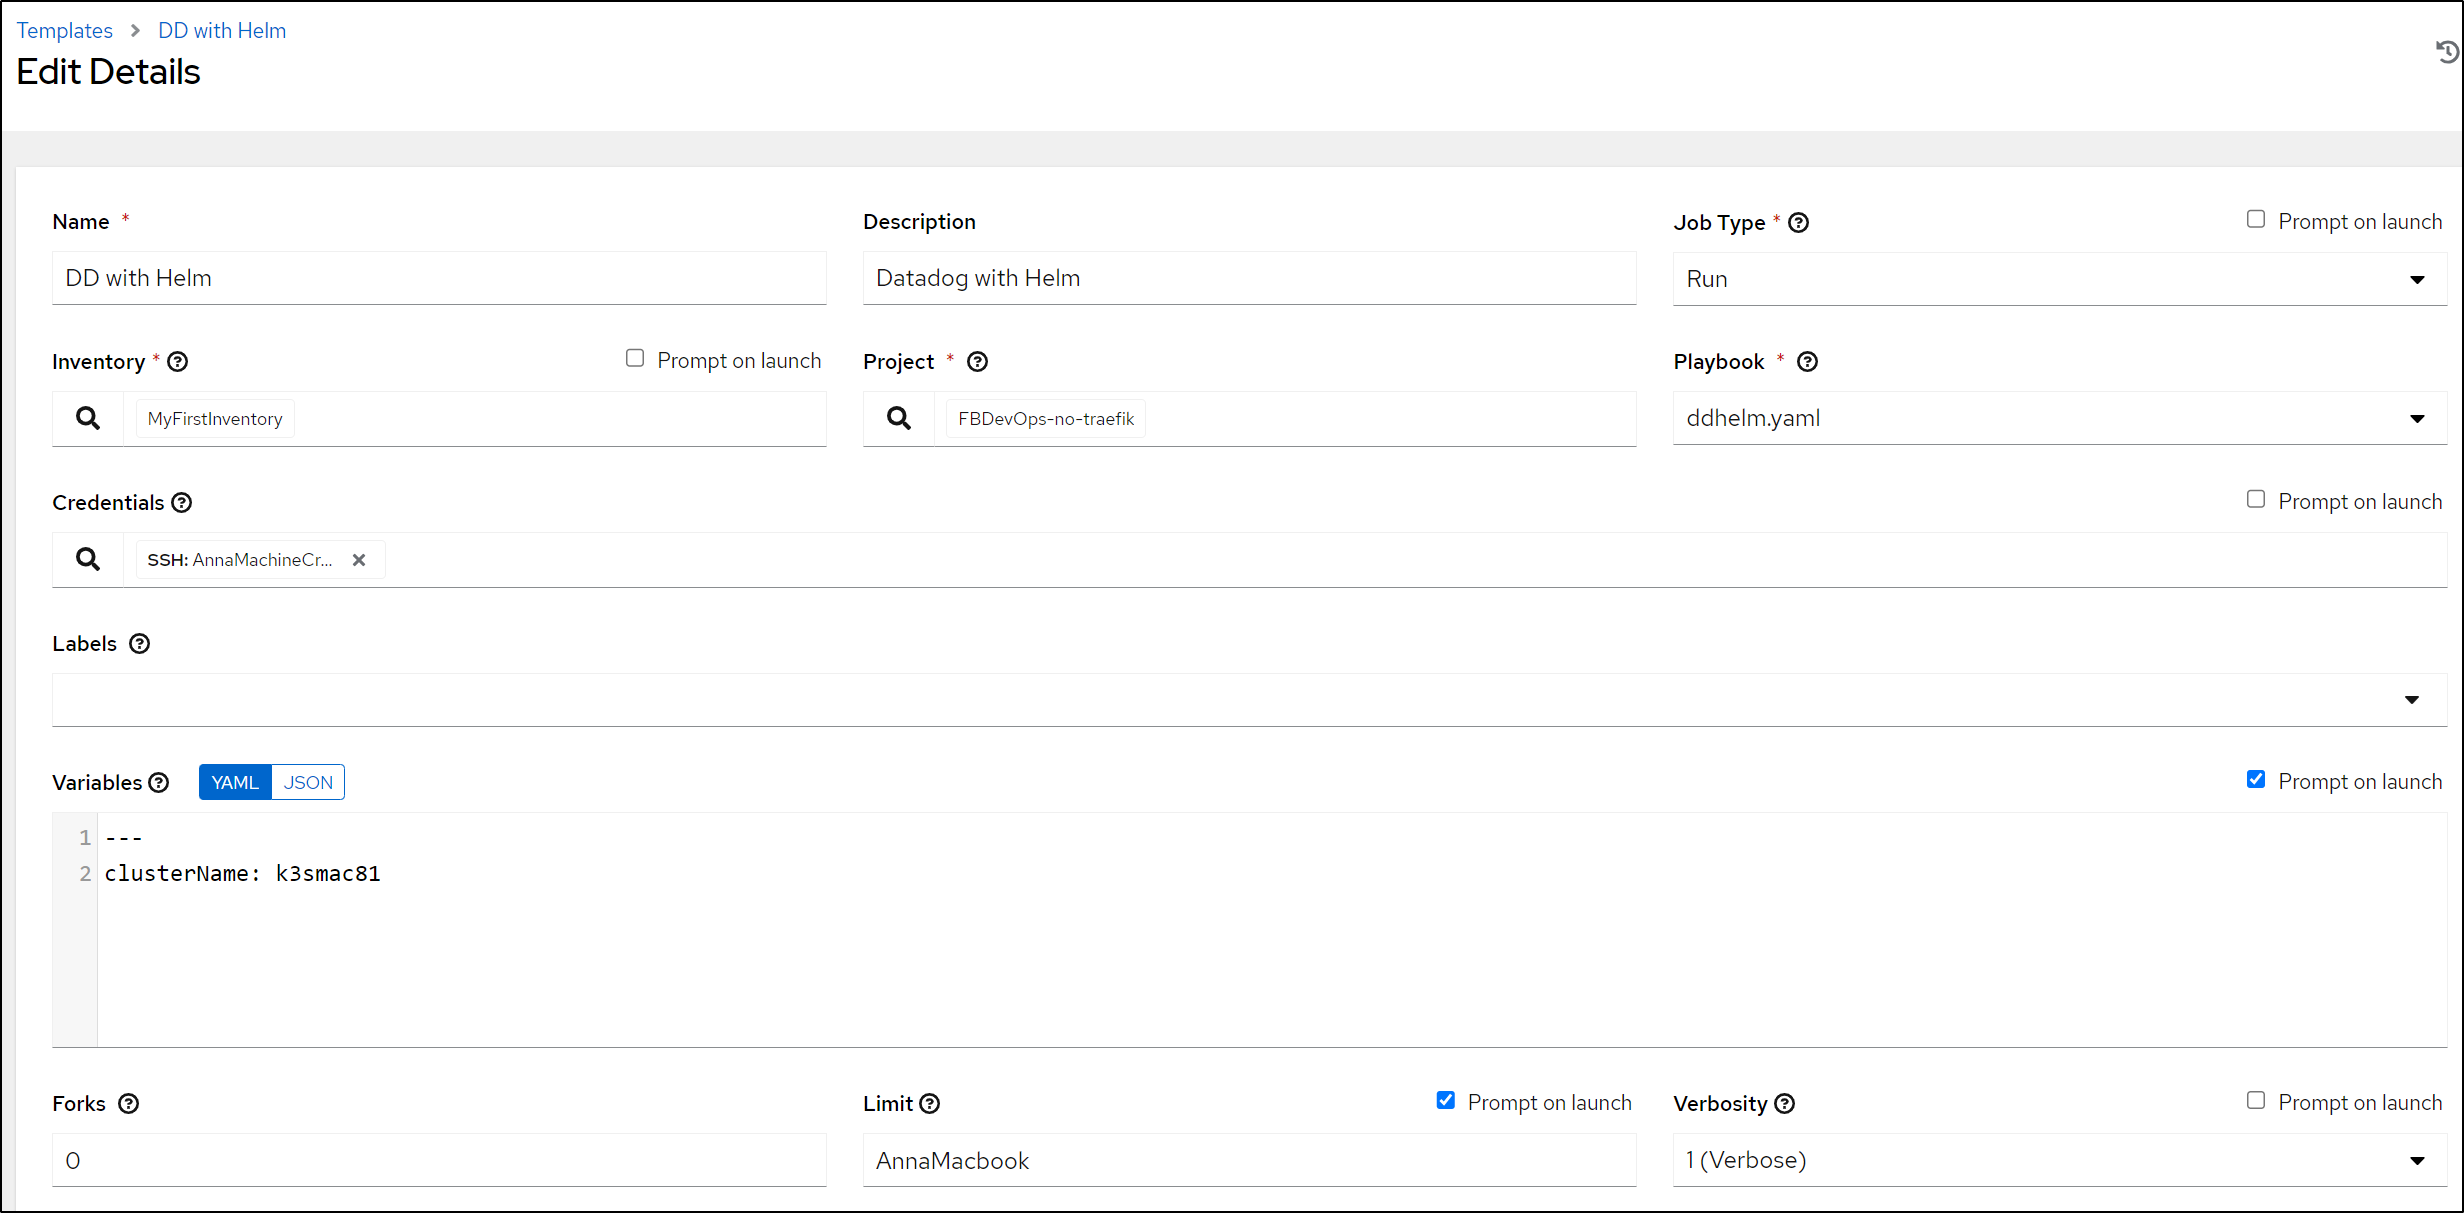
I can now add the Playbook
I’ll set the Playbook and Cluster Name variable, ensuring to allow overrides at launch
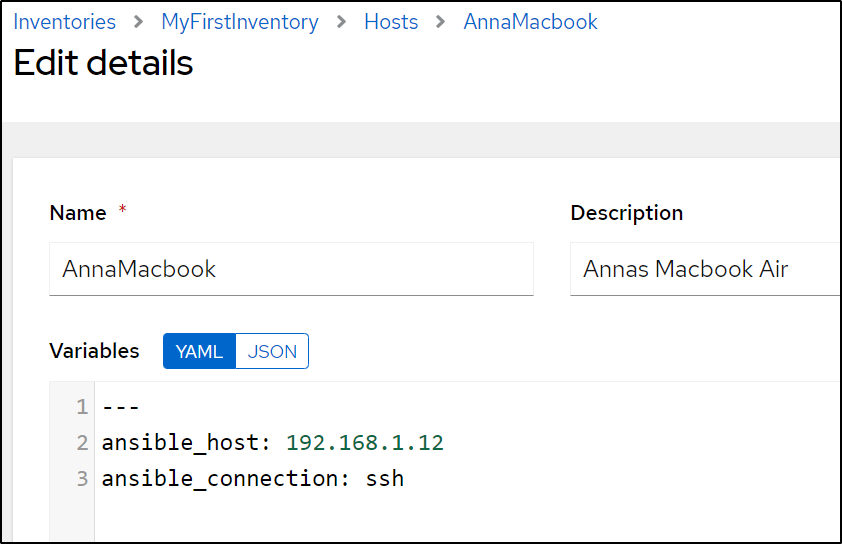
One of the nice things about Ansible is that I refer to catalogues of hosts by Inventory or a Limit by Name.
The actual IP is in the host entry. So changing from the Wifi NIC
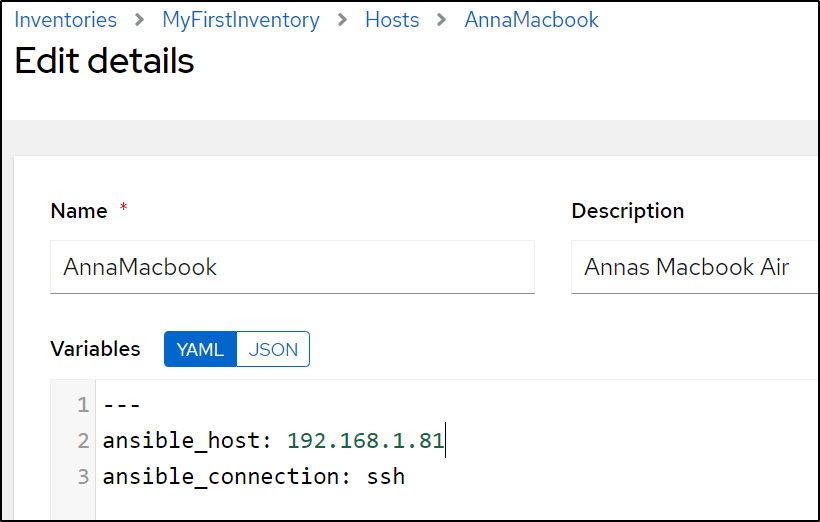
to the Ethernet should speed things up:
I updated the Datadog Ansible chart to create the API Key and pull in the Appkey for the Chart values
$ cat ddhelm.yaml
---
- name: Setup Datadog
  hosts: all

  tasks:
  - name: Install Helm
    ansible.builtin.shell: |
      curl https://baltocdn.com/helm/signing.asc | gpg --dearmor | tee /usr/share/keyrings/helm.gpg > /dev/null
      apt-get install apt-transport-https --yes
      echo "deb [arch=$(dpkg --print-architecture) signed-by=/usr/share/keyrings/helm.gpg] https://baltocdn.com/helm/stable/debian/ all main" | tee /etc/apt/sources.list.d/helm-stable-debian.list
      apt-get update
      apt-get install helm

  - name: Create DD Secret
    ansible.builtin.shell: |
      kubectl delete secret my-dd-apikey || true
      kubectl create secret generic my-dd-apikey --from-literal=api-key=$(az keyvault secret show --vault-name idjhomelabakv --name ddapikey -o json | jq -r .value | tr -d '\n')

  - name: Add DD Repo
    ansible.builtin.shell: |
      helm repo add datadog https://helm.datadoghq.com
      helm repo update
    become: true
    args:
      chdir: /tmp

  - name: Create Initial DD Values Templates
    ansible.builtin.shell: |
      # Fetch APPKEY
      export APPKEY=`az keyvault secret show --vault-name idjhomelabakv --name ddappkey -o json | jq -r .value | tr -d '\n'`

      # Create Helm Values
      cat >/tmp/ddvalues2.yaml <<EOF
      agents:
        rbac:
          create: true
          serviceAccountName: default
      clusterAgent:
        metricsProvider:
          createReaderRbac: true
          enabled: true
          service:
            port: 8443
            type: ClusterIP
          useDatadogMetrics: true
        rbac:
          create: true
          serviceAccountName: default
        replicas: 2
      clusterChecksRunner:
        enabled: true
        rbac:
          create: true
          serviceAccountName: default
        replicas: 2
      datadog:
        apiKeyExistingSecret: dd-secret
        apm:
          enabled: true
          port: 8126
          portEnabled: true
        appKey: ${APPKEY}
        clusterName:
        logs:
          containerCollectAll: true
          enabled: true
        networkMonitoring:
          enabled: true
        orchestratorExplorer:
          enabled: true
        processAgent:
          enabled: true
          processCollection: true
        tags: []
      targetSystem: linux
      EOF

      export KUBECONFIG=/etc/rancher/k3s/k3s.yaml
      helm install my-dd-release -f /tmp/ddvalues2.yaml datadog/datadog
    args:
      chdir: /tmp
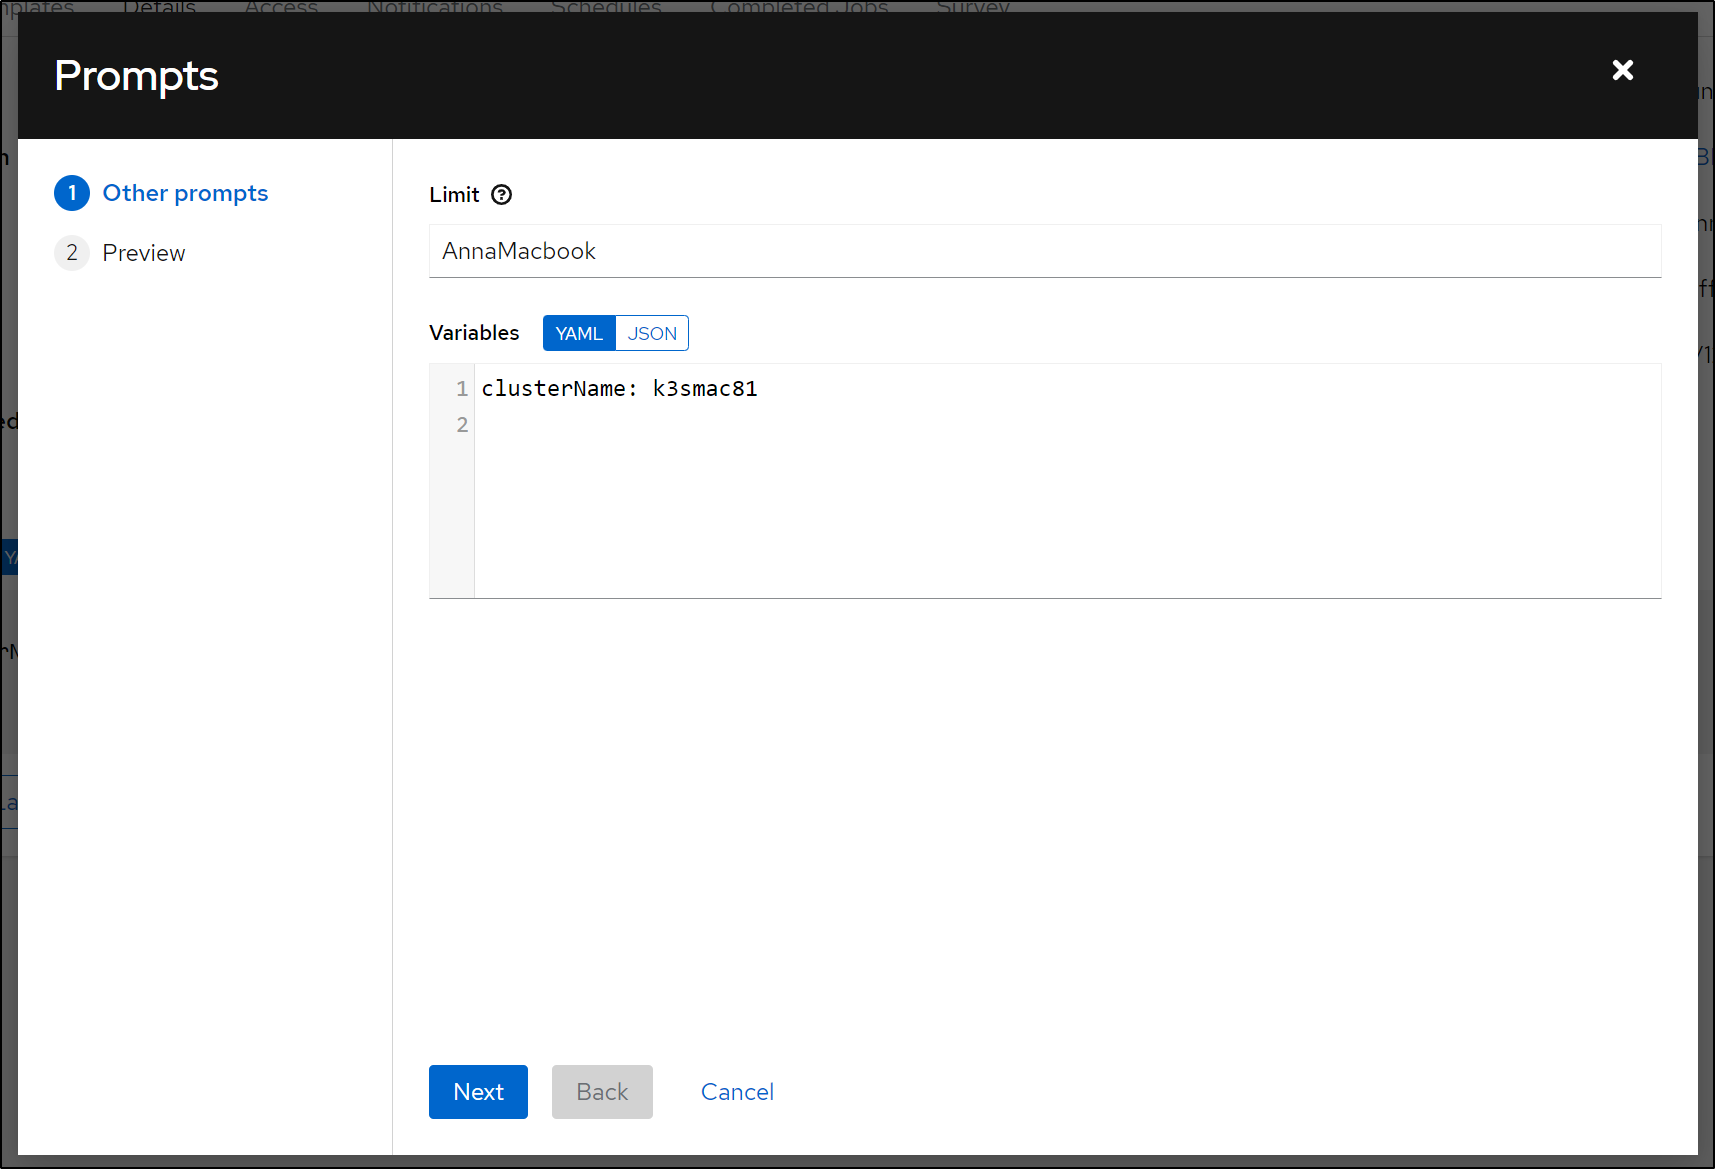
I decided to Limit to just the Macbook and ensure I added the Credential
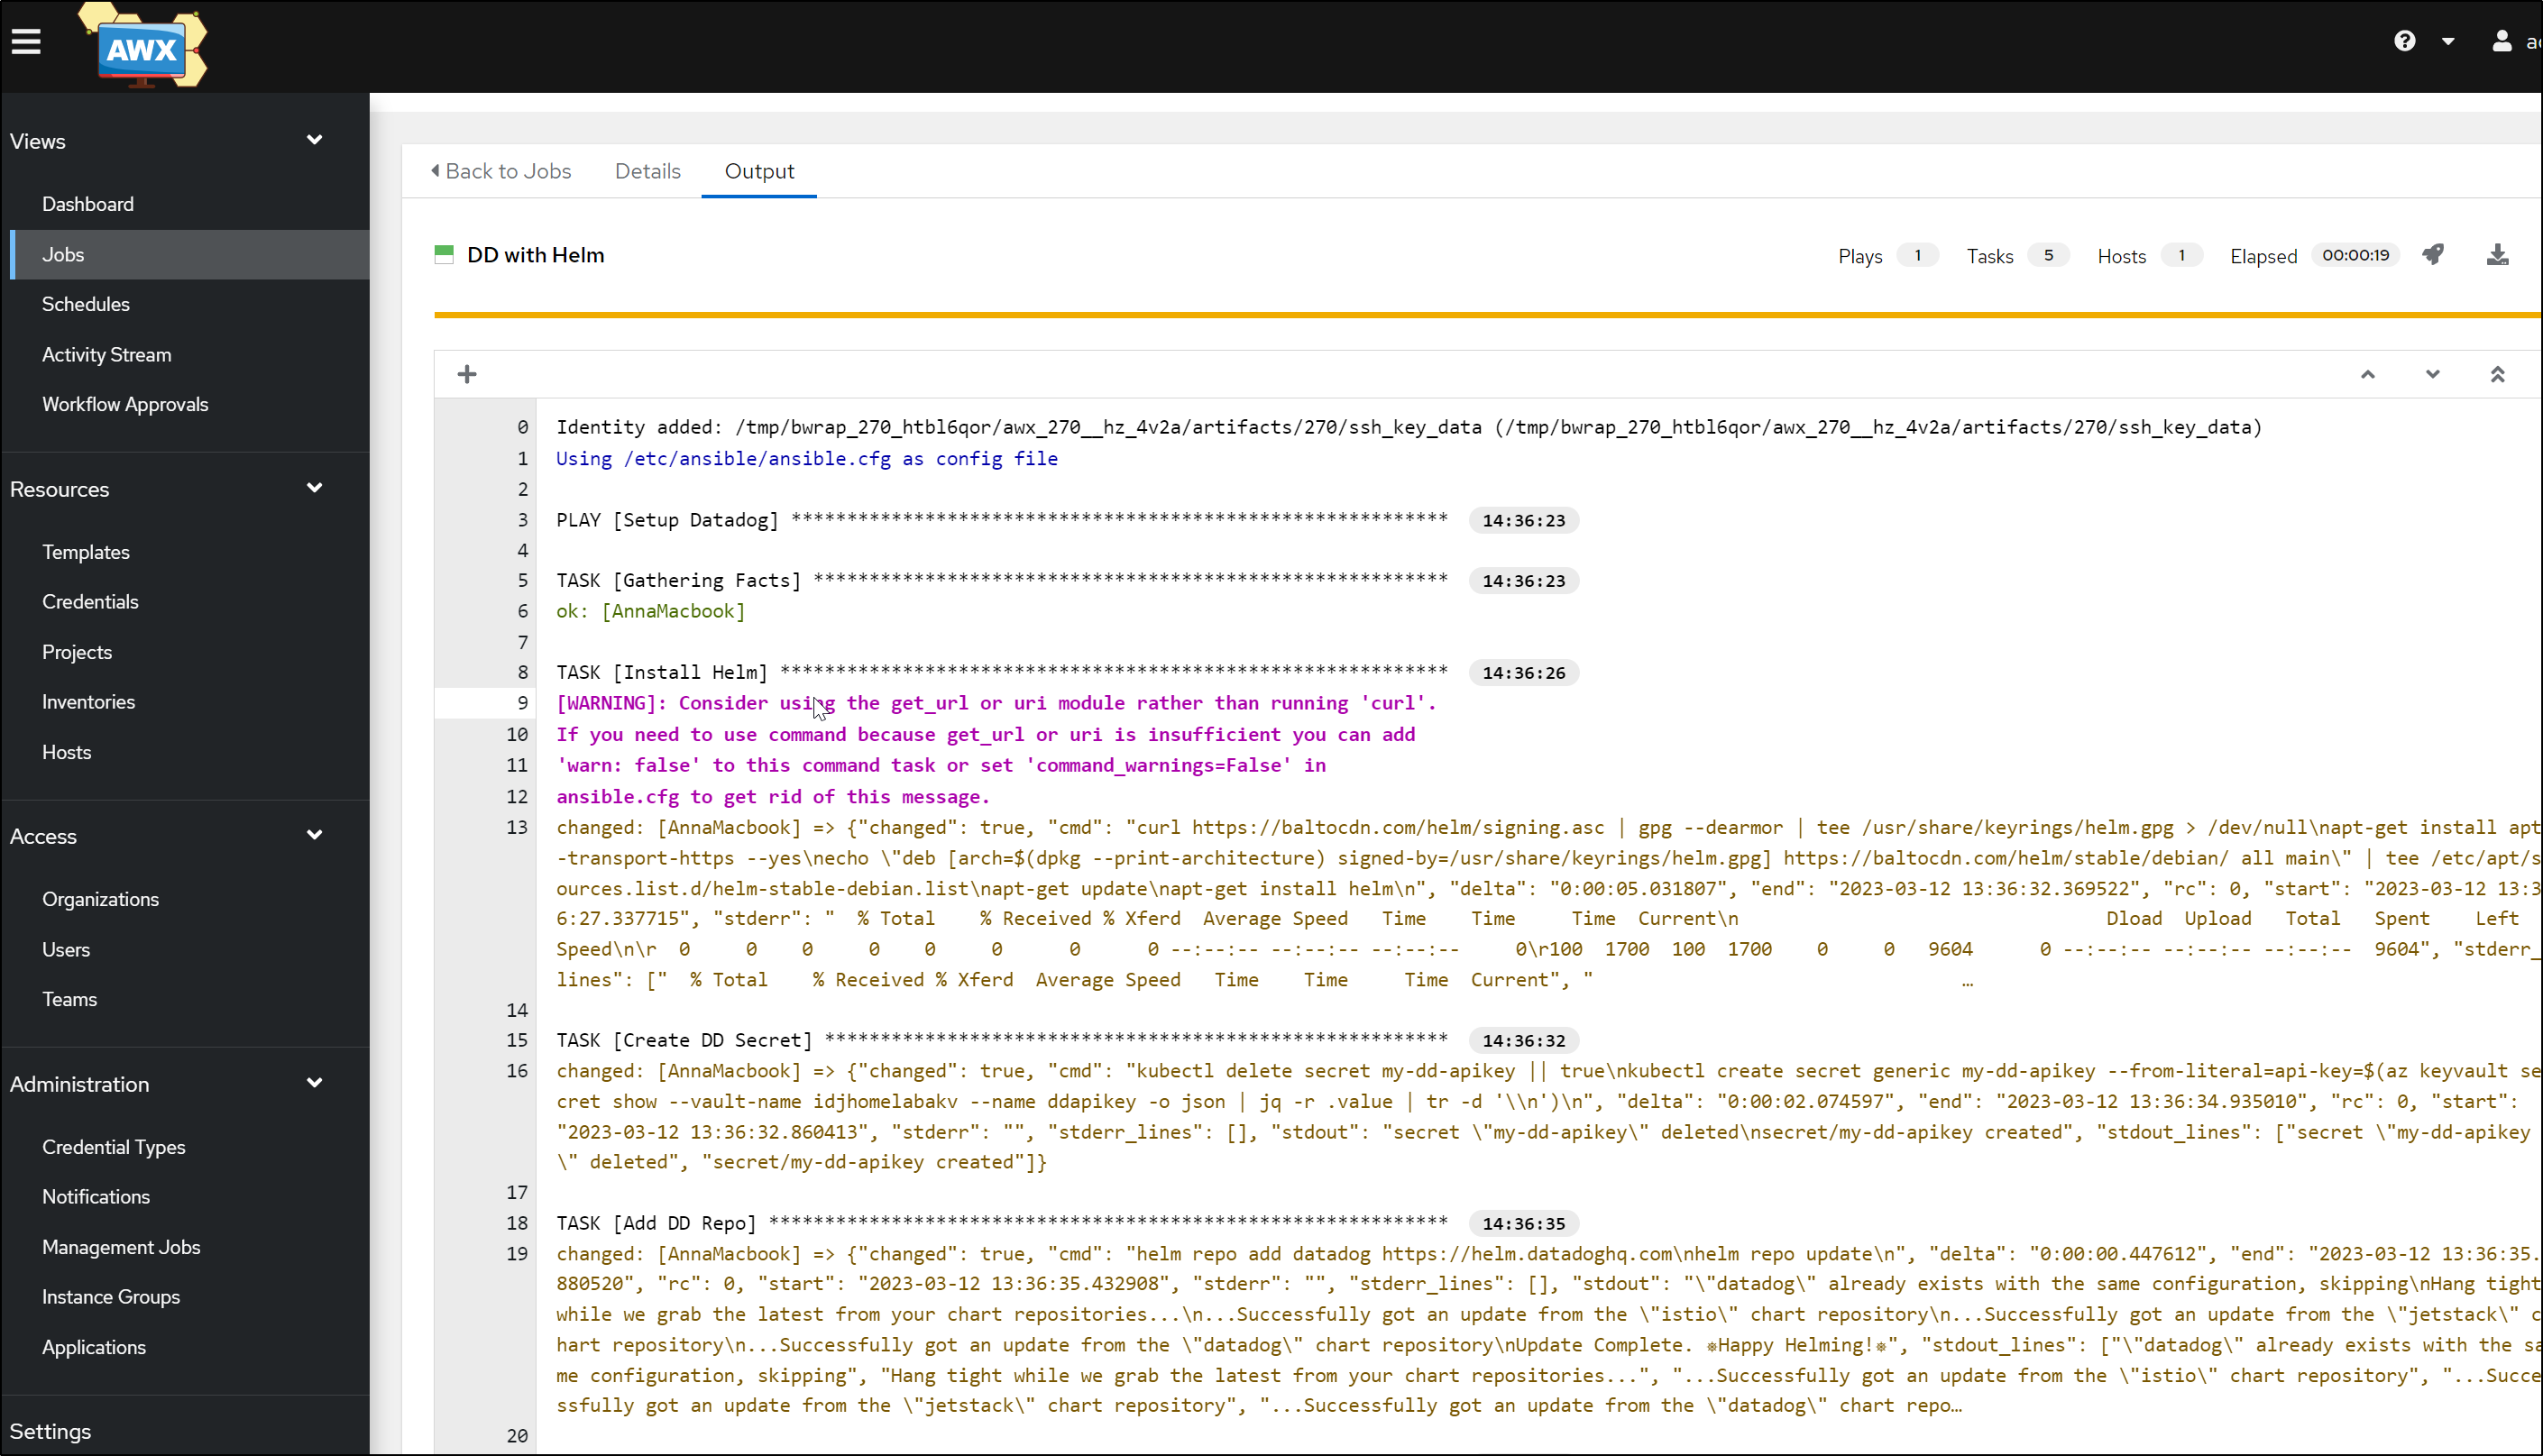
I’ll then launch it
which installs to the new K3s Cluster
Pretty sson I can see the pods up
vote-back-azure-vote-1678278477-7dc4cf9668-wj8wt       1/1     Running   0          4d11h
vote-front-azure-vote-1678278477-d7ff46b74-hxqt8       1/1     Running   0          4d11h
my-dd-release-datadog-4j9jd                            4/4     Running   0          4m31s
my-dd-release-datadog-cluster-agent-798ffb9cb-sb55q    1/1     Running   0          4m30s
my-dd-release-datadog-clusterchecks-847f48d6fc-dd77r   1/1     Running   0          4m30s
my-dd-release-datadog-cluster-agent-798ffb9cb-l6xwv    1/1     Running   0          4m31s
my-dd-release-datadog-clusterchecks-847f48d6fc-pvt2x   1/1     Running   0          4m31s
my-dd-release-datadog-tn4fr                            4/4     Running   0          4m31s
my-dd-release-datadog-hf5nl                            4/4     Running   0          4m31s
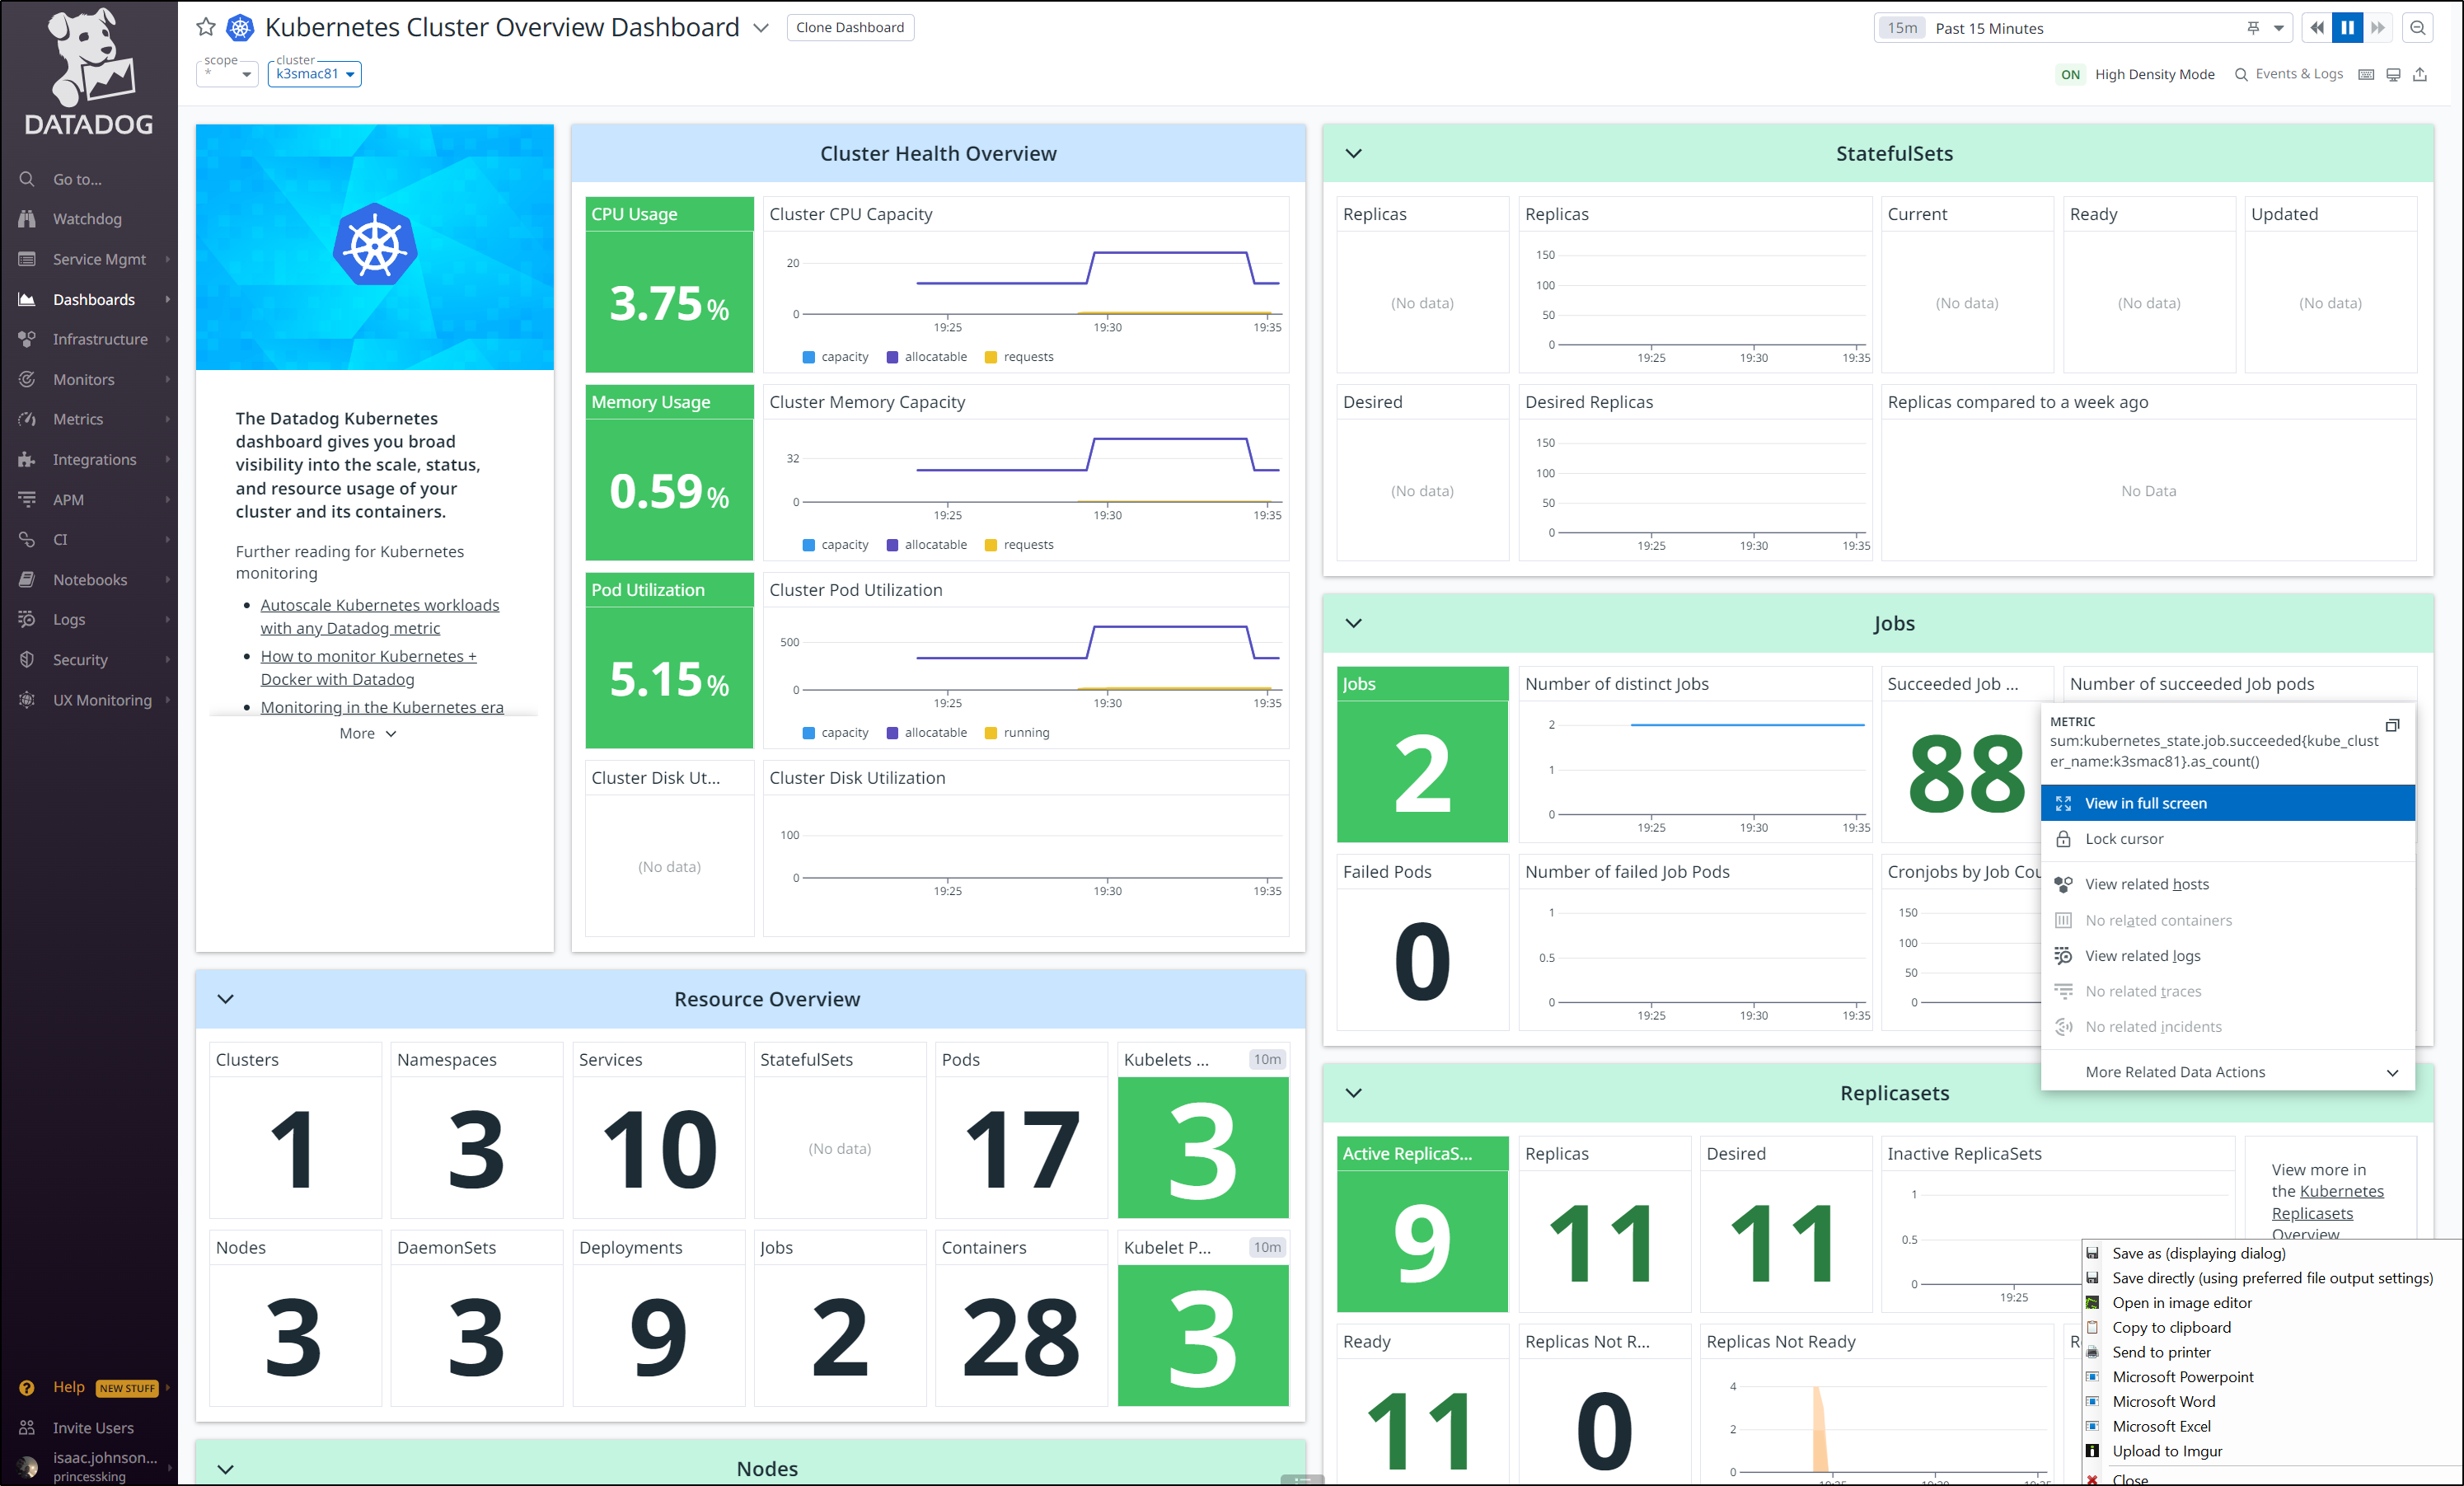
I then saw the new cluster in the Kubernetes dashboard
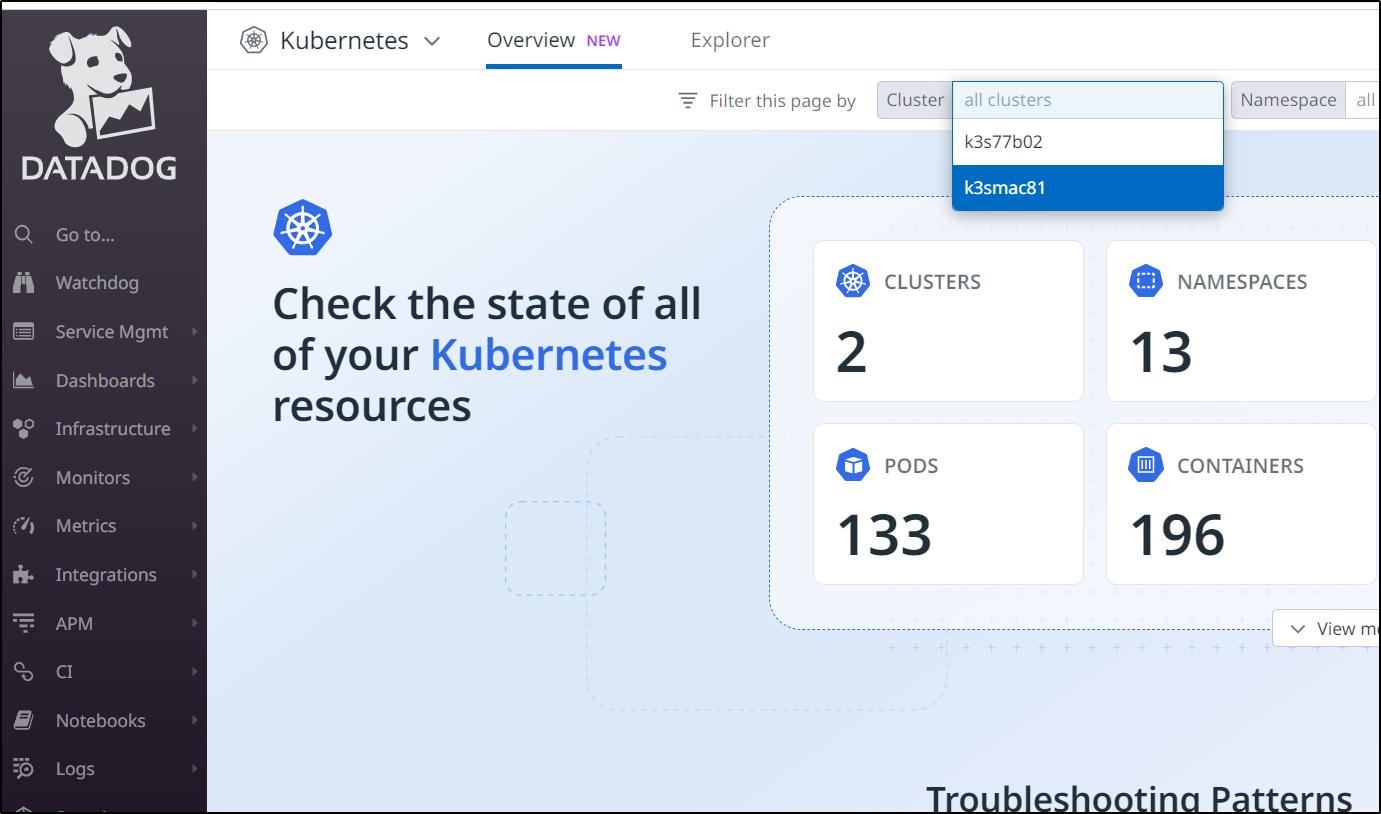
Which gives me access to a wealth of metrics and information
Summary
Ansible AWX is a great platform for orchestrating Ansible Playbooks in a scalable reliable way. We not only can use it to orchestrate and automate the provisioning of infrastructure but we can use it to setup and configure our monitoring suites as well.
Hopefully this gave you some easy to replicate examples you can use in your own AWX or Ansible Tower setups.