

Published: Jul 4, 2023 by Isaac Johnson
Part of a healthy data center is a healthy storage appliances and servers. For me, it was time to upgrade my old Synology DS216Play to something stronger, albeit surprisingly not necessarily newer, such as the DS220+ (or DS216slim). I had issues with the lower power CPU in the DS216Play being able to transcode videos or host a lot of applications and databases. It was an entry level NAS I bought in August of 2016 for $250 - around the time Amazon introduced the first Echo. Additionally, I had WD Red 6TB drives (WD60EFRX) that had run almost contually since 2016. They generally are expected to last 4y so I had fears I might lose data (though I always choose RAID 1 when only operating with 2 drives).
I wanted to share how to set that up, monitor multiple NASes with CSM and Policies, and lastly how to perform drive maintenance. To keep it fun, we’ll setup Docker on one and run some self-built apps when the setup and maintenance is complete.
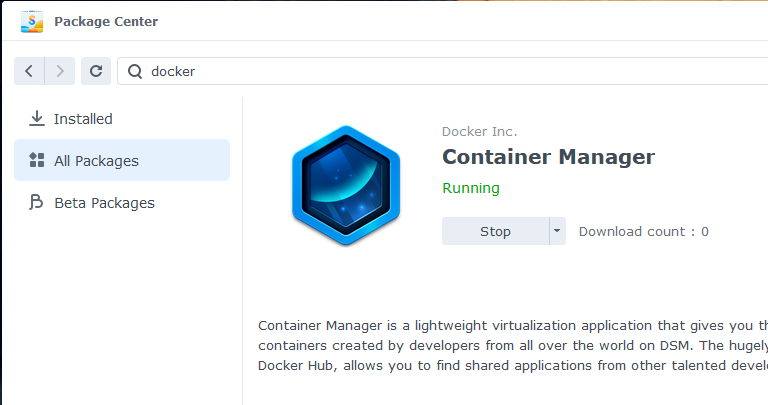
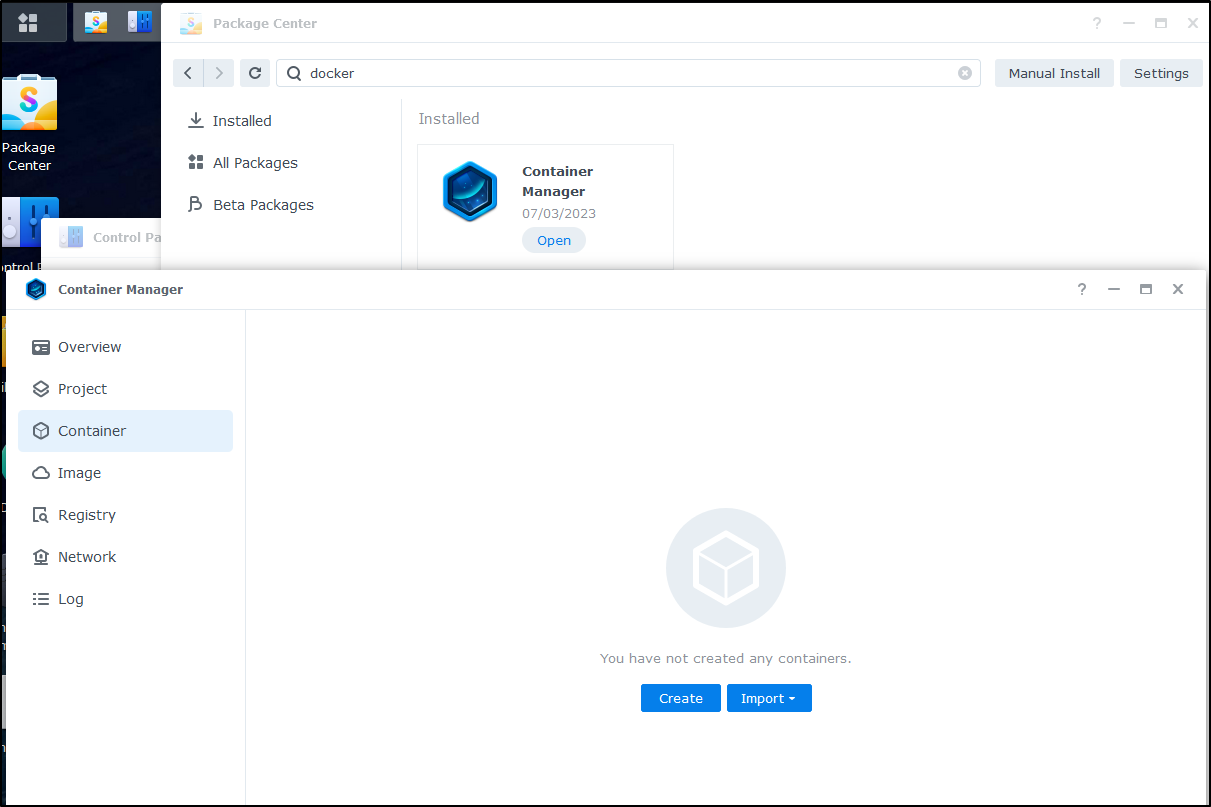
Container Manager
I’ll install container manager, which we will need for docker later
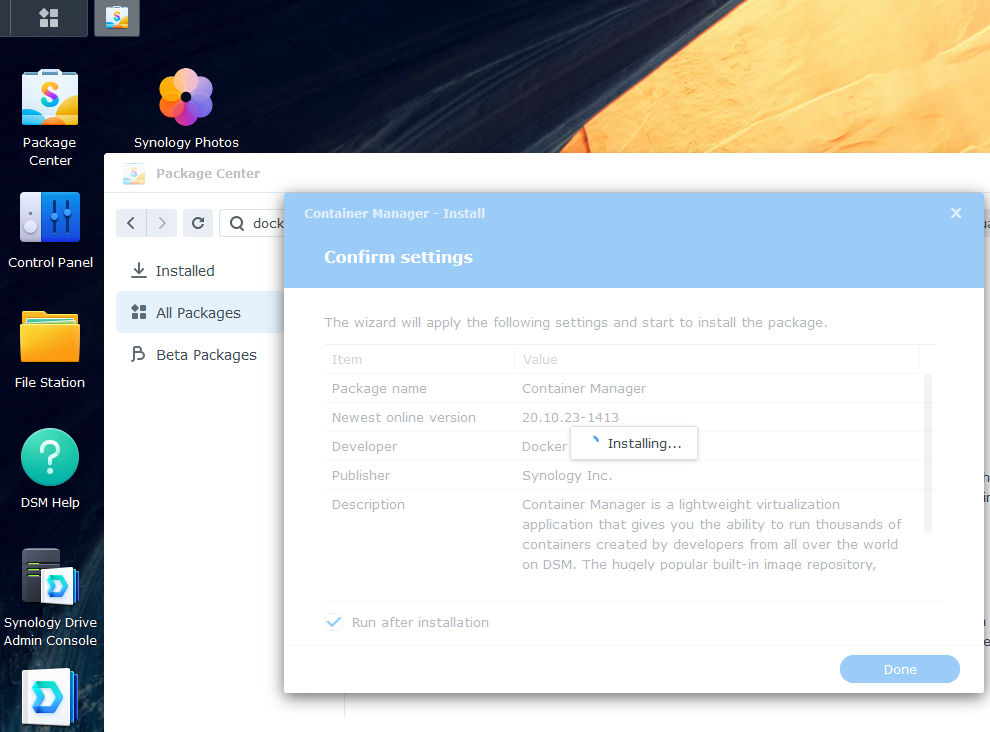
When done, I can see it running
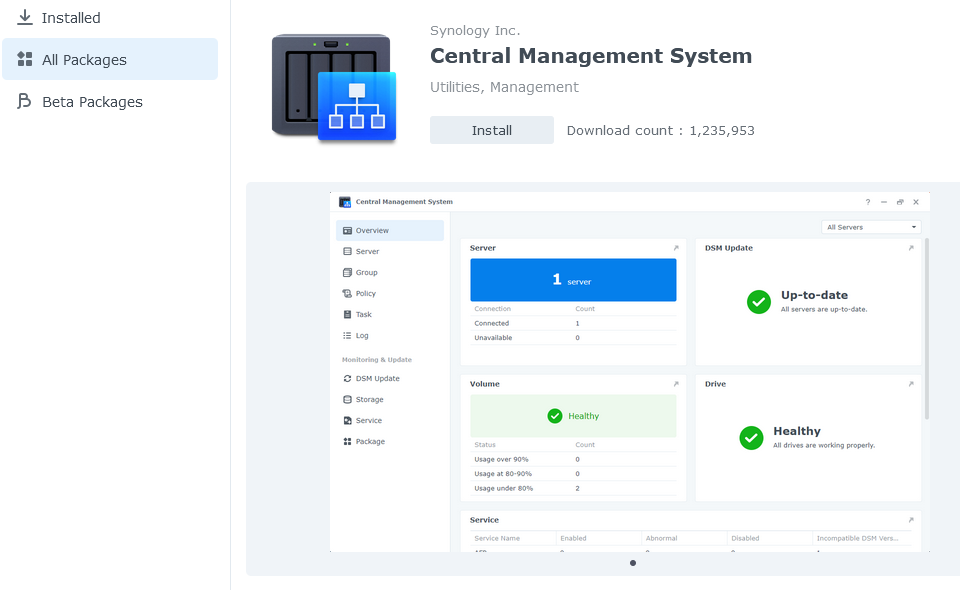
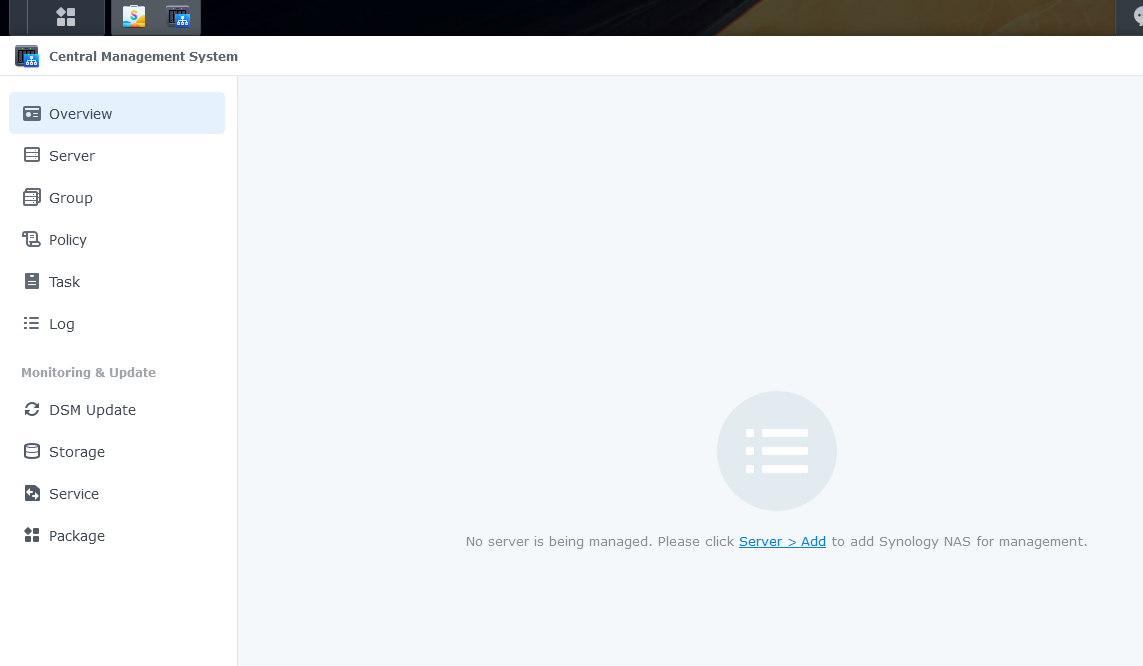
CSM
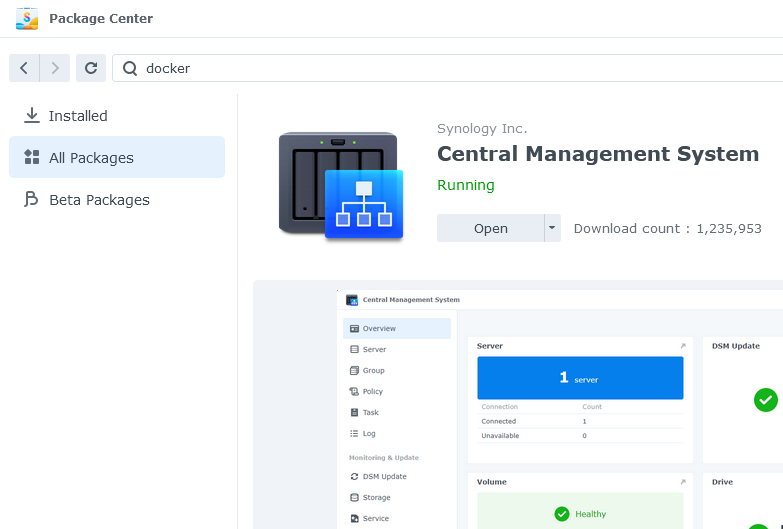
Next, I’ll want to install the Central Management System
When done, I’ll click open
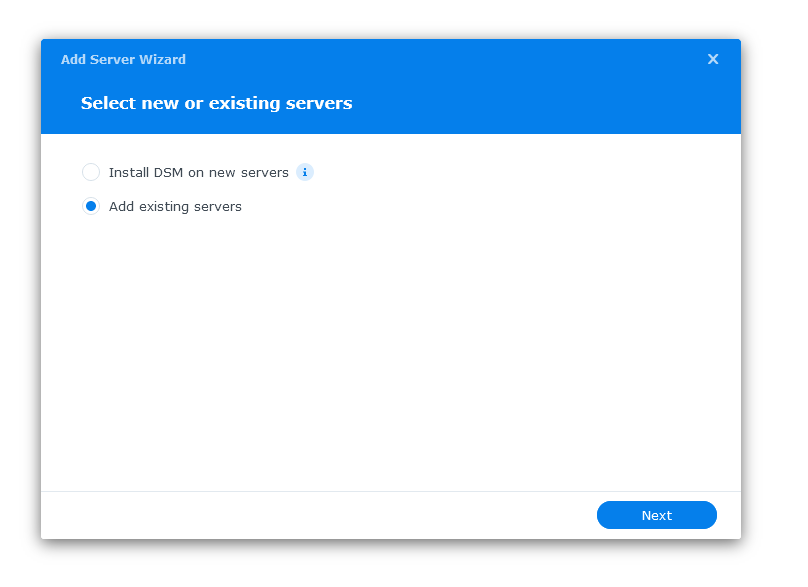
and add a server
I’ll then choose to add existing servers (instead of provisioning new)
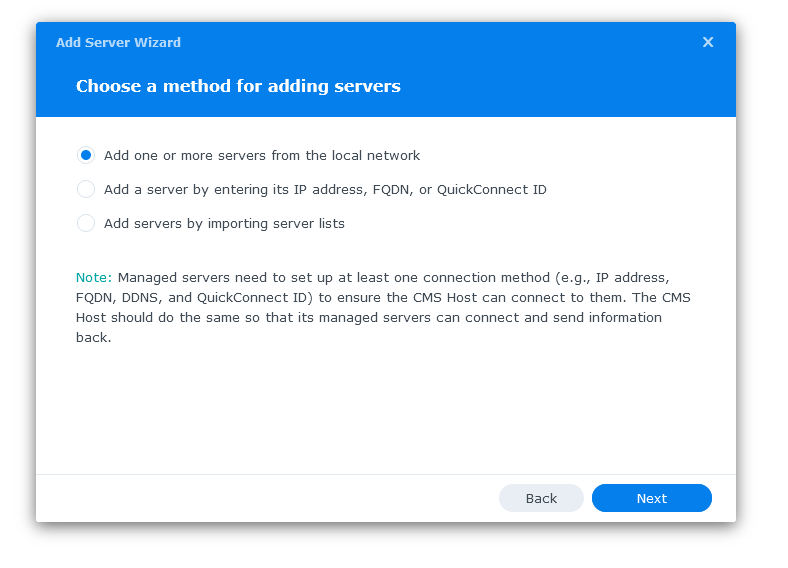
All three of the next options would work, but for this run, I’ll chose to “Add one or more servers from the local network”
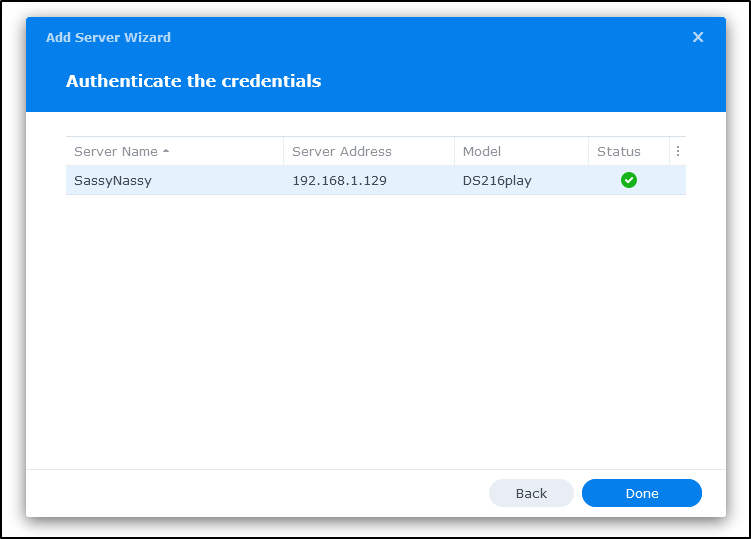
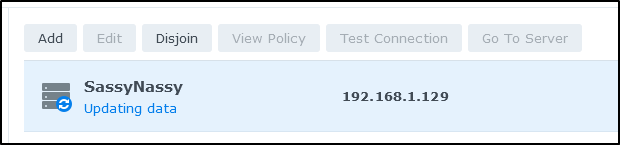
We can see it found the original SassyNassy
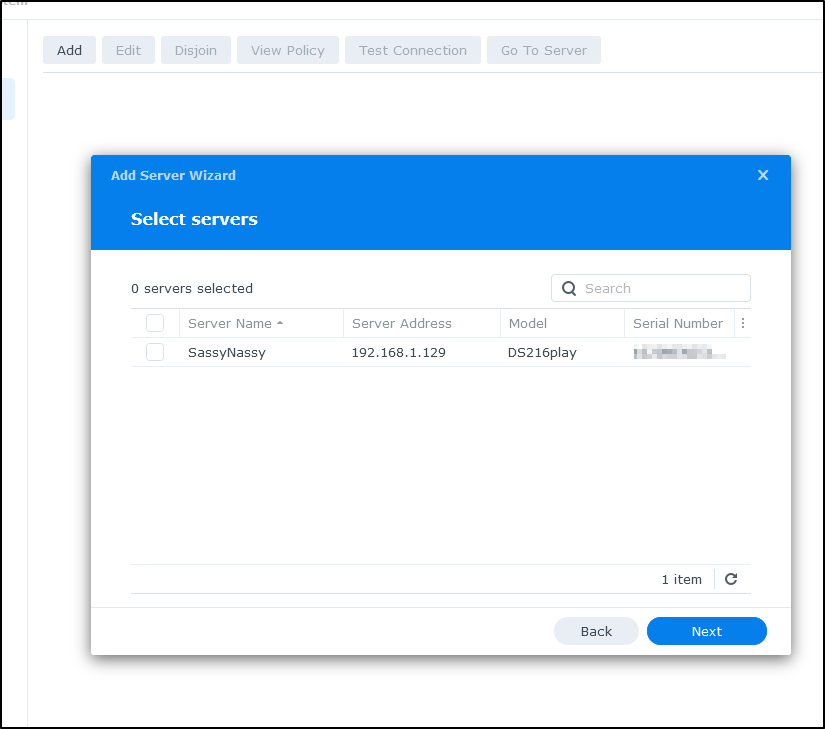
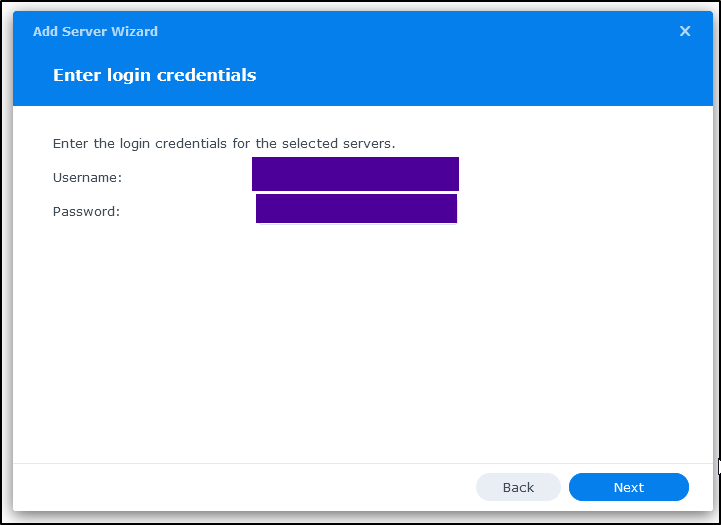
I’ll check the box and then get prompted for the login
If it works, you’ll see a green check on the Status (otherwise an orange triangle warning - which happened when i mistyped the password)
I then went and added this new NAS by IP (though I’m sure 127.0.0.1 would work, I used it’s actual IPv4)

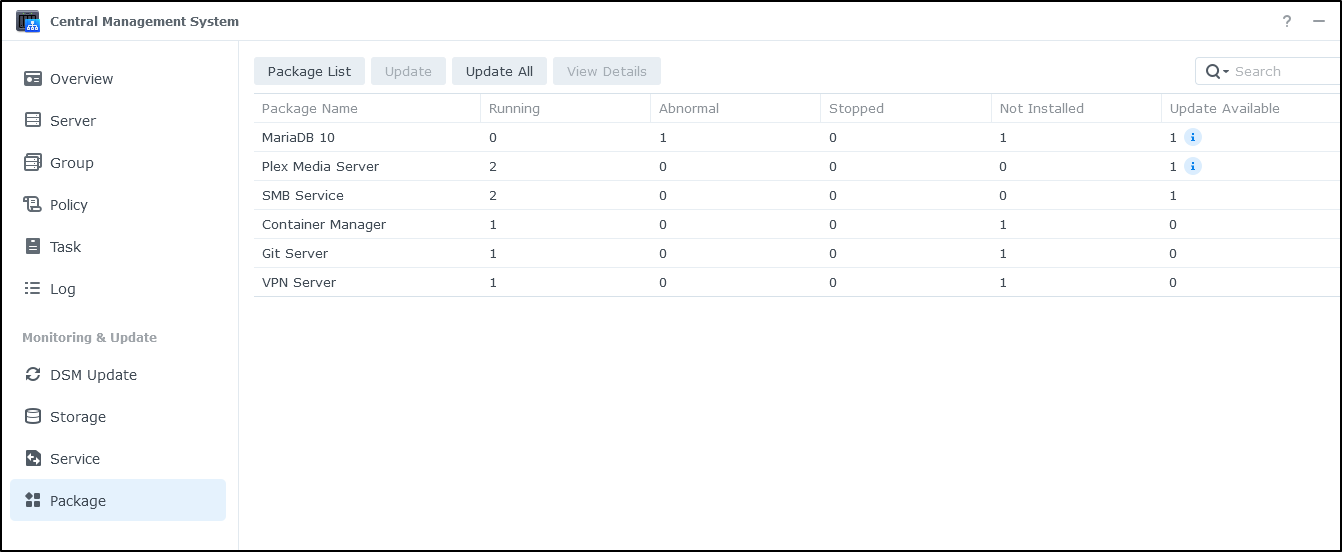
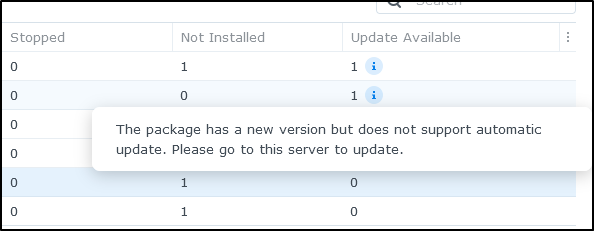
I can choose to monitor specific packages (applications). Here we can see MariaDB and Plex have updates:
Mousing over just gives me the notes
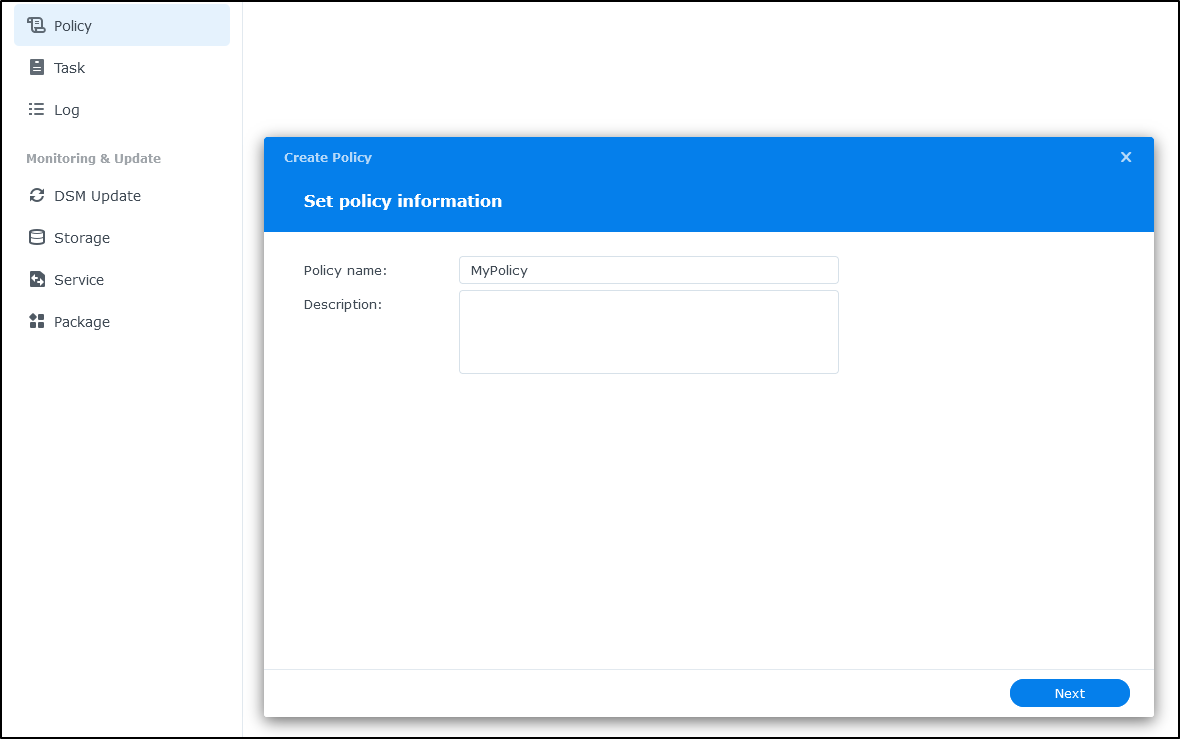
Policies
One nice affect, and this would be if we had to manage a lot of NAS systems, is that I can create a Policy
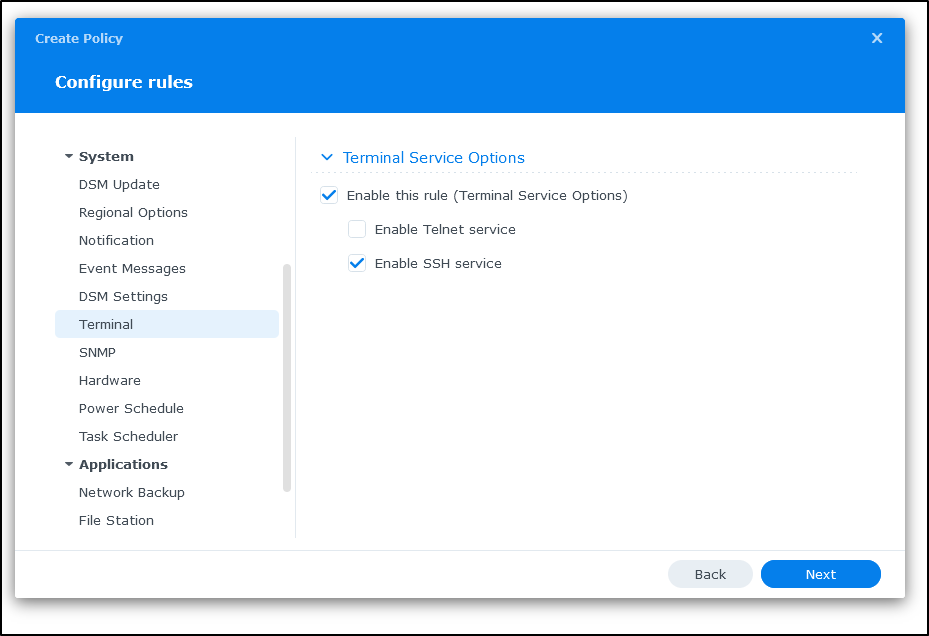
And enable services I require, such as FTP, SMB or SSH, which I’ll do next
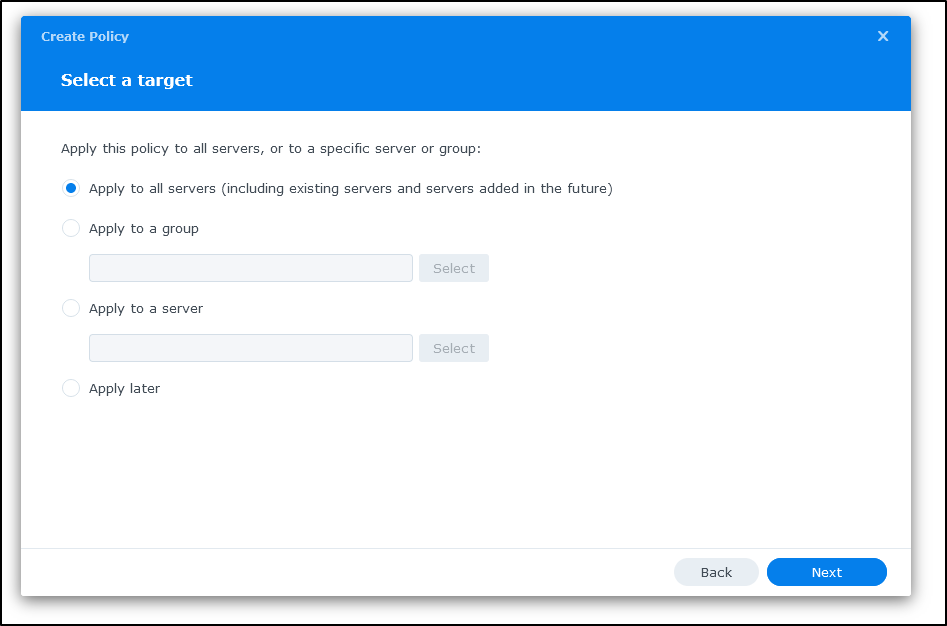
I’ll chose to “Apply to all servers”
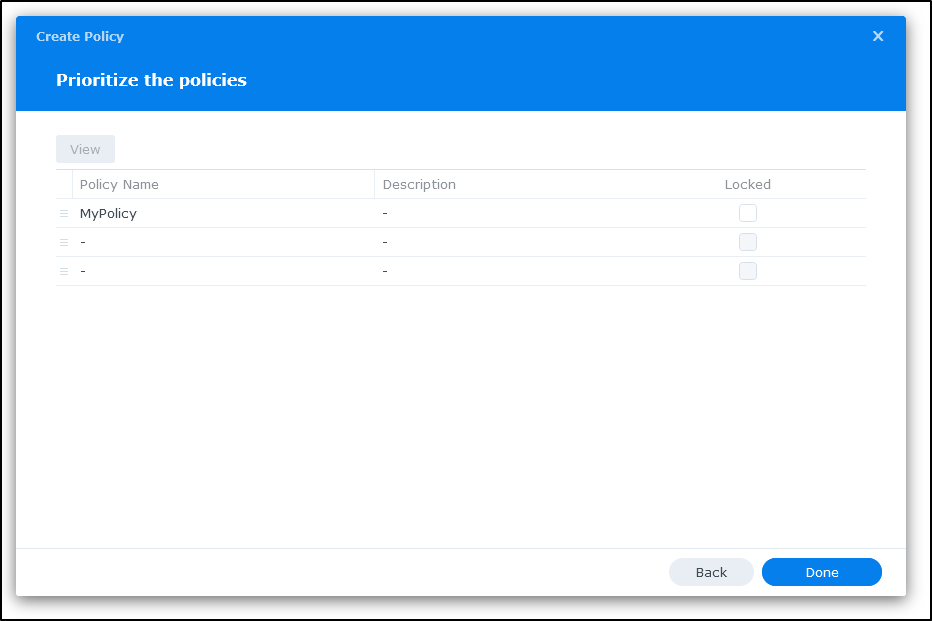
I can then prioritize and lock policies before clicking done
Which I immediately put to the test
I can see docker is running:
Here we can see how we can update a Synology host using CSM
I should note, I needed to update data after that update
and the older NAS was slow, but i have it doing a lot of heavy lifting in my network so I give it a bit of grace

I could see it did update properly
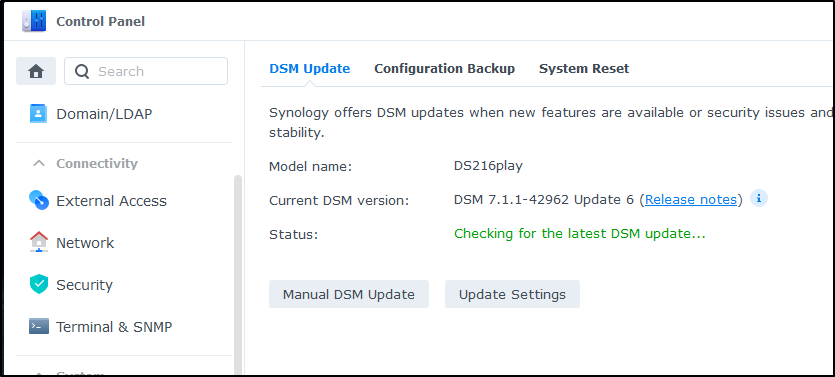
And also in the dashboard
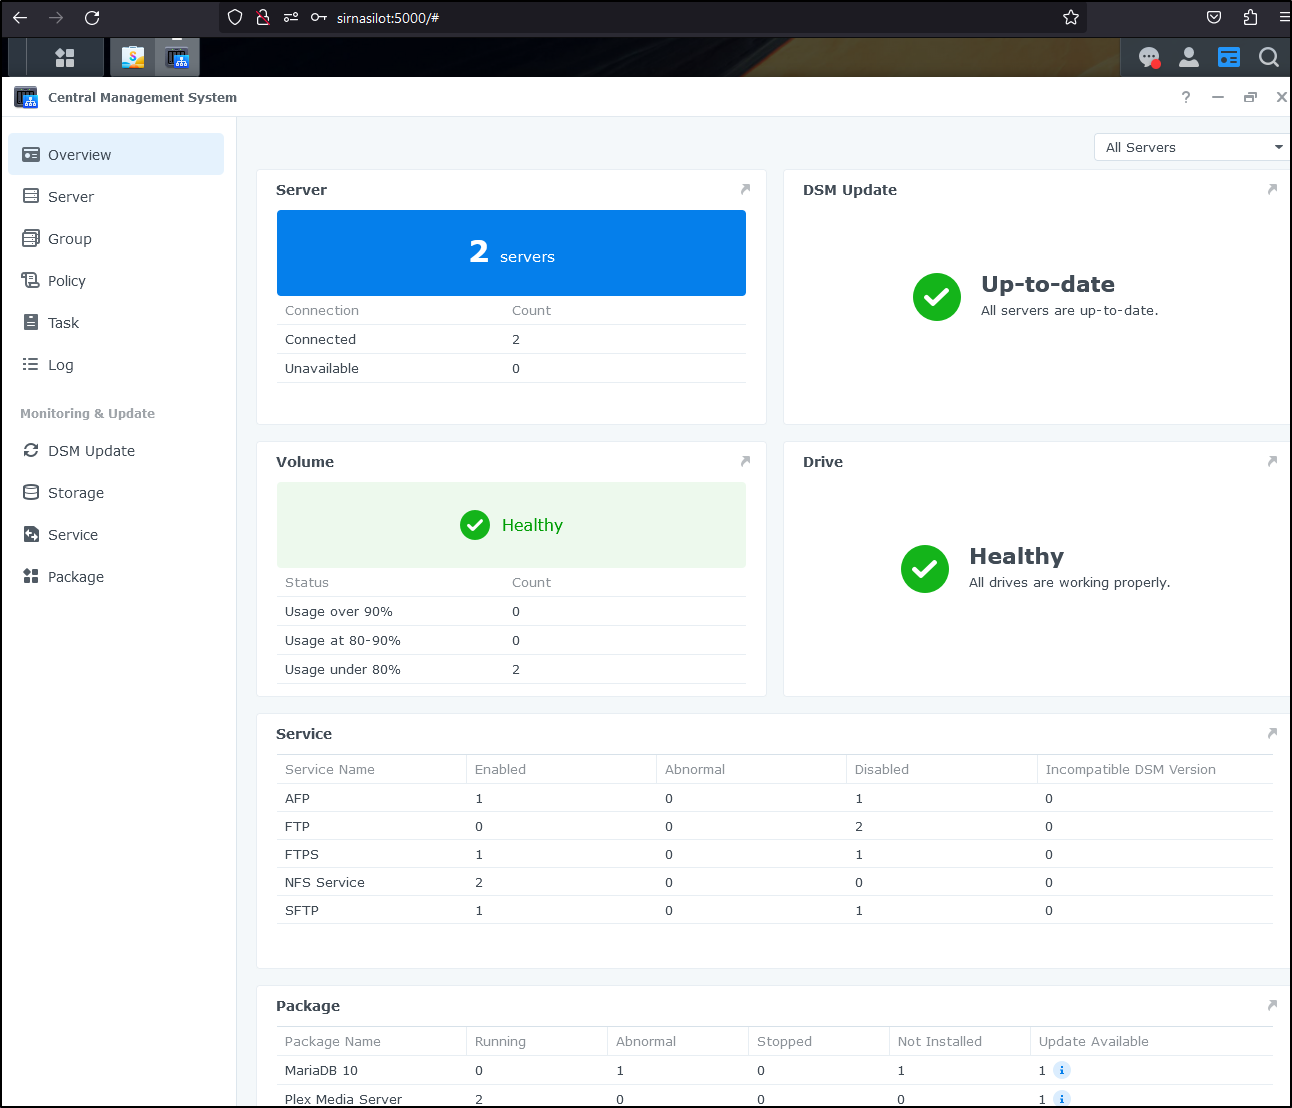
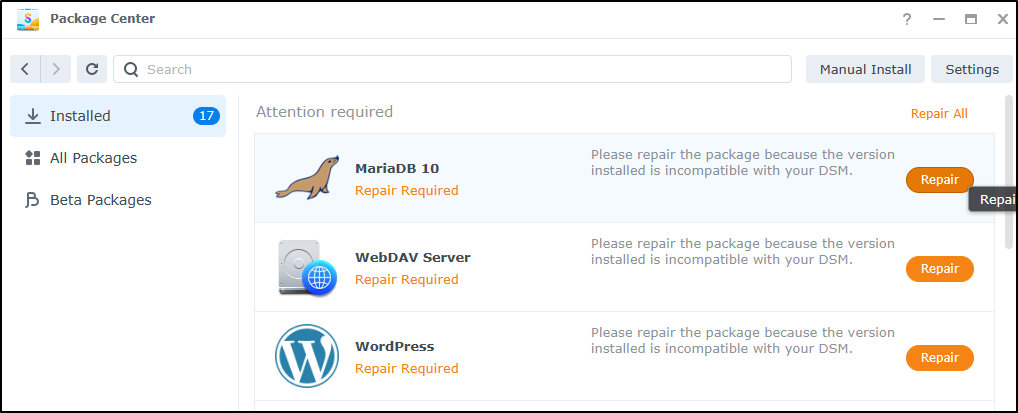
Beware an update might mean updating packages. Here I see three that need updates as a result of OS upgrades
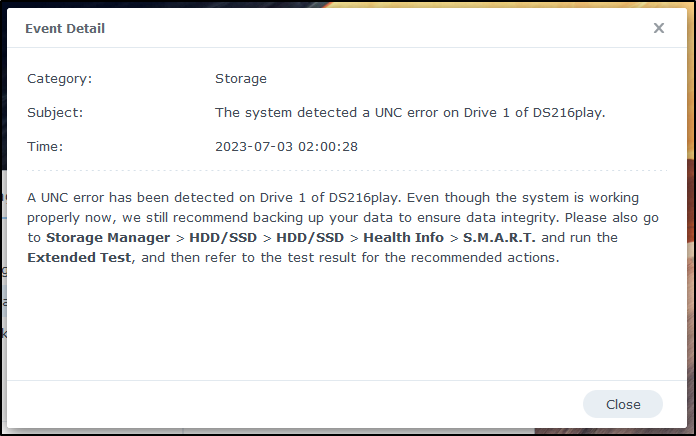
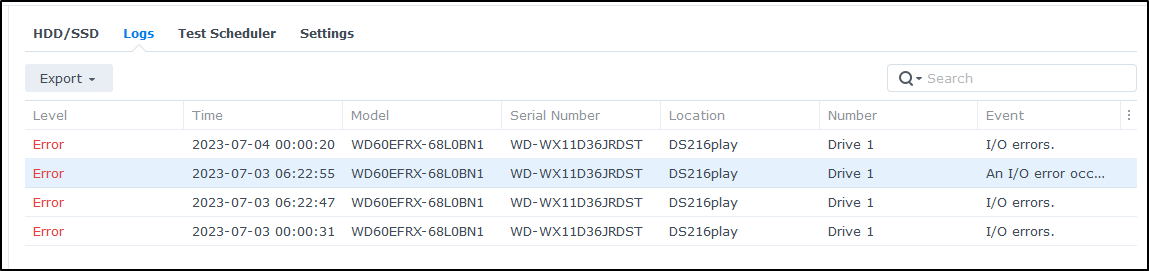
Since there were some errors detected on a drive
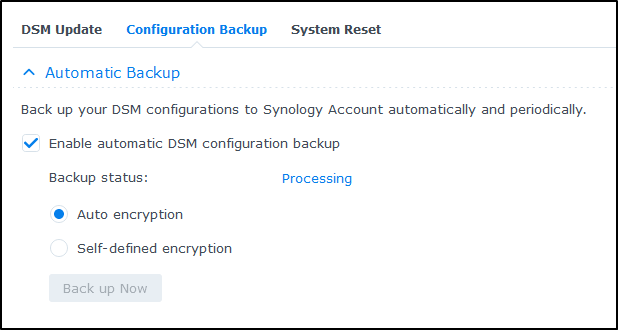
I decided to backup configurations
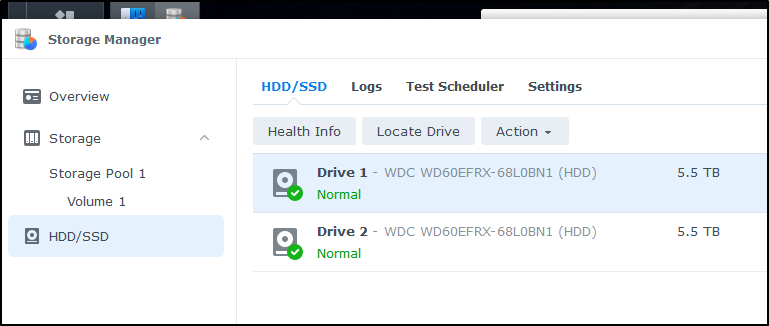
Now to the errors, I clicked the odd shape icon in the upper left for main Applications which gets me to storage manager.
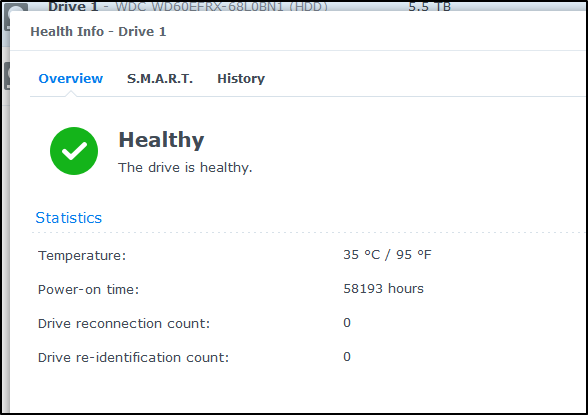
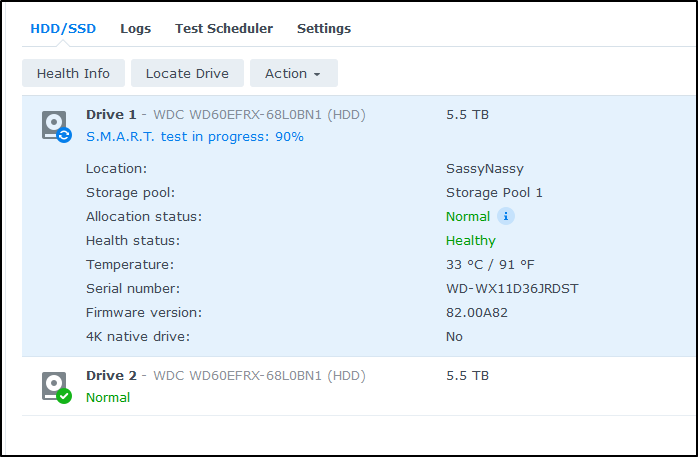
I can now go to my drives and see while Drive 1 shows healthy
It has been running 58193 hours, which is about 6.6years. I googled to see there is a reason for a 3y warranty. They typically live about 4years and I saw plenty of posts about a 40k hour lifespan. The upper ends seem “millions of hours” (from some marketing page) or 10 years “with good caching”. Either way, this old drive might be ready to head out to pasture.
We can go to the “SMART” menu to run an extended test
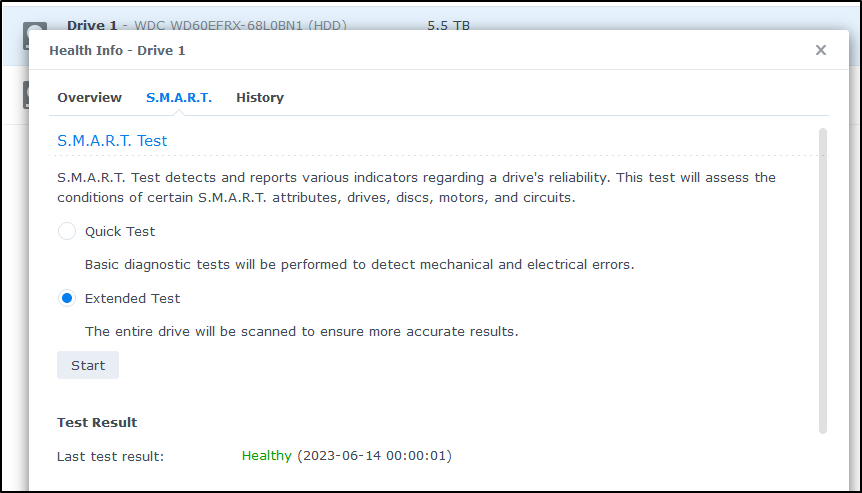
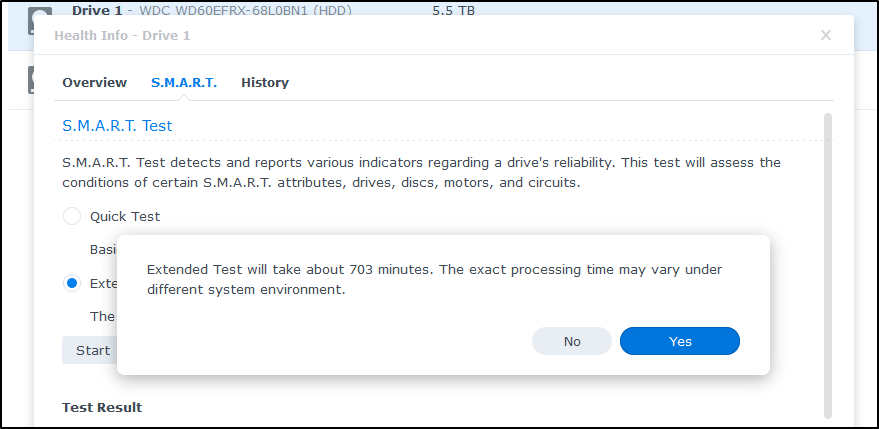
Which will take 703 minutes, or a bit over 11 hours
I can track progress
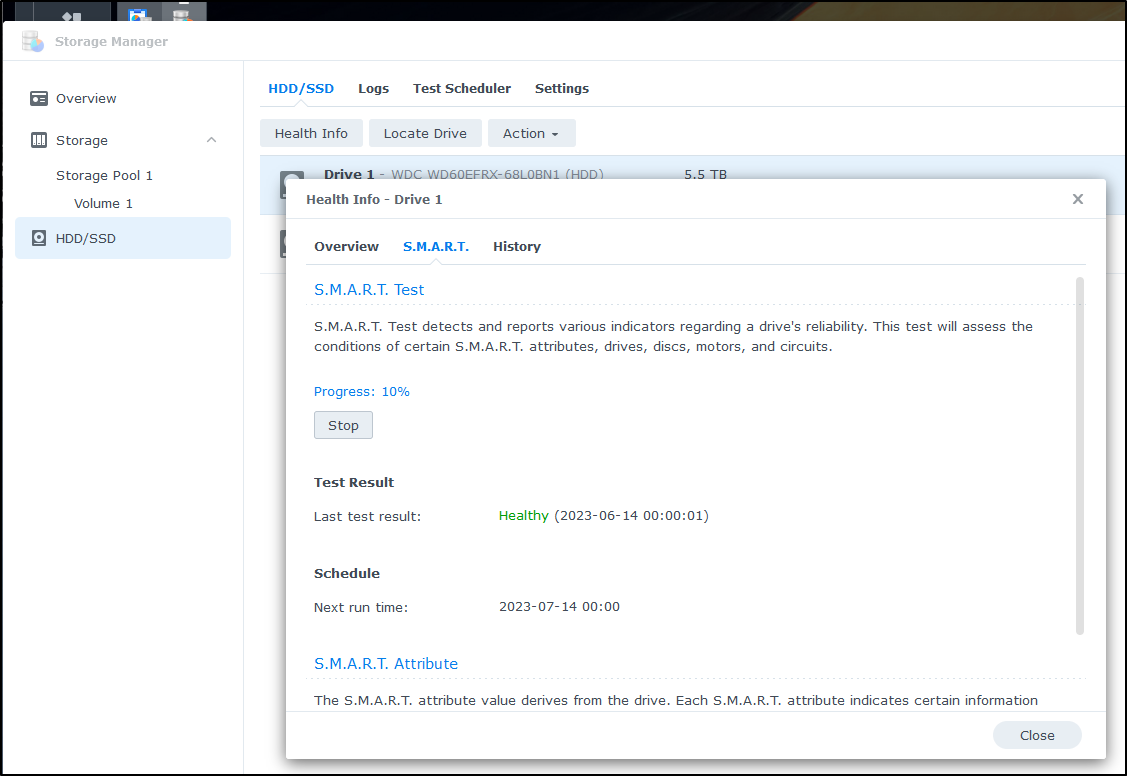
It’s now been over 24 hours and it’s still running.. I’ll let it finish but so far it made it to 90%
and under logs I can see errors listed
Container Registry
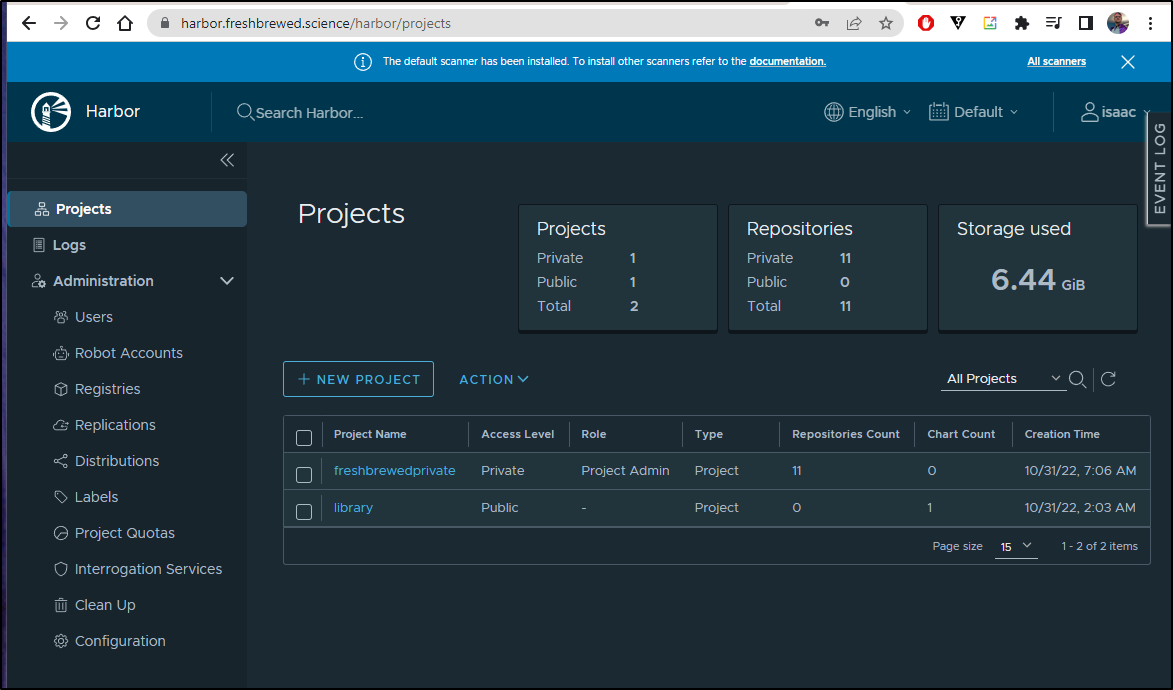
One service I’m always looking to improve is my container registry.
I have harbor, which I do like, but it’s somewhat delicate
Since we setup the Container Manager, we can open that from the Package Manager. Older instructions might call it “Docker” or “Docker Manager”. We’ll then want to the container pane.
I’m going to locate the “registry” container and “Download” it. I’ll choose to use the ‘latest’ image
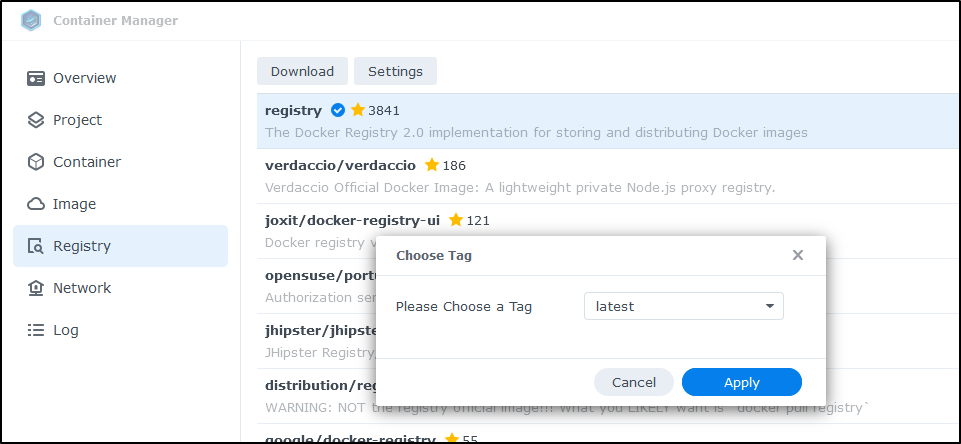
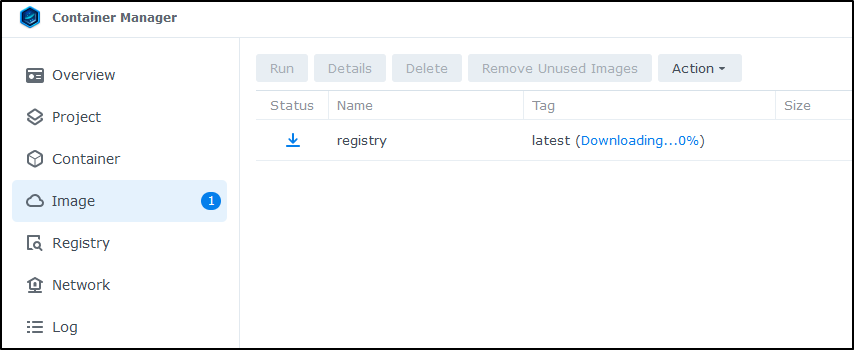
and we can see it downloading
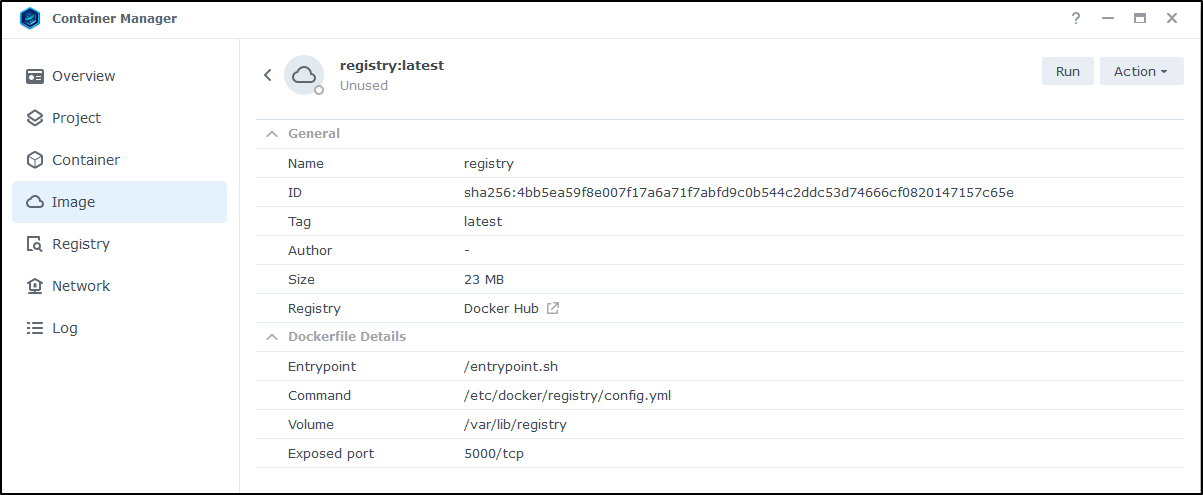
Once downloaded, I can see details
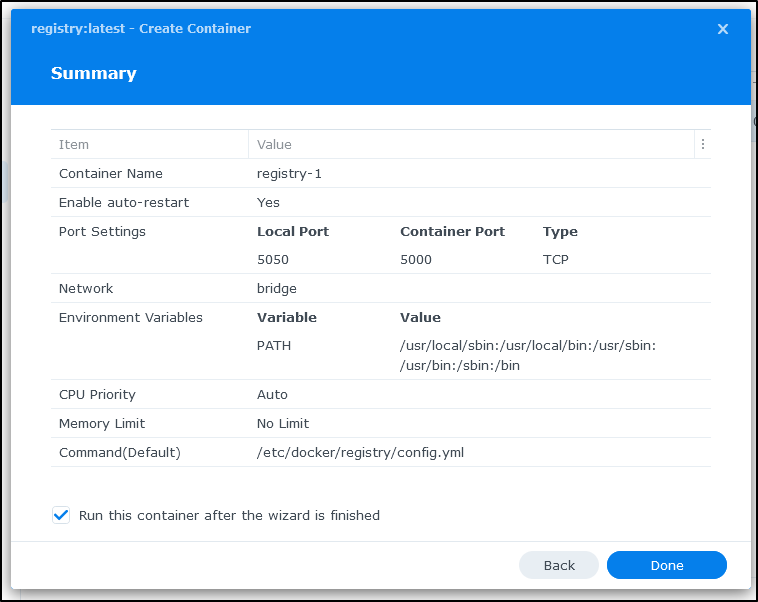
When we click and run it, we can set auto-restart as well as memory settings
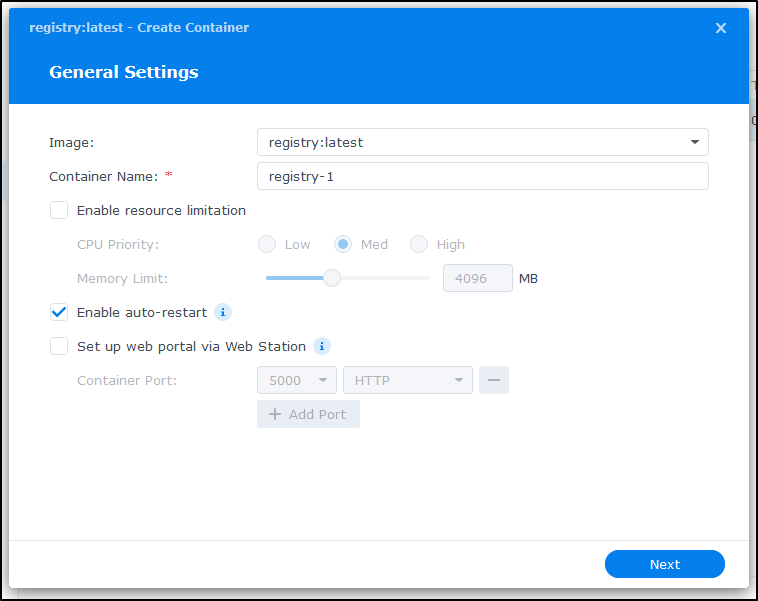
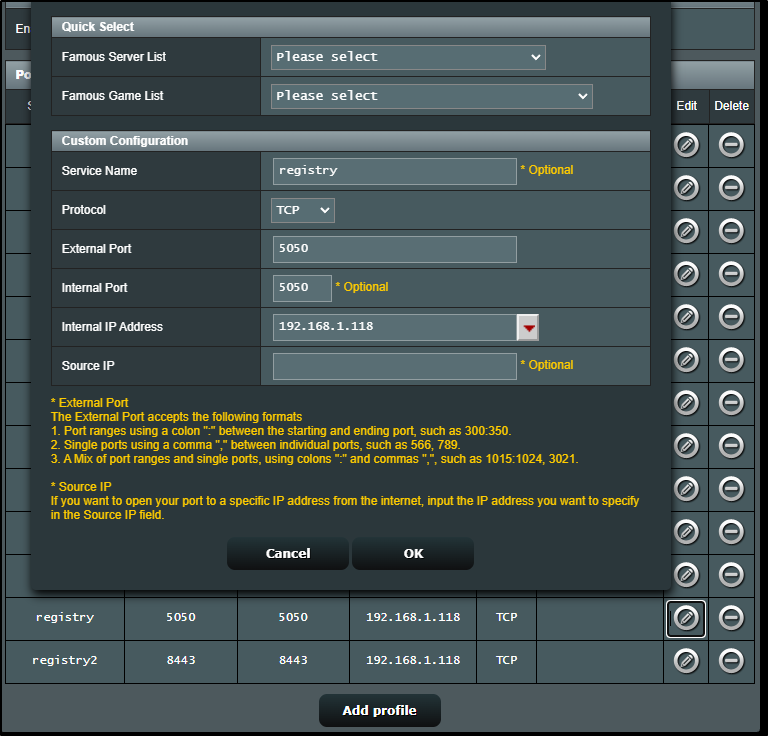
We can set the local port to be something other than 5000. Here I’ll set it to be 5050

I’ll add a folder and give a name
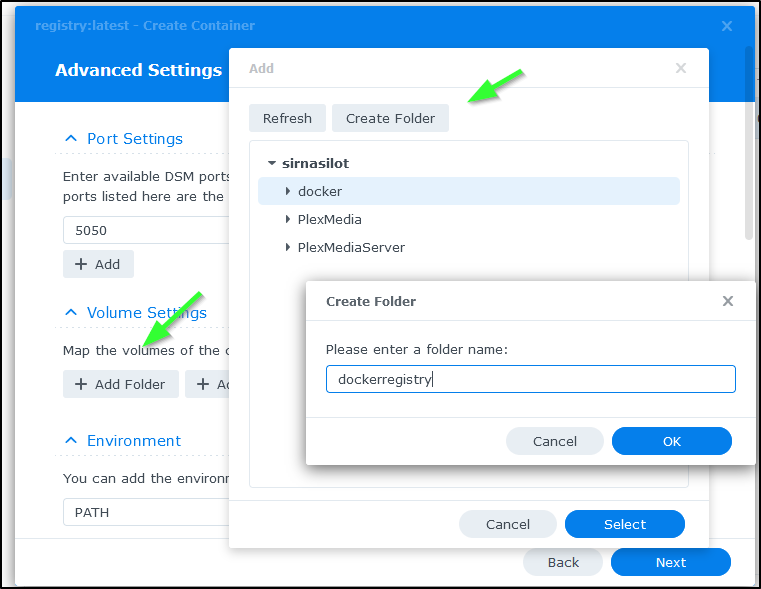
Though I opted to get rid of the mapped folder
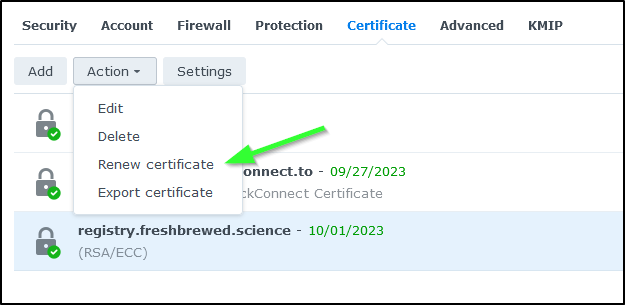
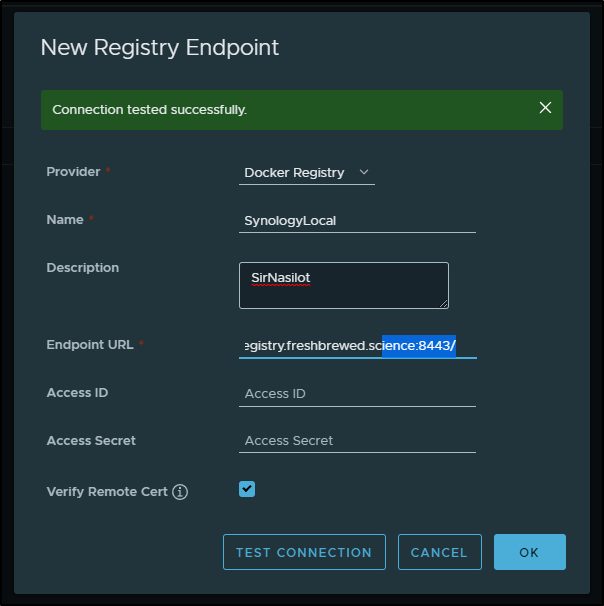
HTTPS / TLS
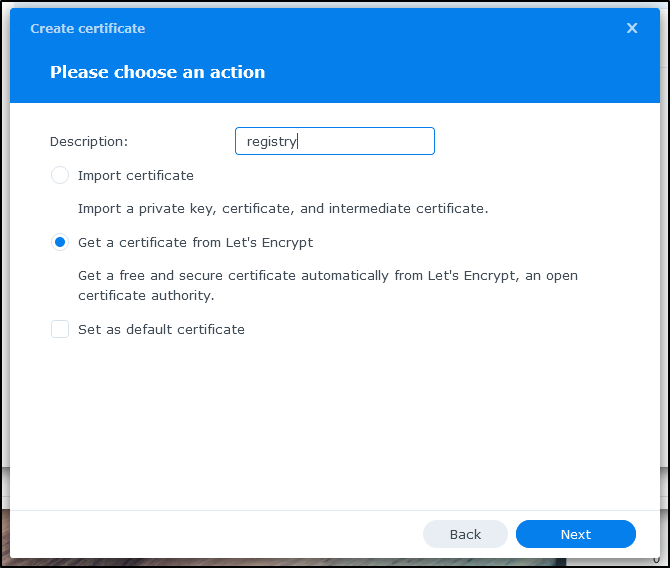
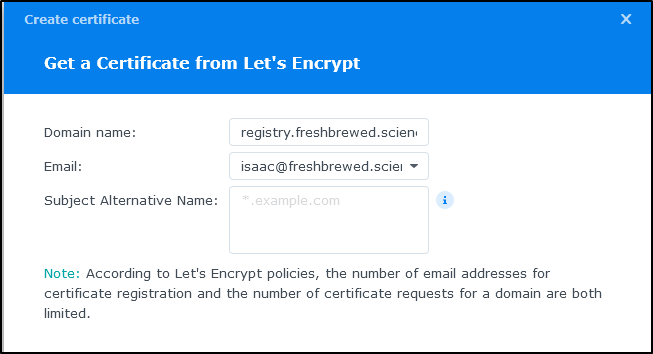
The next step is to add a certificate which we can do under “Certificate”

We’ll set up a certificate from LE
Before I go on, I’ll need to create an A Record to point here
$ cat r53-registry.json
{
    "Comment": "CREATE registry fb.s A record ",
    "Changes": [
      {
        "Action": "CREATE",
        "ResourceRecordSet": {
          "Name": "registry.freshbrewed.science",
          "Type": "A",
          "TTL": 300,
          "ResourceRecords": [
            {
              "Value": "73.242.50.46"
            }
          ]
        }
      }
    ]
  }

$ aws route53 change-resource-record-sets --hosted-zone-id Z39E8QFU0F9PZP --change-batch file://r53-registry.json
{
    "ChangeInfo": {
        "Id": "/change/C02322642Y9XTTLB8KN6T",
        "Status": "PENDING",
        "SubmittedAt": "2023-07-03T18:29:06.272Z",
        "Comment": "CREATE registry fb.s A record "
    }
}
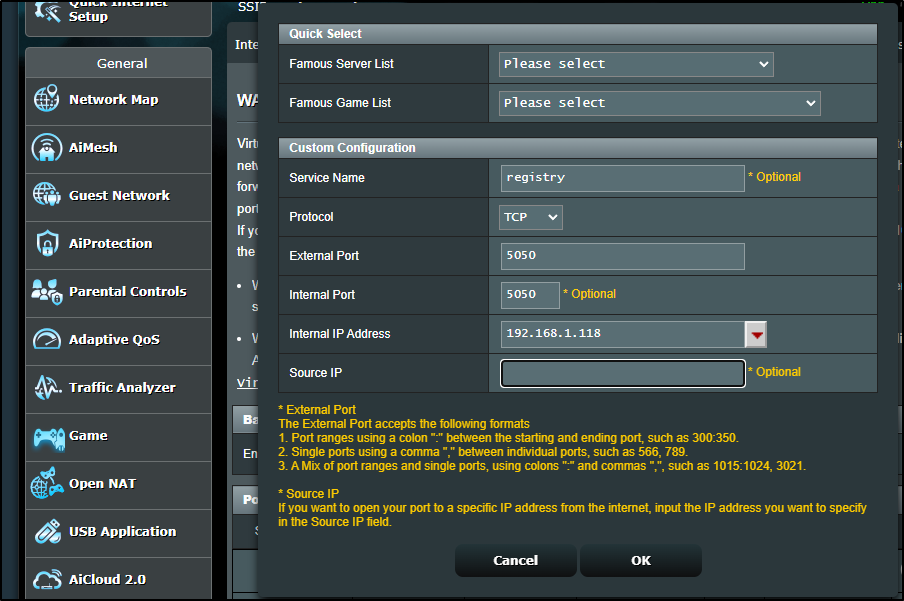
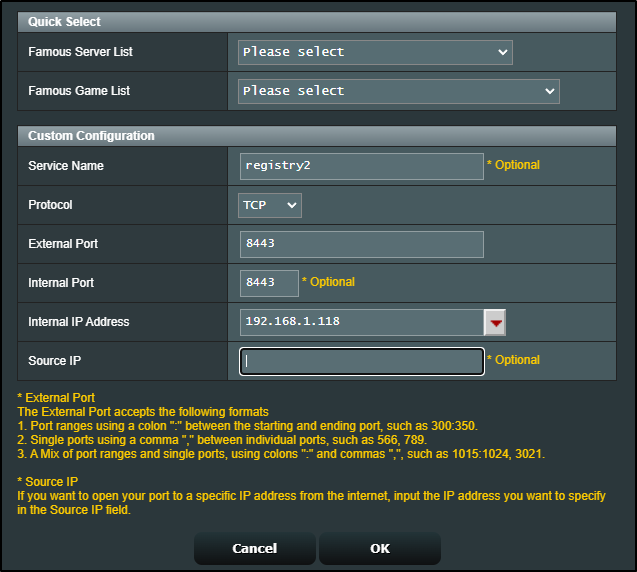
I’ll also need to forward external traffic to this NAS on one of its two NICs
I can now use those values in the next step
However, I got stopped, likely because it uses Cert Manager behind the scenes and my web traffic rightly goes to my k8s ingress controller.
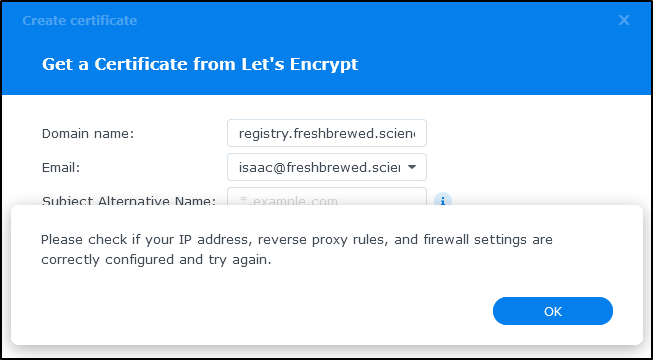
I debated whether to force a cert through k8s, or get one via interactive cert-manager. In the end, I decided to KISS and just forward 443 and 80 to the NAS for a moment which would solve the requirement.

This time it worked
I’ll need to make a mental note to revisit this near the end of sept to renew the cert
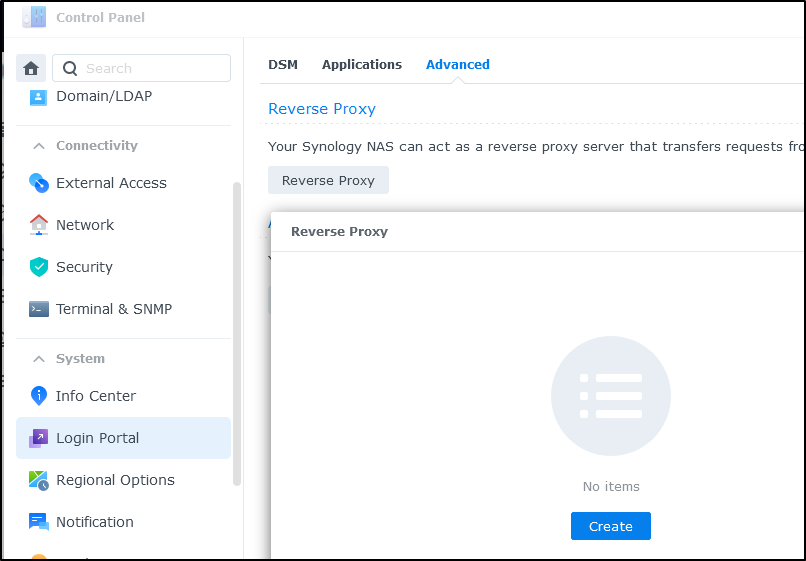
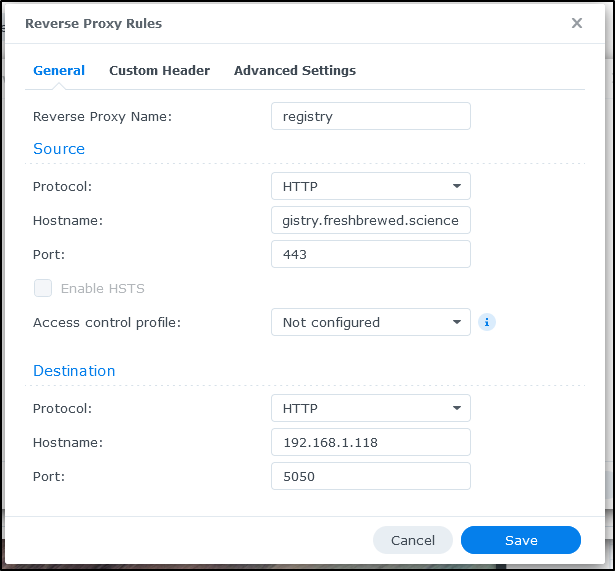
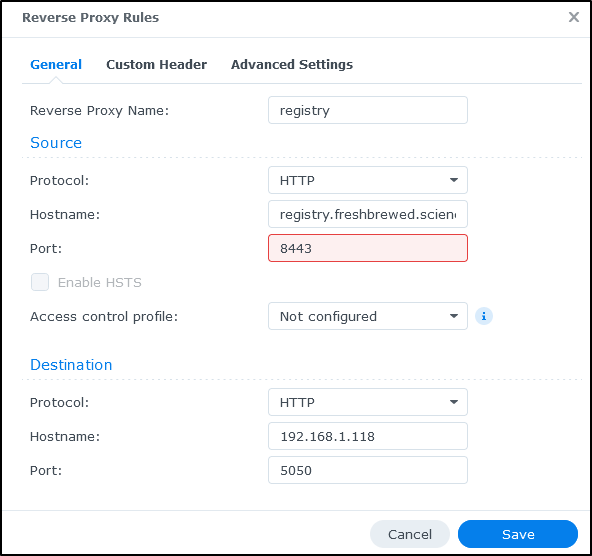
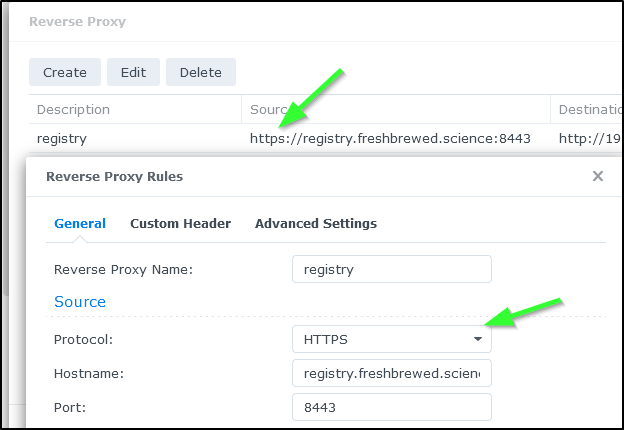
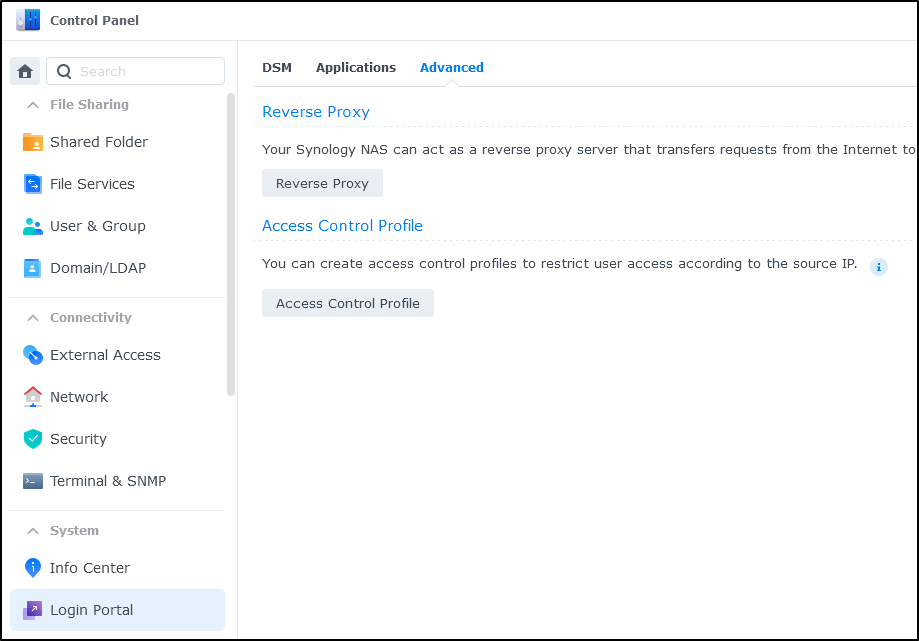
Lastly, we want to setup a reverse proxy. We’ll now find that under System/Login Portal in Advanced (in the past it was in Applications/Application Portal).
I’ll use the local IP but the custom port of 5050 in the configuration
I need to add some custom headers
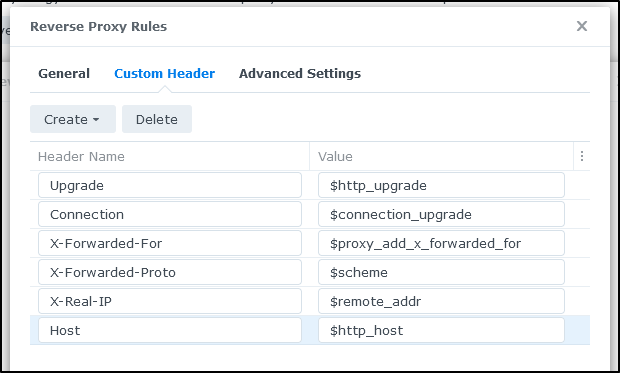
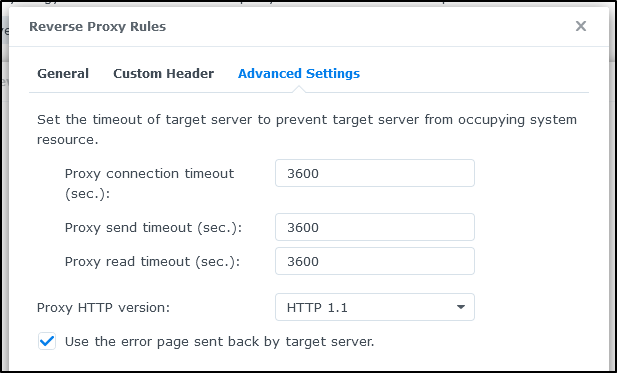
And lastly, kick up the time limits from 60seconds to 3600 for large images
I had to use a different port (8443) because 443 was in use
I can now see port 5050 works
And once I added 8443
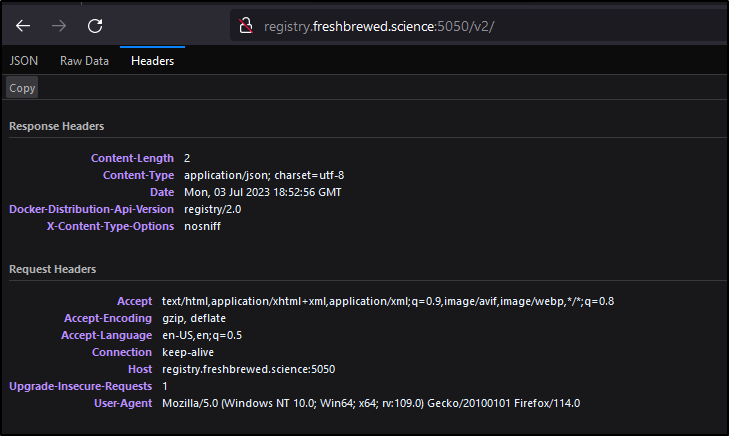
I could use http://registry.freshbrewed.science:8443/v2/ as well.
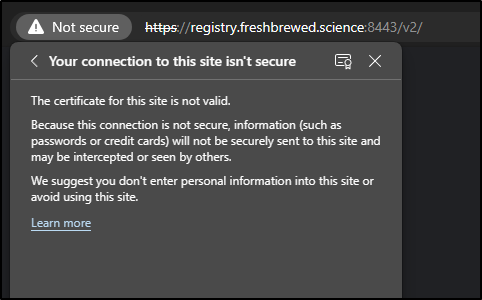
One issue was I errantly use HTTP instead of HTTP which I corrected:
But I still got the wrong cert from the reverse proxy
$ docker push  registry.freshbrewed.science:8443/kube-scheduler
Using default tag: latest
The push refers to repository [registry.freshbrewed.science:8443/kube-scheduler]
Get "https://registry.freshbrewed.science:8443/v2/": x509: certificate is valid for synology, not registry.freshbrewed.science
And i could see an error in browsers as well:
builder@DESKTOP-QADGF36:~/Workspaces$ openssl s_client -showcerts -verify 32 -connect registry.freshbrewed.science:8443
verify depth is 32
CONNECTED(00000003)
depth=0 C = TW, L = Taipei, O = Synology Inc., CN = synology
...snip
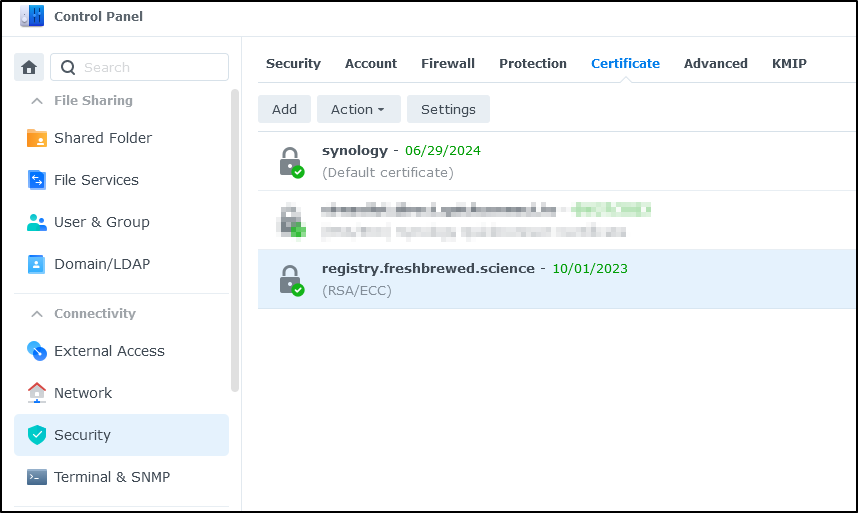
That’s when I figured out the missing piece - set the cert in Security/Certificates for the reverse proxy
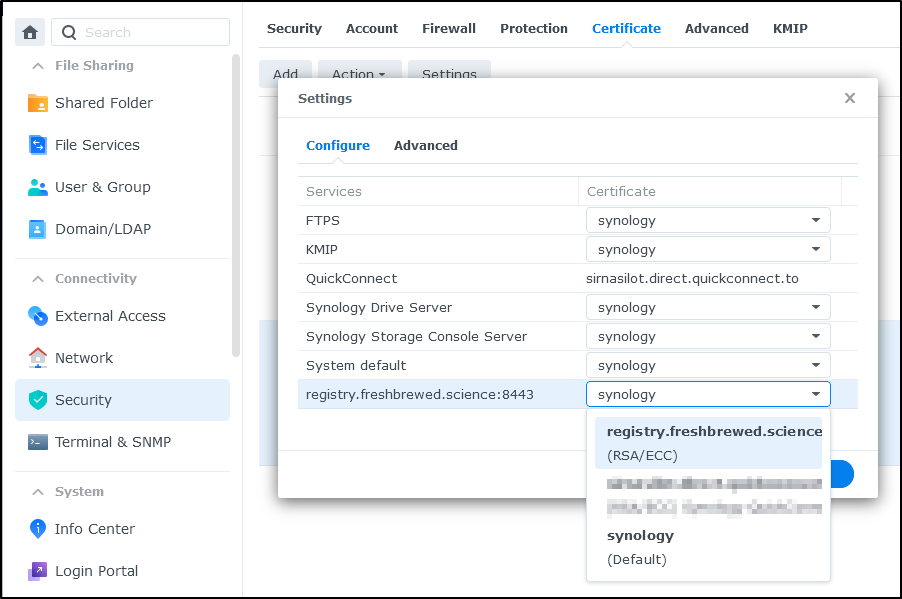
I now had a wide open Docker Registry with a valid cert as hosted by my NAS
$ docker push  registry.freshbrewed.science:8443/kube-scheduler
Using default tag: latest
The push refers to repository [registry.freshbrewed.science:8443/kube-scheduler]
eeb4632a7460: Pushed
9547b4c33213: Pushed
latest: digest: sha256:d4ed76bc6f6588a7d792d56f4ff152a445bbab21db4890d8fbd159b0c3017aea size: 739
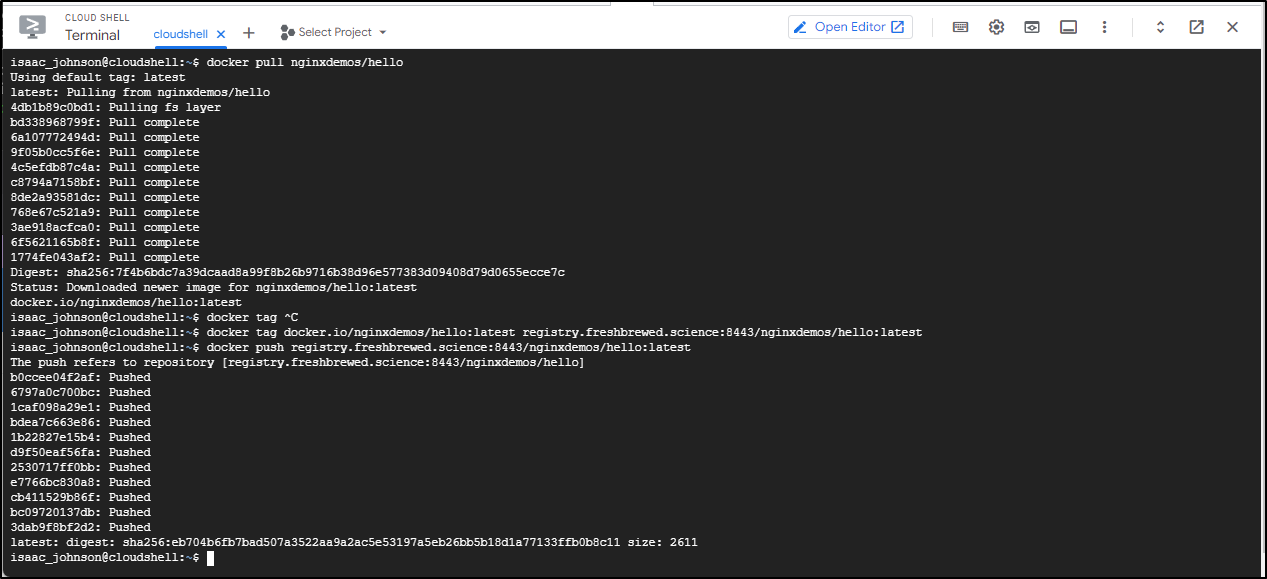
One downside here is there is no security. It’s a free-for-all registry at this point.
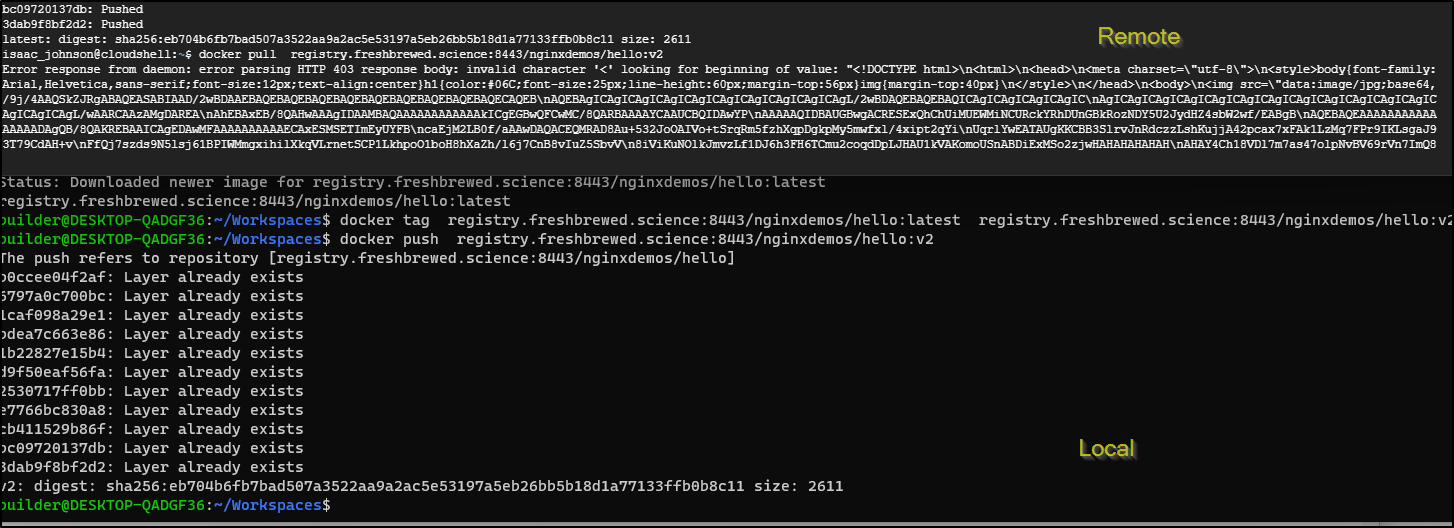
To prove it, I shot over to an ephemeral GCP Cloud Shell and tried pulling and pushing a common image
Securing the Registry
I have two ways to constrain my ingress.
The first is to use Router to limit to a select IP
Sadly, at least my model can only fixate on a single IPv4 and not a CIDR.
For more complicated setups, we can go back to Synology to remedy the situation.
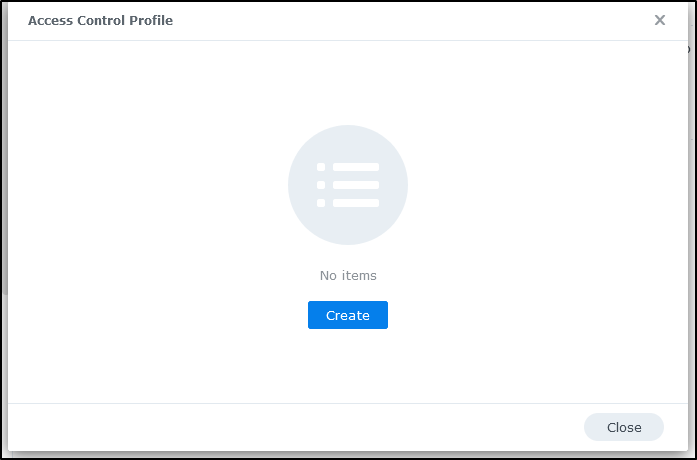
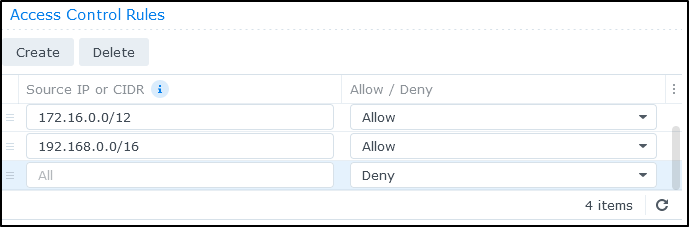
We’ll create an Access Control Profile under Advanced in Login Portal
Click create
I’ll add all the Private IP CIDR Ranges
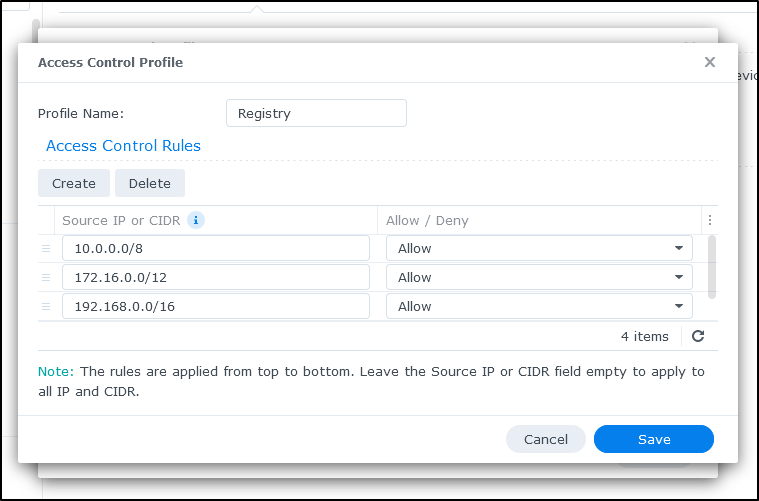
Making sure the last rule is a Deny All
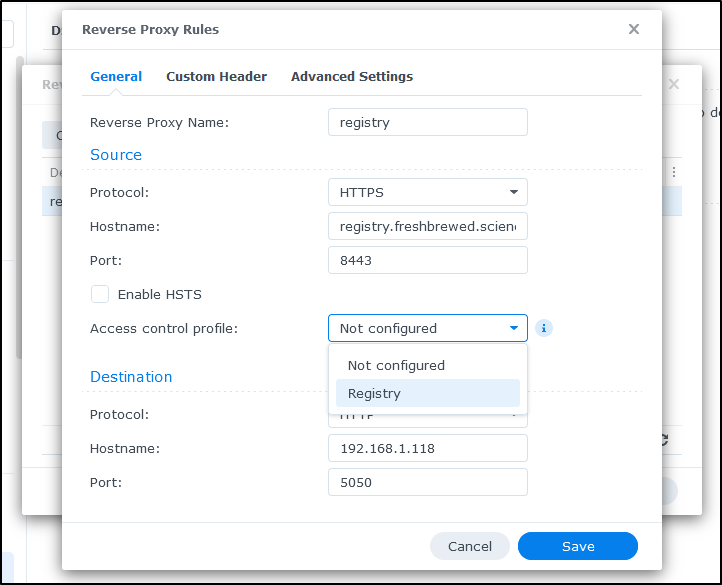
I can now edit my reverse proxy and restrict traffic using the Access Control Profile we just created
We can see worked locally but rejected the remote Cloud Shell
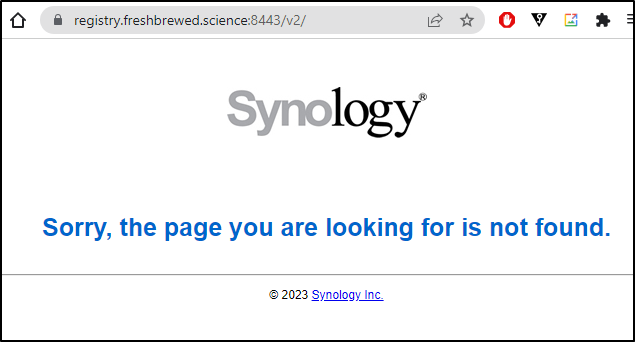
If rendered, the response page looks like this:
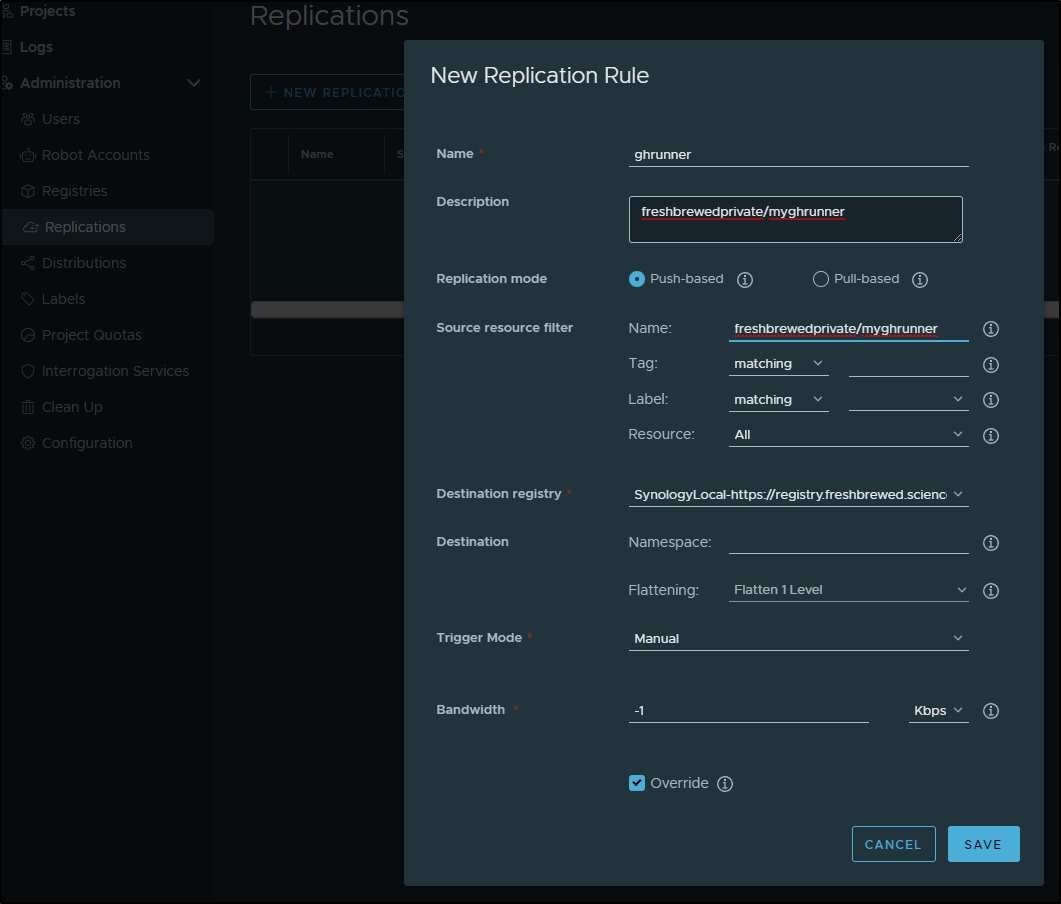
Adding to Harbor
I can now add this registry to my Harbor instance
I can then use that in a manual replication rule
I can select the rule and click “Replicate” and confirm

And see it start a job
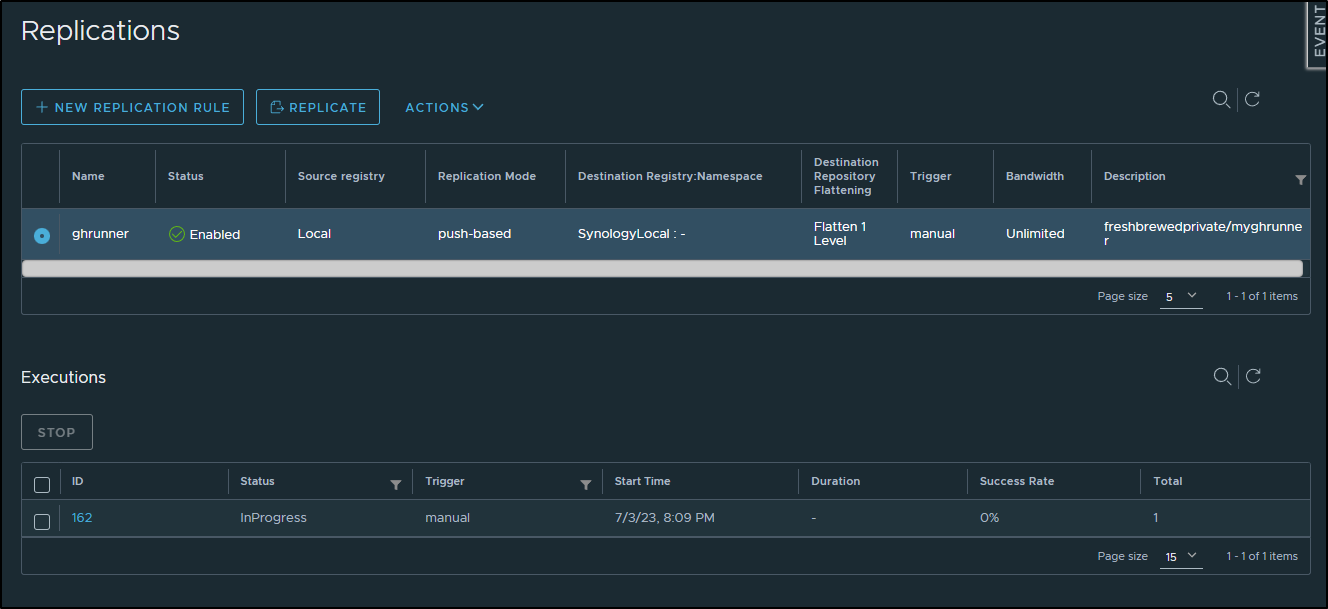
Which if I click the job, I can see the progress
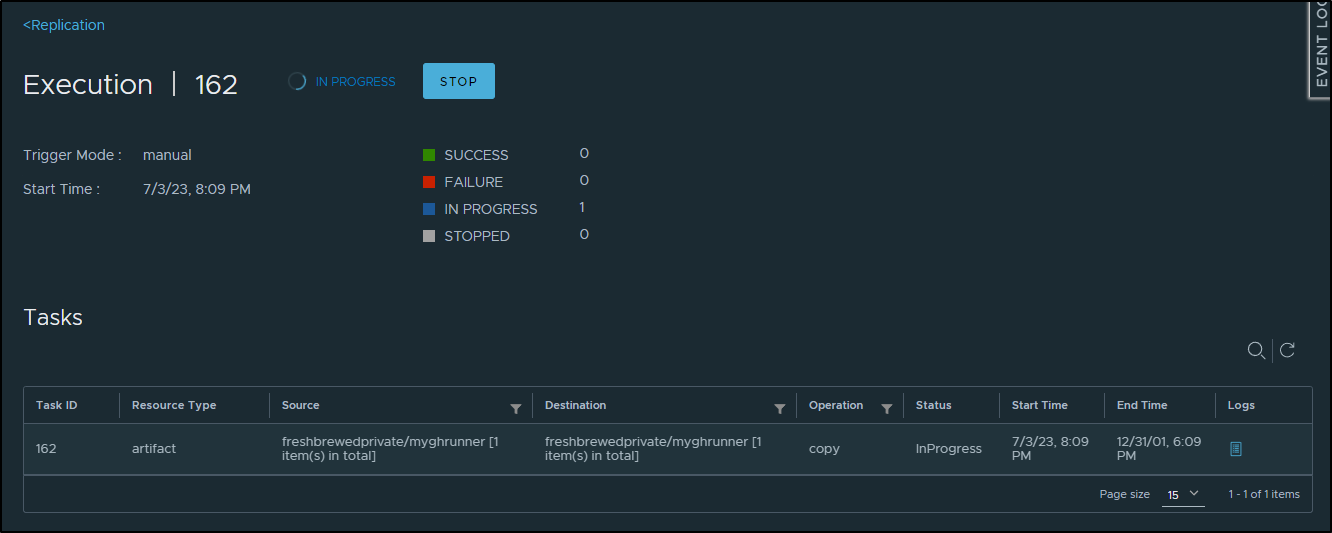
and it succeeding
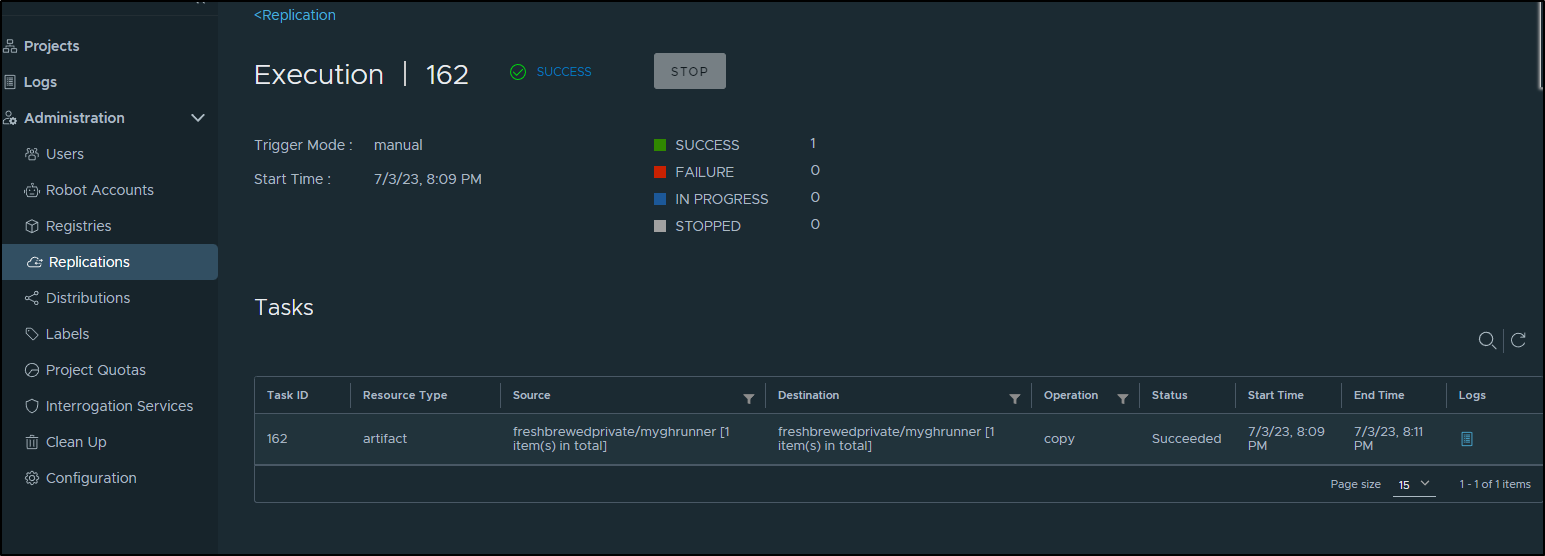
I can double check the log of that Job to see the destination and lastly pull from that destination to prove it works

I’ll now want to add some steps to pull from Harbor and push to the Registry in my Github Workflow that builds my actions runner
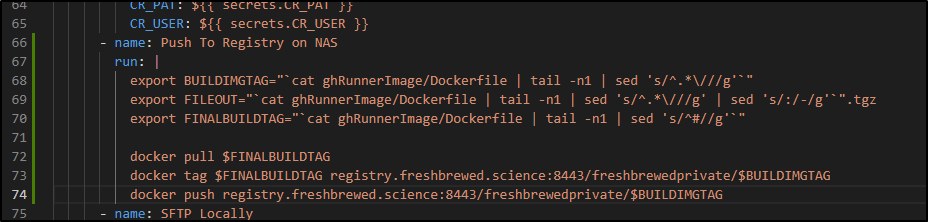
At the moment that is:
$ cat ghRunnerImage/Dockerfile | tail -n1 | sed 's/^#//g'
harbor.freshbrewed.science/freshbrewedprivate/myghrunner:1.1.13
$ cat ghRunnerImage/Dockerfile | tail -n1 | sed 's/^.*\///g'
myghrunner:1.1.13
$ cat ghRunnerImage/Dockerfile | tail -n1 | sed 's/^.*\///g' | sed 's/:/-/g'
myghrunner-1.1.13
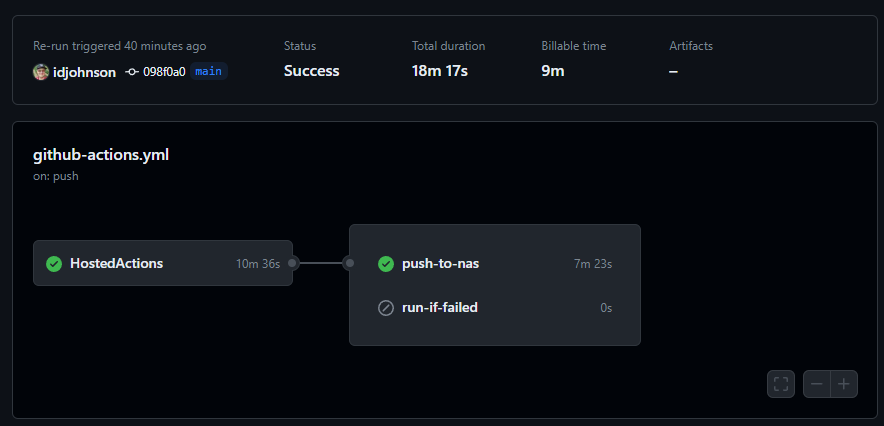
I’ll push both the GH Action change and a new Docker image up to test
builder@DESKTOP-QADGF36:~/Workspaces/jekyll-blog$ git diff .github/workflows/github-actions.yml
diff --git a/.github/workflows/github-actions.yml b/.github/workflows/github-actions.yml
index 27016a7..0554f6d 100644
--- a/.github/workflows/github-actions.yml
+++ b/.github/workflows/github-actions.yml
@@ -63,6 +63,15 @@ jobs:
         env: # Or as an environment variable
           CR_PAT: $
           CR_USER: $
+      - name: Push To Registry on NAS
+        run: |
+          export BUILDIMGTAG="`cat ghRunnerImage/Dockerfile | tail -n1 | sed 's/^.*\///g'`"
+          export FILEOUT="`cat ghRunnerImage/Dockerfile | tail -n1 | sed 's/^.*\///g' | sed 's/:/-/g'`".tgz
+          export FINALBUILDTAG="`cat ghRunnerImage/Dockerfile | tail -n1 | sed 's/^#//g'`"
+
+          docker pull $FINALBUILDTAG
+          docker tag $FINALBUILDTAG registry.freshbrewed.science:8443/freshbrewedprivate/$BUILDIMGTAG
+          docker push registry.freshbrewed.science:8443/freshbrewedprivate/$BUILDIMGTAG
       - name: SFTP Locally
         run: |
           export BUILDIMGTAG="`cat ghRunnerImage/Dockerfile | tail -n1 | sed 's/^.*\///g'`"
builder@DESKTOP-QADGF36:~/Workspaces/jekyll-blog$ git diff ghRunnerImage/Dockerfile
diff --git a/ghRunnerImage/Dockerfile b/ghRunnerImage/Dockerfile
index dc2fd6a..ccc4172 100644
--- a/ghRunnerImage/Dockerfile
+++ b/ghRunnerImage/Dockerfile
@@ -33,4 +33,4 @@ RUN umask 0002 \

 RUN sudo rm -rf /var/lib/apt/lists/*

-#harbor.freshbrewed.science/freshbrewedprivate/myghrunner:1.1.13
+#harbor.freshbrewed.science/freshbrewedprivate/myghrunner:1.1.14
Without an external system to index images, I have to just pull to test if the latest image is there
$ docker pull registry.freshbrewed.science:8443/freshbrewedprivate/myghrunner:1.1.14
1.1.14: Pulling from freshbrewedprivate/myghrunner
99803d4b97f3: Pull complete
b4bcc430cfac: Pull complete
db2077c043eb: Pull complete
196c2810b3cc: Pull complete
0f14dd117202: Pull complete
27197dbbcdc0: Pull complete
70cf5506f0d1: Pull complete
46be545161c9: Pull complete
d71c5f5673c2: Pull complete
a9f050f1d55a: Pull complete
044ee7934194: Pull complete
aed2386026ea: Pull complete
923cb2d666a4: Pull complete
862eaedeb44a: Pull complete
d522bf2507e3: Pull complete
4caf782762f1: Pull complete
9e465f791c2c: Pull complete
3d56526fa9e8: Pull complete
de9a285d0c0e: Pull complete
f867ccd05a35: Pull complete
696ae0518799: Pull complete
0668afd4de5d: Pull complete
e8f6f617ffe8: Pull complete
20e4a48992bf: Pull complete
Digest: sha256:62a3897adb7db76ee258d9c3088f0d5dd6ff134b90cbdc6cb3c6264d51f81489
Status: Downloaded newer image for registry.freshbrewed.science:8443/freshbrewedprivate/myghrunner:1.1.14
registry.freshbrewed.science:8443/freshbrewedprivate/myghrunner:1.1.14
Now there is a way to see what tags are there by logging into the NAS and checking the _manifests on the container
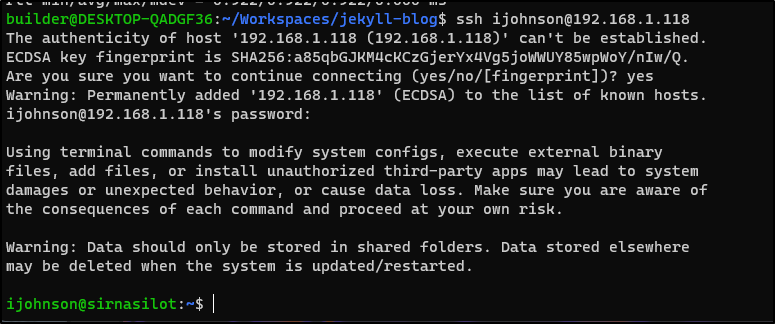
$ ssh ijohnson@192.168.1.118
ijohnson@192.168.1.118's password:
Using terminal commands to modify system configs, execute external binary
files, add files, or install unauthorized third-party apps may lead to system
damages or unexpected behavior, or cause data loss. Make sure you are aware of
the consequences of each command and proceed at your own risk.
Warning: Data should only be stored in shared folders. Data stored elsewhere
may be deleted when the system is updated/restarted.
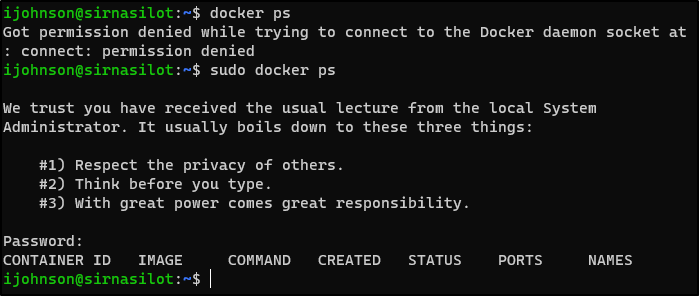
ijohnson@sirnasilot:~$ sudo docker ps
Password:
CONTAINER ID IMAGE COMMAND CREATED STATUS PORTS NAMES
83af22fb4b32 registry:latest "/entrypoint.sh /etc…" 28 hours ago Up 28 hours 0.0.0.0:5050->5000/tcp, :::5050->5000/tcp registry-1
ijohnson@sirnasilot:~$ sudo docker exec -it 83af22fb4b32 ls -a /var/lib/registry/docker/registry/v2/repositories/
. freshbrewedprivate nginxdemos
.. kube-scheduler
ijohnson@sirnasilot:~$ sudo docker exec -it 83af22fb4b32 ls -a /var/lib/registry/docker/registry/v2/repositories/freshbrewedprivate
. .. myghrunner
ijohnson@sirnasilot:~$ sudo docker exec -it 83af22fb4b32 ls -a /var/lib/registry/docker/registry/v2/repositories/freshbrewedprivate/myghrunner
. .. _layers _manifests _uploads
ijohnson@sirnasilot:~$ sudo docker exec -it 83af22fb4b32 ls -a /var/lib/registry/docker/registry/v2/repositories/freshbrewedprivate/myghrunner/_manifests
. .. revisions tags
ijohnson@sirnasilot:~$ sudo docker exec -it 83af22fb4b32 ls -a /var/lib/registry/docker/registry/v2/repositories/freshbrewedprivate/myghrunner/_manifests/tags
. .. 1.1.13 1.1.14
Synology and DSM
I cannot speak highly enough of Synology. I think they just make the strongest appliances. Yes, they are a NAS by marketing, but what you are really getting is a robust resilient headless Linux VM that has a fantastic UI.
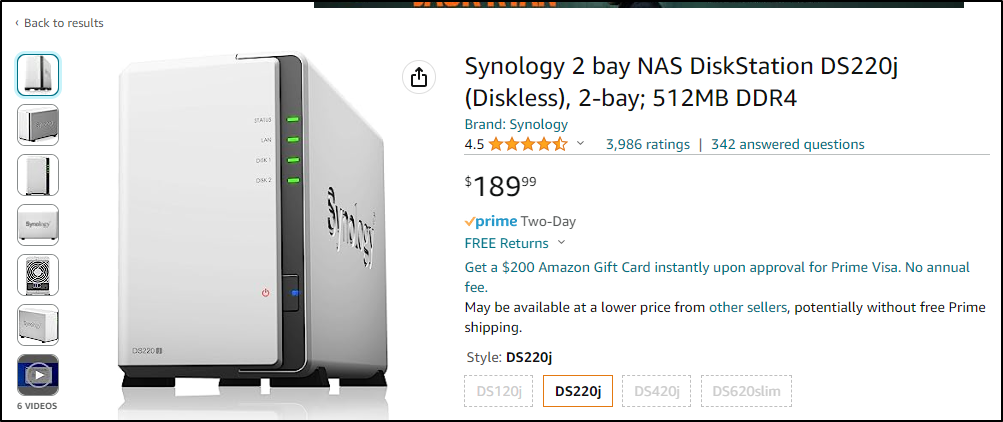
They range from just under US$200:
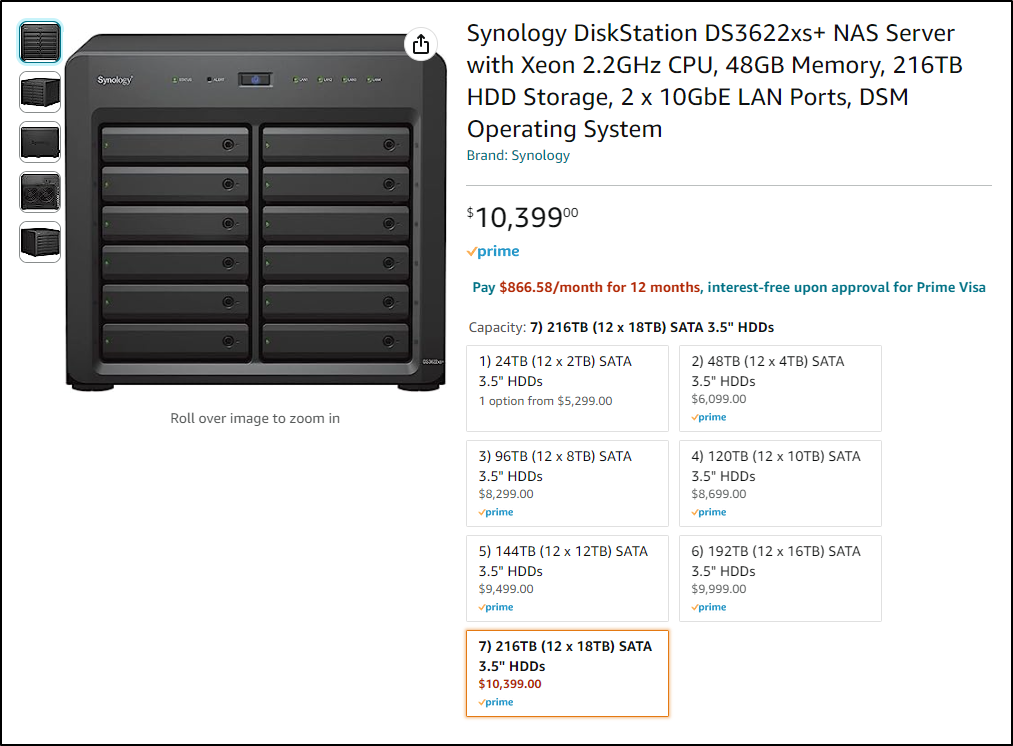
To a quarter Petabyte size appliances over US$10k
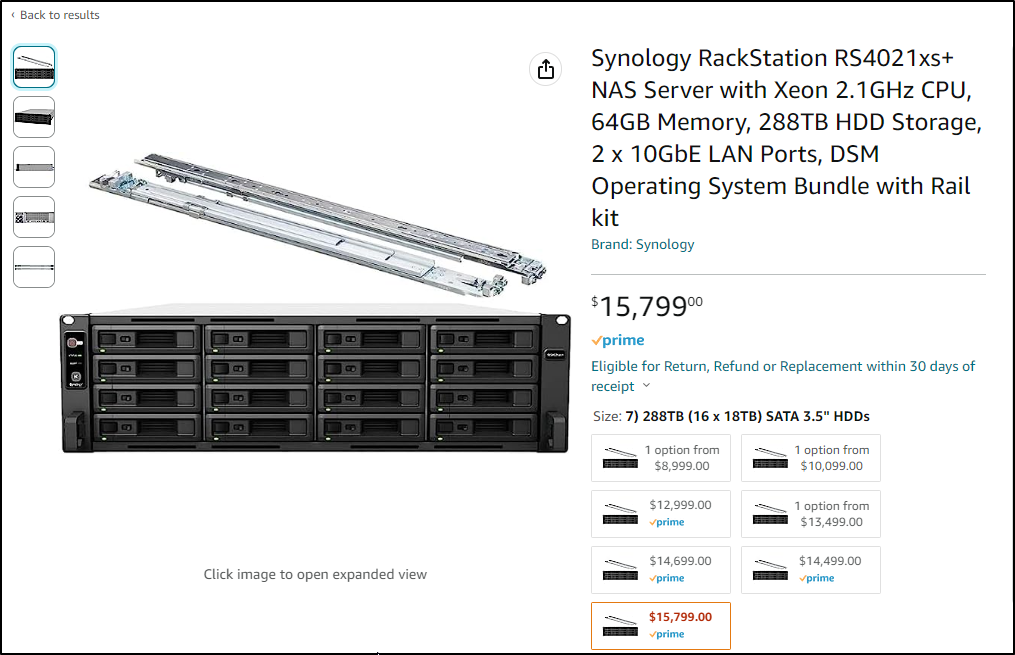
And if you have a rack, they have 1U, and 2U size offerings too
For what it’s worth, I don’t even put in Amazon links above - I’m not trying to sell you hardware.
The point I’m making is I have a device I setup before the Echo 1 was announced and it’s still fully supported by the vendor with OS updates and hardware available. Who does that? Who has a phone from 2016 that still gets updates? In an era of planned obsolescence, I’m just thrilled when a Vendor supports their stuff longer than any other of my devices. My NAS is older than some of my children!
And while I found OOTB options on Amazon up to 270Tb, you can order expansion units and create volumes up to 1Pb