

Published: Jul 11, 2023 by Isaac Johnson
Last week we dug into Portainer covering the CE and BE editions, speaking to Registries and provisioning clusters.
Today, let’s dig into Day 2 by setting up OAuth integrations, exposing externally with proper TLS, and creating proper backups to the cloud (using Akamai Linode instead of AWS). I’ll cover some nuances in licenses and kubectl shell issues with Nginx (and how to get around that).
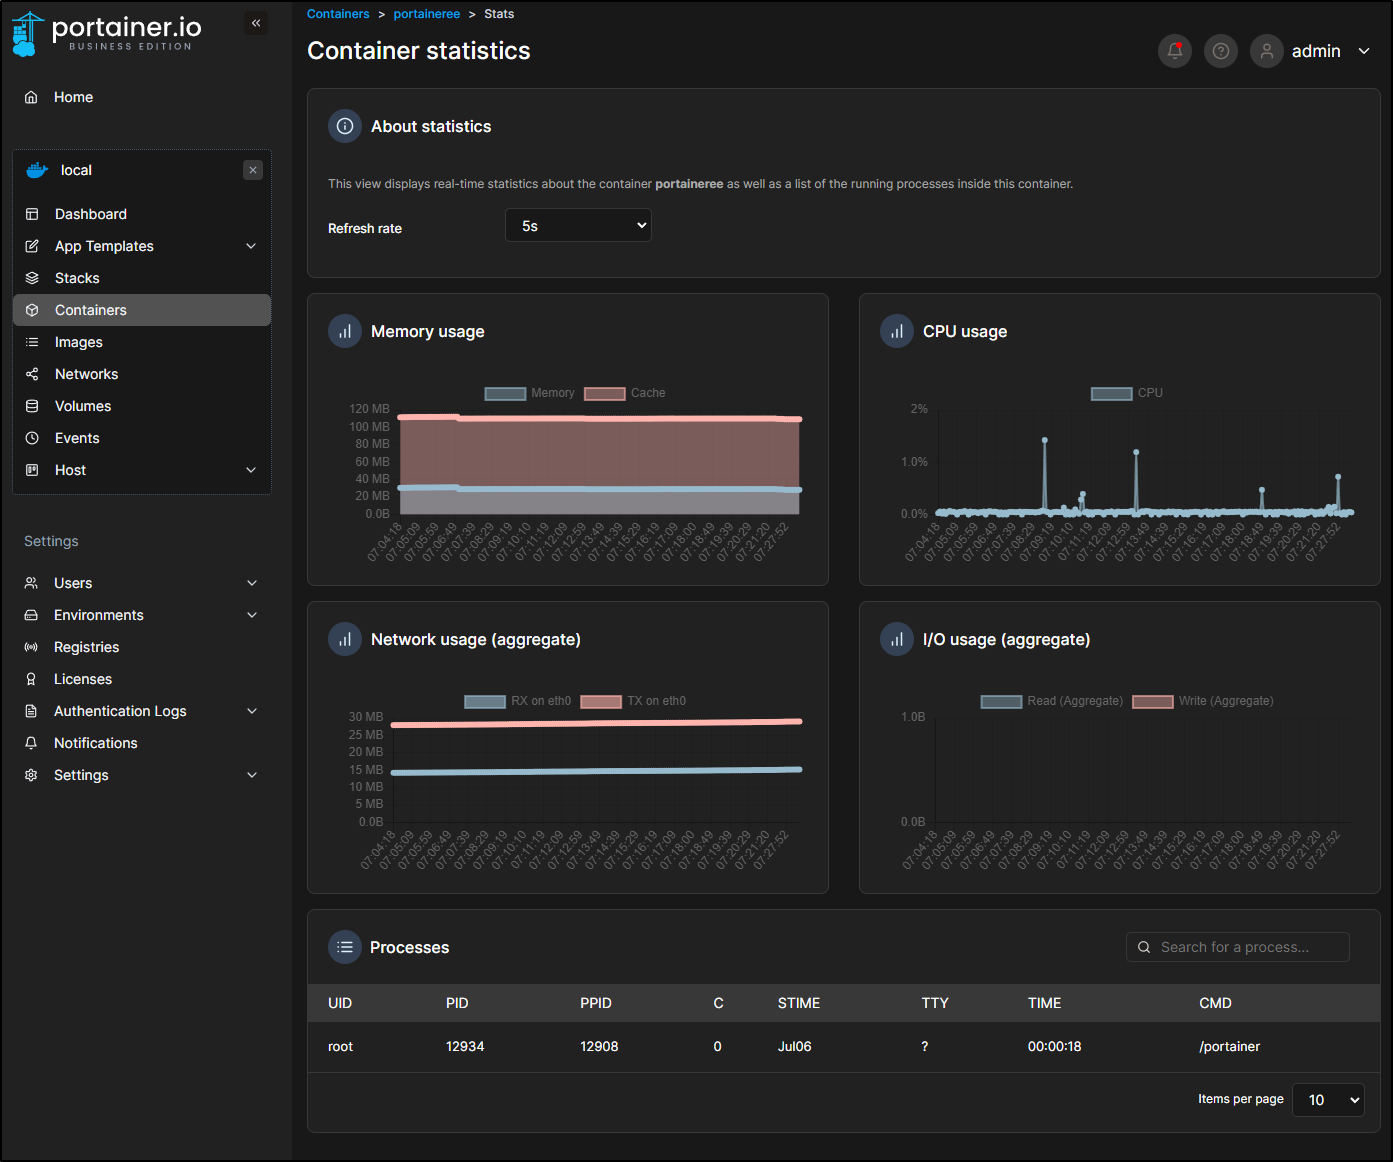
Performance in Docker
So far Portainer.io has not had any aggressive I/O or CPU spikes. I very well could just stay the course and keep it running on the Synology NAS
The Volume created
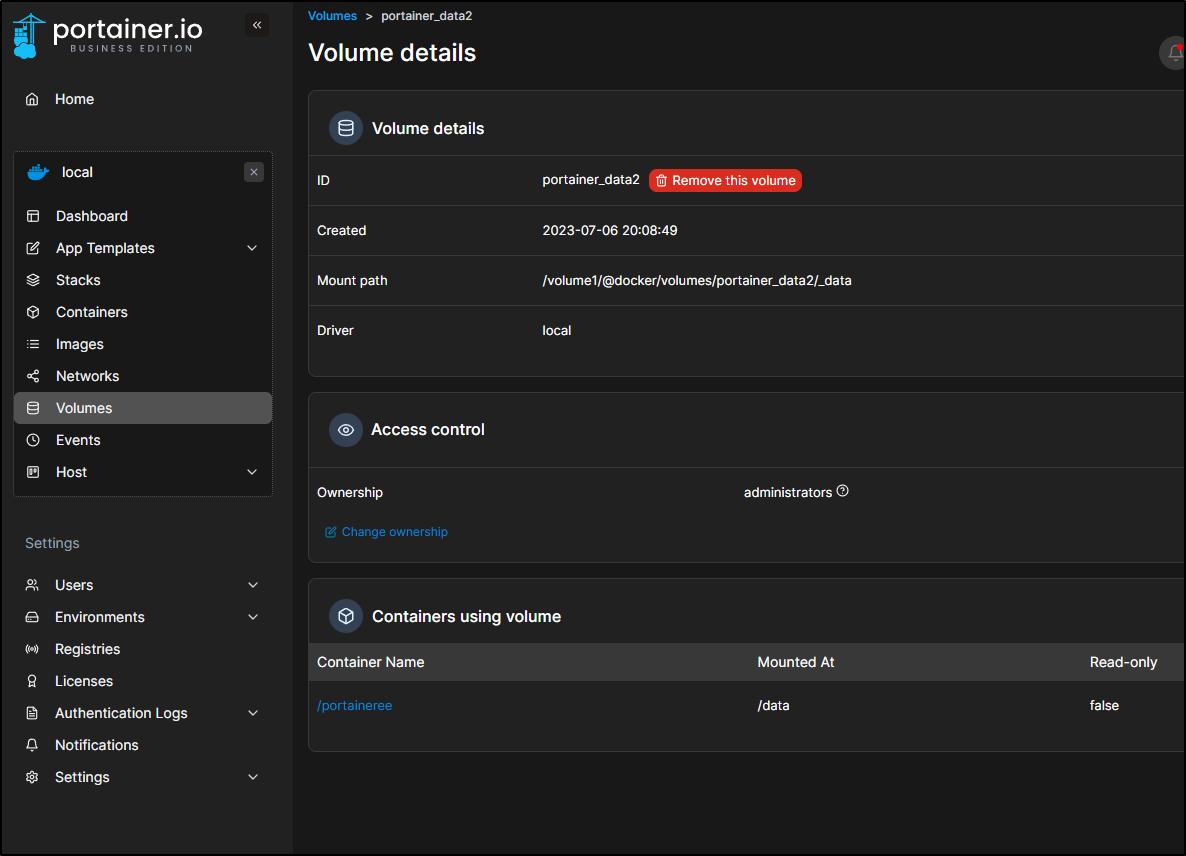
really does not consume much data
root@sirnasilot:/volume1/@docker/volumes# du -chs ./portainer_data2/
372K    ./portainer_data2/
372K    total
However, routing externally with some layer of security might be a challenge. Additionally, I’m not really keen on self-signed certs.
Helm install
I’ll start with the test cluster and Portainer CE
$ kubectl get nodes
NAME                  STATUS   ROLES                  AGE   VERSION
isaac-macbookpro      Ready    <none>                 11d   v1.26.4+k3s1
builder-macbookpro2   Ready    <none>                 11d   v1.26.4+k3s1
anna-macbookair       Ready    control-plane,master   11d   v1.26.4+k3s1
We’ll add the Portainer Helm chart and update
$ helm repo add portainer https://portainer.github.io/k8s/
"portainer" has been added to your repositories
$ helm repo update
Hang tight while we grab the latest from your chart repositories...
...Successfully got an update from the "portainer" chart repository
...Successfully got an update from the "freshbrewed" chart repository
...Successfully got an update from the "myharbor" chart repository
...Successfully got an update from the "confluentinc" chart repository
...Successfully got an update from the "zabbix-community" chart repository
...Successfully got an update from the "opencost" chart repository
...Successfully got an update from the "kube-state-metrics" chart repository
...Successfully got an update from the "hashicorp" chart repository
...Successfully got an update from the "kuma" chart repository
...Successfully got an update from the "actions-runner-controller" chart repository
...Successfully got an update from the "rhcharts" chart repository
...Successfully got an update from the "dapr" chart repository
...Successfully got an update from the "sonarqube" chart repository
...Successfully got an update from the "kubecost" chart repository
...Successfully got an update from the "kiwigrid" chart repository
...Successfully got an update from the "sumologic" chart repository
...Successfully got an update from the "castai-helm" chart repository
...Successfully got an update from the "nginx-stable" chart repository
...Successfully got an update from the "elastic" chart repository
...Successfully got an update from the "datadog" chart repository
...Successfully got an update from the "longhorn" chart repository
...Successfully got an update from the "harbor" chart repository
...Successfully got an update from the "open-telemetry" chart repository
...Successfully got an update from the "rook-release" chart repository
...Successfully got an update from the "argo-cd" chart repository
...Successfully got an update from the "uptime-kuma" chart repository
...Successfully got an update from the "crossplane-stable" chart repository
...Successfully got an update from the "newrelic" chart repository
...Successfully got an update from the "gitlab" chart repository
...Successfully got an update from the "incubator" chart repository
...Successfully got an update from the "grafana" chart repository
...Successfully got an update from the "prometheus-community" chart repository
...Successfully got an update from the "azure-samples" chart repository
...Successfully got an update from the "ngrok" chart repository
...Successfully got an update from the "jfelten" chart repository
...Successfully got an update from the "adwerx" chart repository
...Successfully got an update from the "novum-rgi-helm" chart repository
...Successfully got an update from the "epsagon" chart repository
...Successfully got an update from the "lifen-charts" chart repository
...Successfully got an update from the "akomljen-charts" chart repository
...Successfully got an update from the "rancher-latest" chart repository
...Successfully got an update from the "signoz" chart repository
...Successfully got an update from the "bitnami" chart repository
Update Complete. ⎈Happy Helming!⎈
We can now install the CE version with helm
$ helm upgrade --install --create-namespace -n portainer portainer portainer/portainer --set tls.force=true
Release "portainer" does not exist. Installing it now.
NAME: portainer
LAST DEPLOYED: Fri Jul  7 07:36:14 2023
NAMESPACE: portainer
STATUS: deployed
REVISION: 1
NOTES:
Get the application URL by running these commands:
    export NODE_PORT=$(kubectl get --namespace portainer -o jsonpath="{.spec.ports[0].nodePort}" services portainer)
  export NODE_IP=$(kubectl get nodes --namespace portainer -o jsonpath="{.items[0].status.addresses[0].address}")
  echo https://$NODE_IP:$NODE_PORT
I can see the Node Port listed
$ kubectl get svc --all-namespaces
NAMESPACE NAME TYPE CLUSTER-IP EXTERNAL-IP PORT(S) AGE
default kubernetes ClusterIP 10.43.0.1 <none> 443/TCP 11d
kube-system kube-dns ClusterIP 10.43.0.10 <none> 53/UDP,53/TCP,9153/TCP 11d
kube-system metrics-server ClusterIP 10.43.161.88 <none> 443/TCP 11d
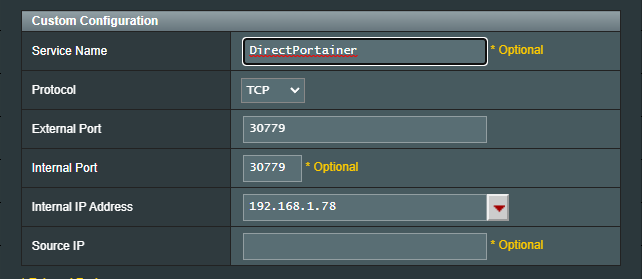
portainer portainer NodePort 10.43.255.1 <none> 9443:30779/TCP,30776:30776/TCP 66s
I’ll check the Node the pod runs on
$ kubectl describe pod portainer-68ff748bd8-5w9wx -n portainer | grep Node:
Node:         isaac-macbookpro/192.168.1.206
I don’t need to use that host though. That is the advantage of NodePort.
I can use the port on the control plane server to reach the new instance of Portainer
Kubectl Shell
I won’t repeat last week’s deep dive. Instead, we will just focus on the features I have yet to cover.
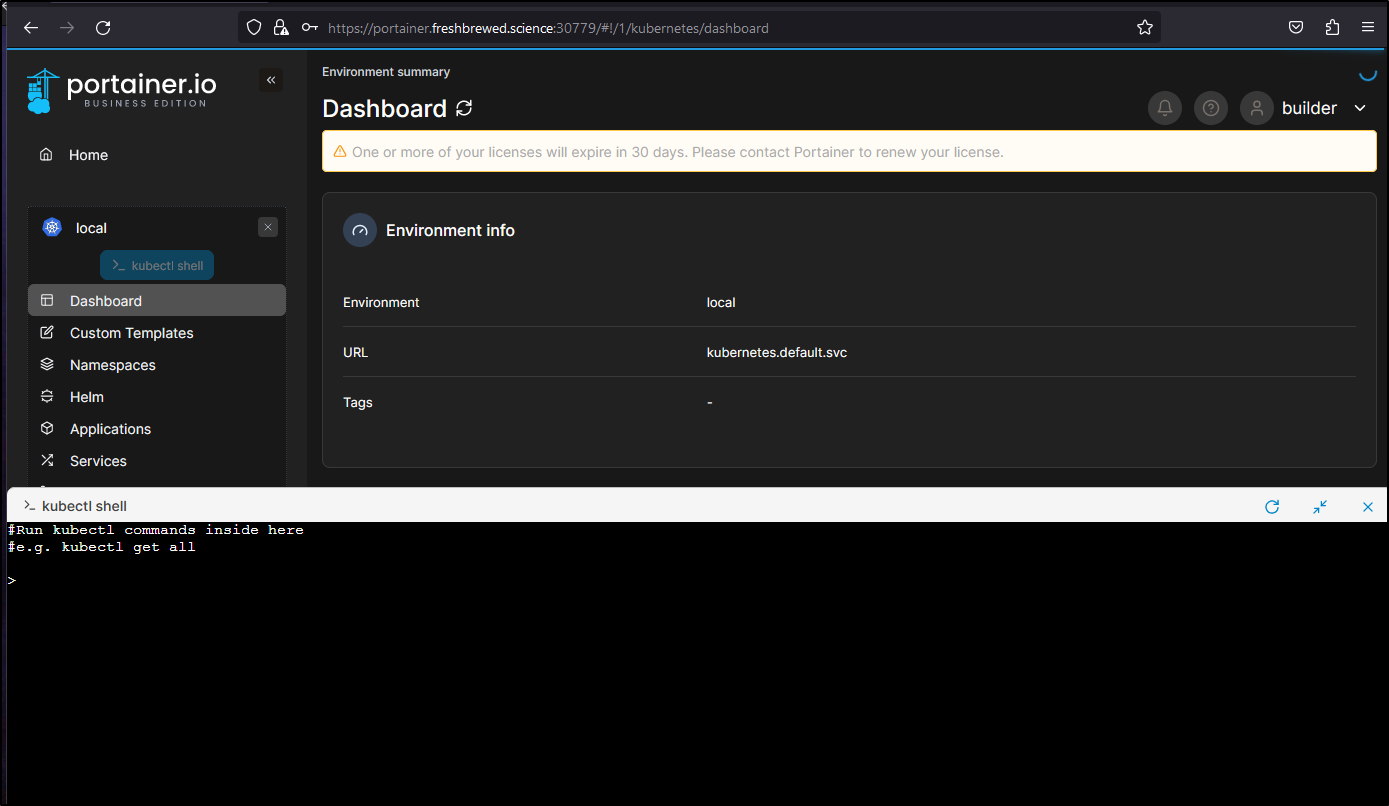
In viewing the Kubernetes cluster, we can click “Kubectl shell” to open what looks a lot like a cloud shell.
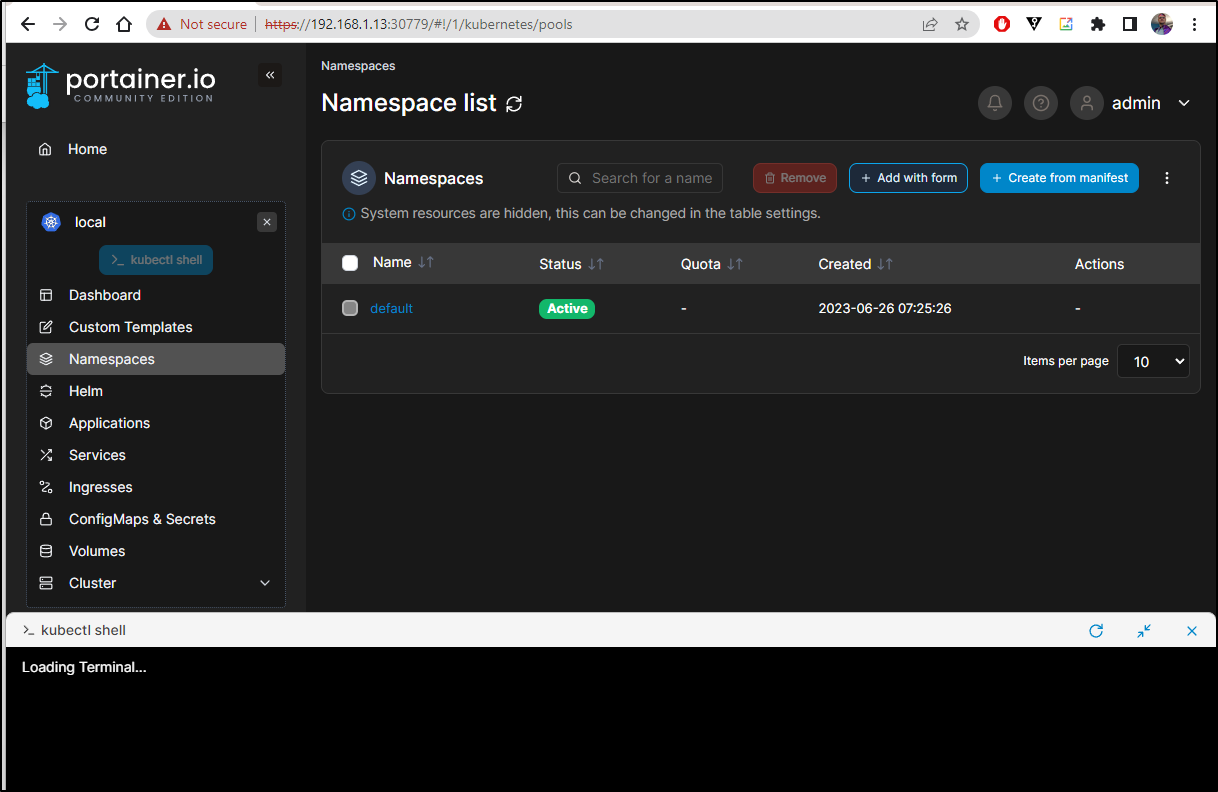
From there we can easily do maintenance
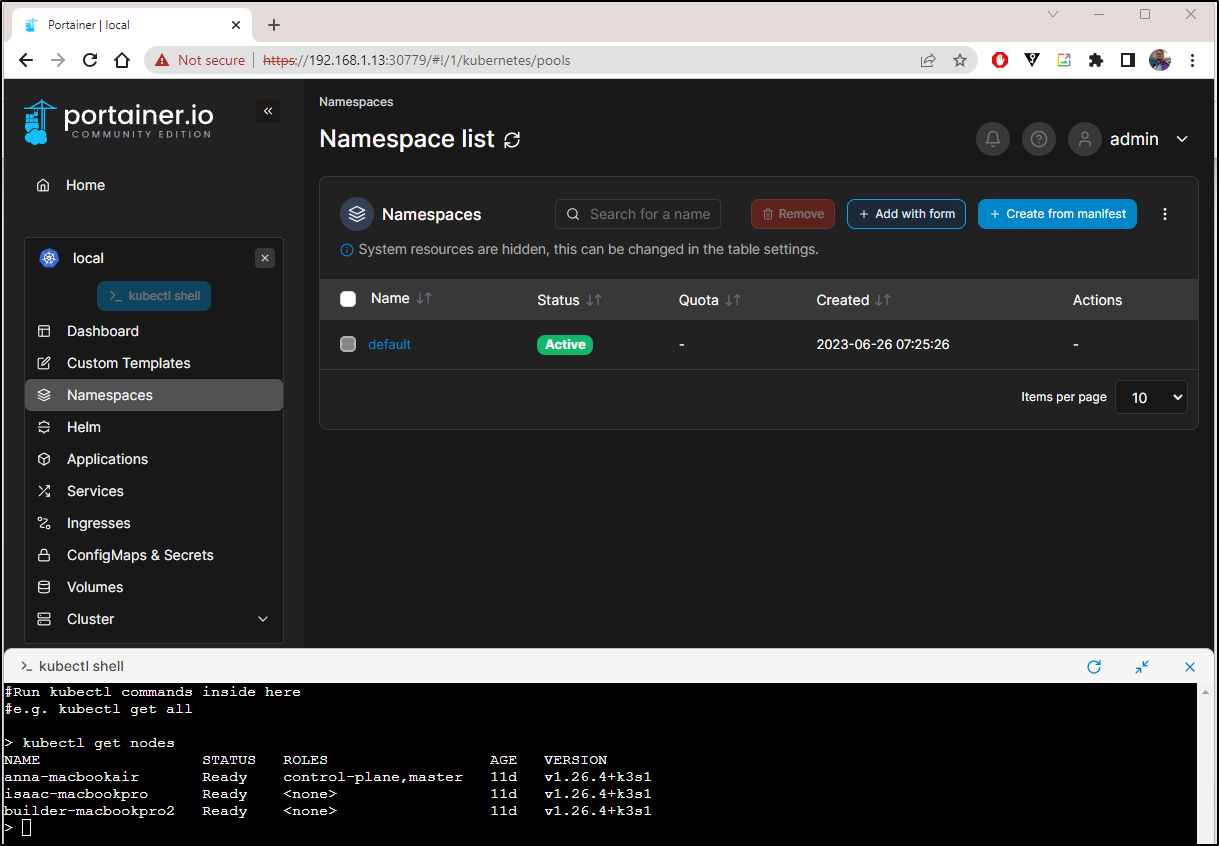
This means that if we exposed Portainer externally, we would have an easy way with a browser to fire up a shell - something I could do with a tablet, phone or Chromebook.
Backup Files
we can backup Portainer under settings near the bottom
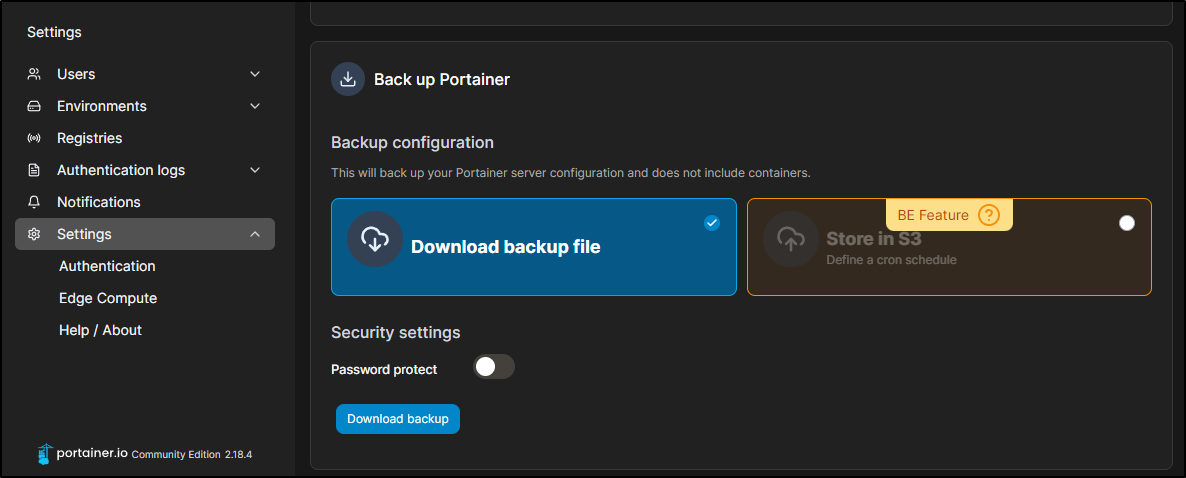
This will create a small tgz we can save out to long term storage

The BE feature allows a scheduled backup to S3 which I’m sure would work fine with Fuse.
Proper Kubernetes Install
Assuming we really want the BE version and to expose it externally, our best bet to use the production cluster.
$ helm upgrade --install --create-namespace -n portainer portainer portainer/portainer
Release "portainer" does not exist. Installing it now.
E0707 16:49:25.886559   20170 memcache.go:255] couldn't get resource list for external.metrics.k8s.io/v1beta1: Got empty response for: external.metrics.k8s.io/v1beta1
E0707 16:49:27.336404   20170 memcache.go:255] couldn't get resource list for external.metrics.k8s.io/v1beta1: Got empty response for: external.metrics.k8s.io/v1beta1
E0707 16:49:27.468846   20170 memcache.go:255] couldn't get resource list for external.metrics.k8s.io/v1beta1: Got empty response for: external.metrics.k8s.io/v1beta1
E0707 16:49:27.559194   20170 memcache.go:255] couldn't get resource list for external.metrics.k8s.io/v1beta1: Got empty response for: external.metrics.k8s.io/v1beta1
E0707 16:49:27.686152   20170 memcache.go:255] couldn't get resource list for external.metrics.k8s.io/v1beta1: Got empty response for: external.metrics.k8s.io/v1beta1
E0707 16:49:27.833944   20170 memcache.go:255] couldn't get resource list for external.metrics.k8s.io/v1beta1: Got empty response for: external.metrics.k8s.io/v1beta1
E0707 16:49:27.914748   20170 memcache.go:255] couldn't get resource list for external.metrics.k8s.io/v1beta1: Got empty response for: external.metrics.k8s.io/v1beta1
NAME: portainer
LAST DEPLOYED: Fri Jul  7 16:49:25 2023
NAMESPACE: portainer
STATUS: deployed
REVISION: 1
NOTES:
Get the application URL by running these commands:
    export NODE_PORT=$(kubectl get --namespace portainer -o jsonpath="{.spec.ports[1].nodePort}" services portainer)
  export NODE_IP=$(kubectl get nodes --namespace portainer -o jsonpath="{.items[0].status.addresses[0].address}")
  echo https://$NODE_IP:$NODE_PORT
I can see we have pods and a NodePort service setup
$ kubectl get pods -n portainer
NAME                         READY   STATUS    RESTARTS   AGE
portainer-849dd4d9cf-qlsgw   1/1     Running   0          108s
$ kubectl get svc -n portainer
NAME        TYPE       CLUSTER-IP     EXTERNAL-IP   PORT(S)                                         AGE
portainer   NodePort   10.43.164.85   <none>        9000:30777/TCP,9443:30779/TCP,30776:30776/TCP   115s
As usual, I’ll create an A record to forward traffic to my ingress
$ cat r53-portainer.json
{
    "Comment": "CREATE portainer fb.s A record ",
    "Changes": [
      {
        "Action": "CREATE",
        "ResourceRecordSet": {
          "Name": "portainer.freshbrewed.science",
          "Type": "A",
          "TTL": 300,
          "ResourceRecords": [
            {
              "Value": "73.242.50.46"
            }
          ]
        }
      }
    ]
  }

$ aws route53 change-resource-record-sets --hosted-zone-id Z39E8QFU0F9PZP --change-batch file://r53-portainer.json
{
    "ChangeInfo": {
        "Id": "/change/C1041844G5YR0ZA7PYQ2",
        "Status": "PENDING",
        "SubmittedAt": "2023-07-07T21:53:01.580Z",
        "Comment": "CREATE portainer fb.s A record "
    }
}
Now I can create an ingress to send traffic for 9443
$ cat ingress-portainer.yaml
apiVersion: networking.k8s.io/v1
kind: Ingress
metadata:
  annotations:
    cert-manager.io/cluster-issuer: letsencrypt-prod
    ingress.kubernetes.io/proxy-body-size: "0"
    ingress.kubernetes.io/ssl-redirect: "true"
    kubernetes.io/ingress.class: nginx
    nginx.ingress.kubernetes.io/proxy-body-size: "0"
    nginx.ingress.kubernetes.io/proxy-read-timeout: "600"
    nginx.ingress.kubernetes.io/proxy-send-timeout: "600"
    nginx.ingress.kubernetes.io/ssl-redirect: "true"
    nginx.org/client-max-body-size: "0"
    nginx.org/proxy-connect-timeout: "600"
    nginx.org/proxy-read-timeout: "600"
  labels:
    app.kubernetes.io/name: portainer
  name: portainer
  namespace: portainer
spec:
  rules:
  - host: portainer.freshbrewed.science
    http:
      paths:
      - backend:
          service:
            name: portainer
            port:
              number: 9000
        path: /
        pathType: ImplementationSpecific
  tls:
  - hosts:
    - portainer.freshbrewed.science
    secretName: portainer-tls
$ kubectl apply -f ingress-portainer.yaml
ingress.networking.k8s.io/portainer created

$ kubectl get ingress -n portainer
NAME        CLASS    HOSTS                           ADDRESS                                                PORTS     AGE
portainer   <none>   portainer.freshbrewed.science   192.168.1.215,192.168.1.36,192.168.1.57,192.168.1.78   80, 443   42s
When I saw the cert was satisfied, I gave it a try
$ kubectl get cert -n portainer
NAME            READY   SECRET          AGE
portainer-tls   False   portainer-tls   57s
$ kubectl get cert -n portainer
NAME            READY   SECRET          AGE
portainer-tls   True    portainer-tls   108s
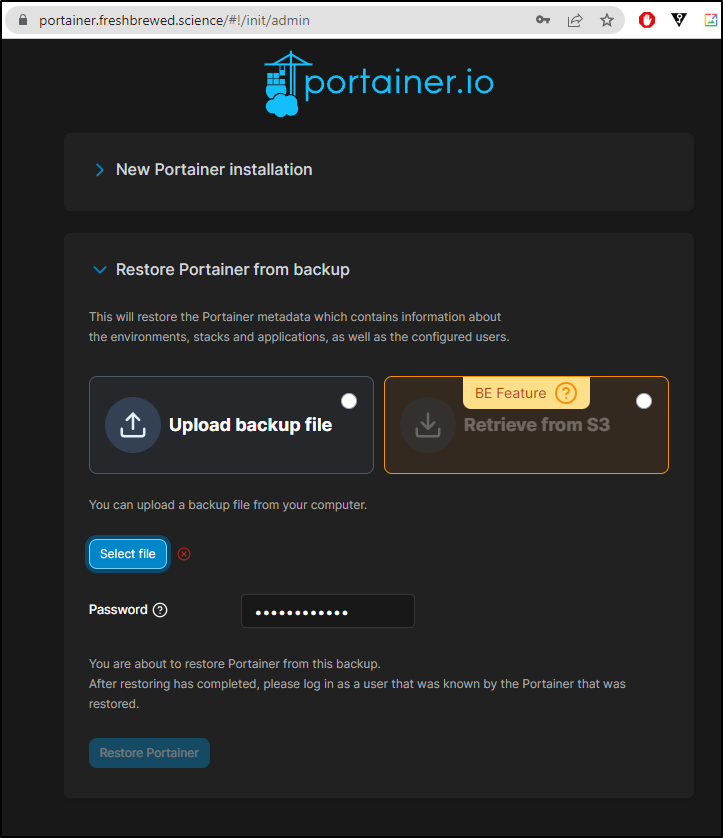
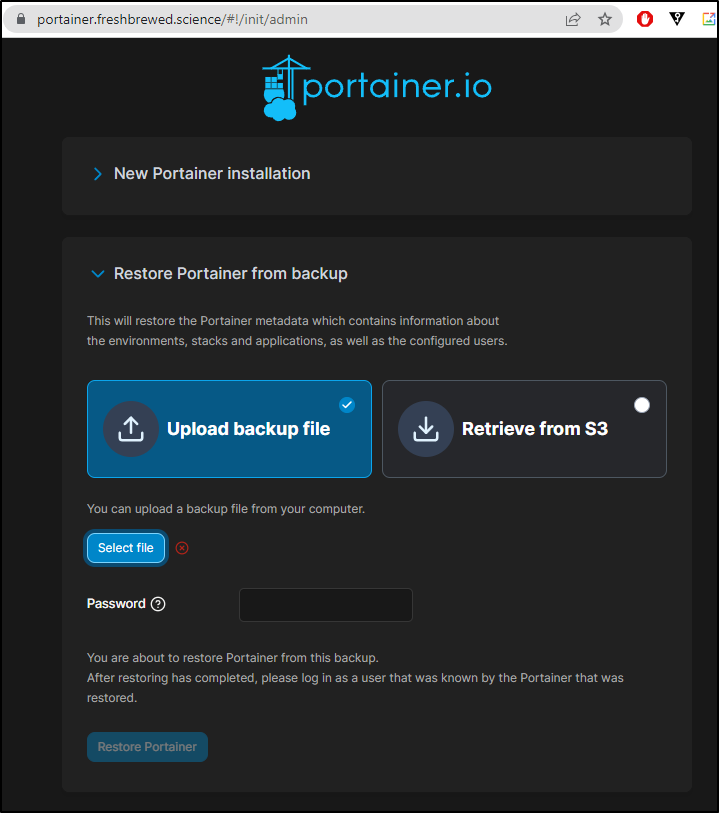
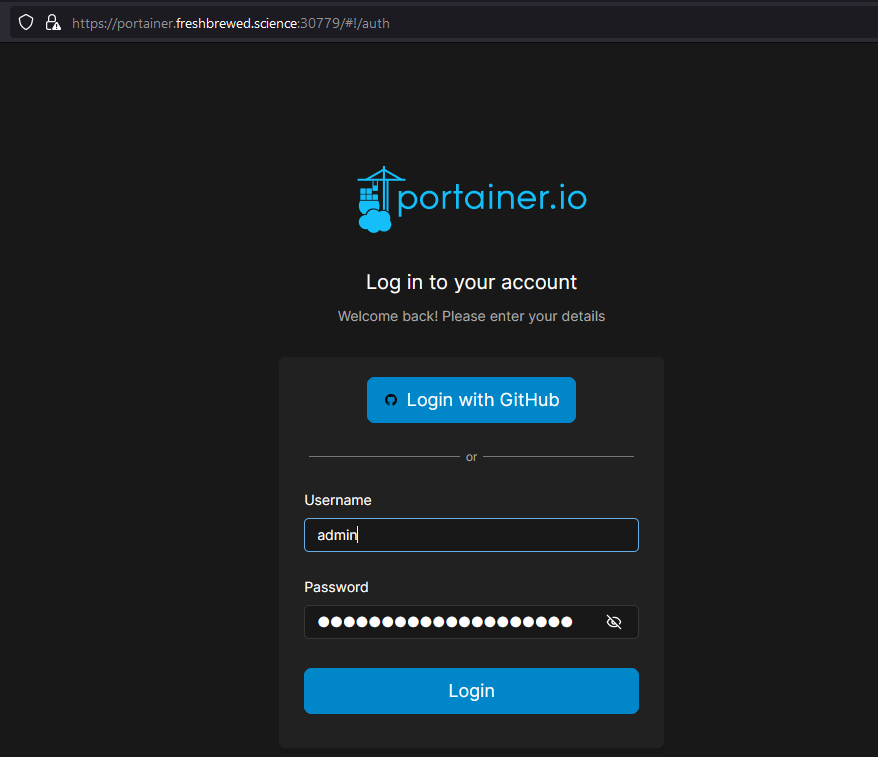
Now we are able to start the setup using proper TLS
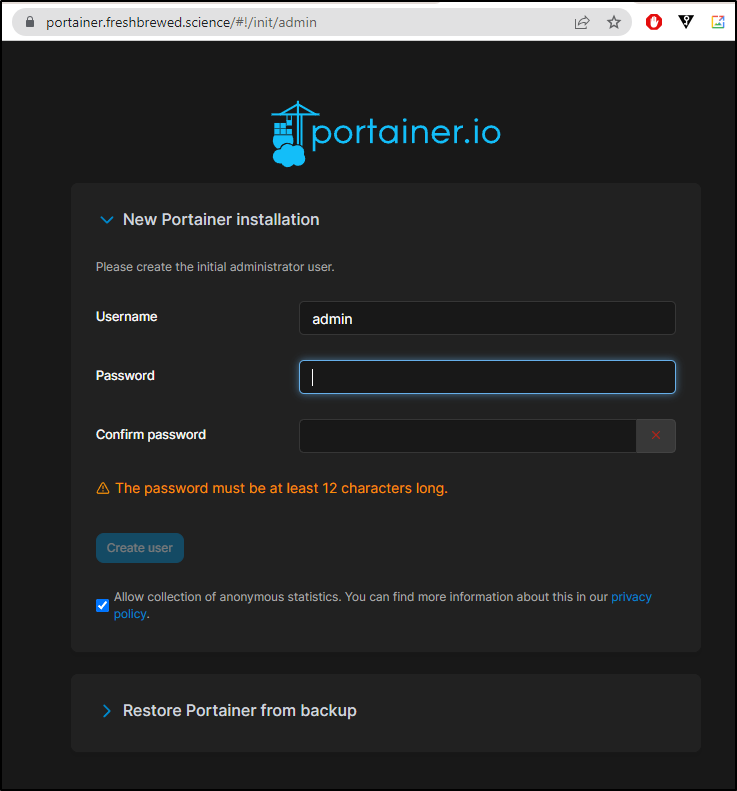
This is also the step where we would upload from a backup file
The “BE Feature” caught me off guard - I thought I was using BE.
That is when I realized one needs to use “–set enterpriseEdition.enabled=true” when launching helm.
I added that to my helm command
$ helm upgrade --install --create-namespace -n portainer portainer portainer/portainer --set enterpriseEdition.enabled=true
Release "portainer" has been upgraded. Happy Helming!
NAME: portainer
LAST DEPLOYED: Fri Jul  7 17:32:47 2023
NAMESPACE: portainer
STATUS: deployed
REVISION: 2
NOTES:
Get the application URL by running these commands:
    export NODE_PORT=$(kubectl get --namespace portainer -o jsonpath="{.spec.ports[1].nodePort}" services portainer)
  export NODE_IP=$(kubectl get nodes --namespace portainer -o jsonpath="{.items[0].status.addresses[0].address}")
  echo https://$NODE_IP:$NODE_PORT
Which looked much better
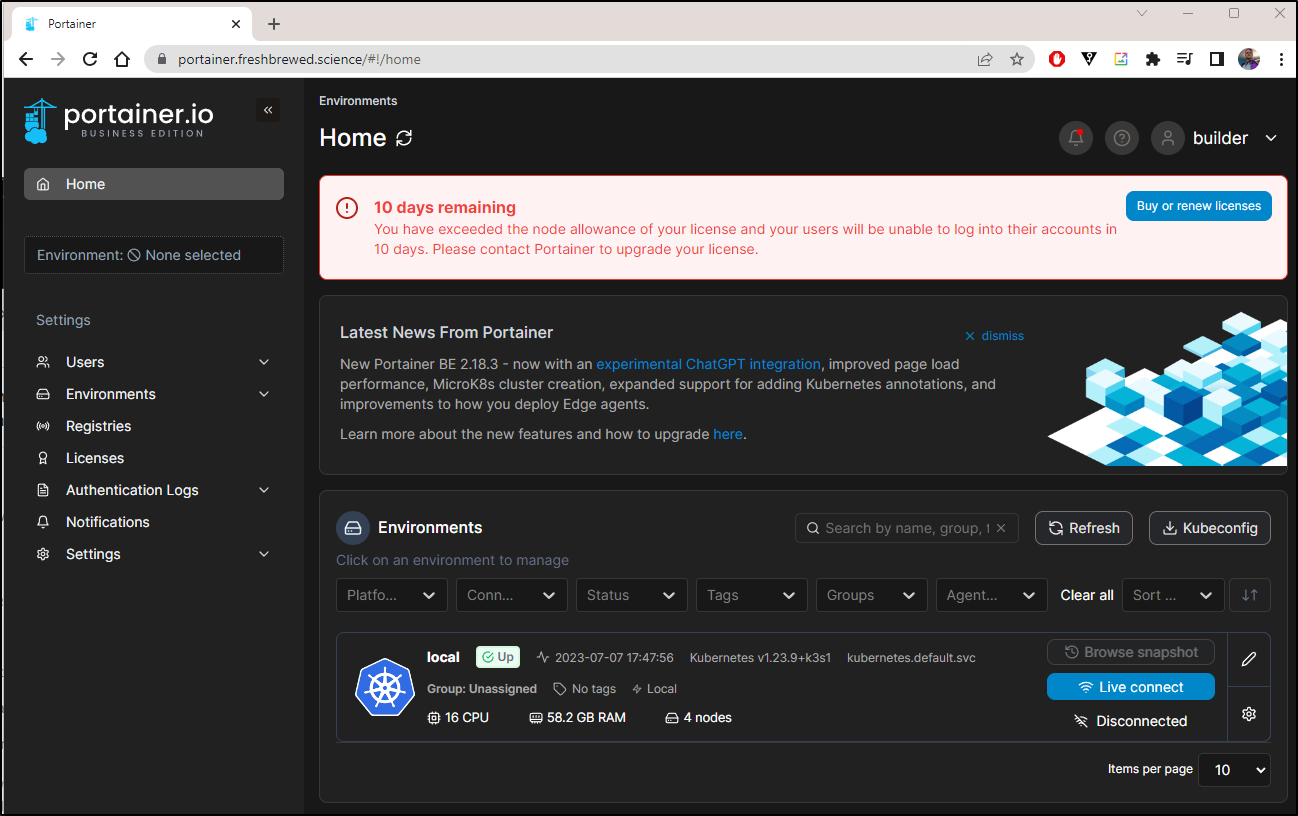
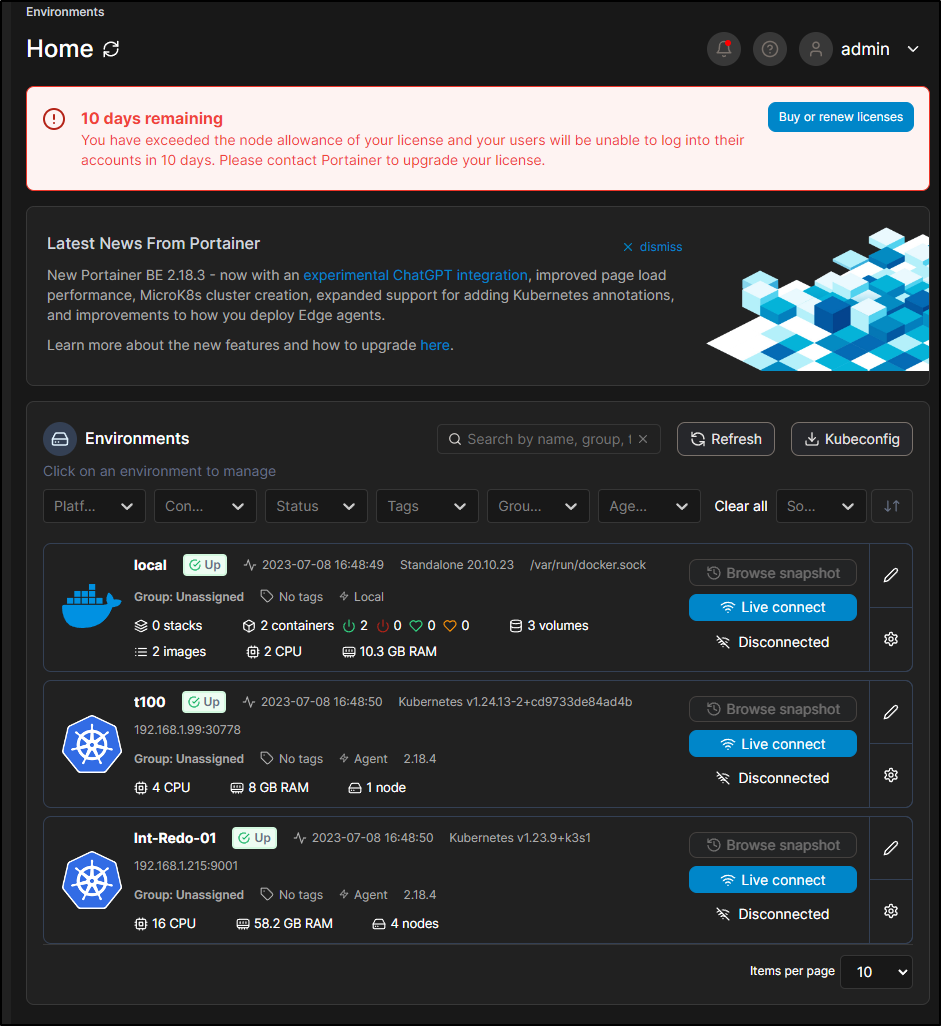
I realized this isn’t going to work. My on-prem cluster already has 4 nodes and I’m unlikely to go any less
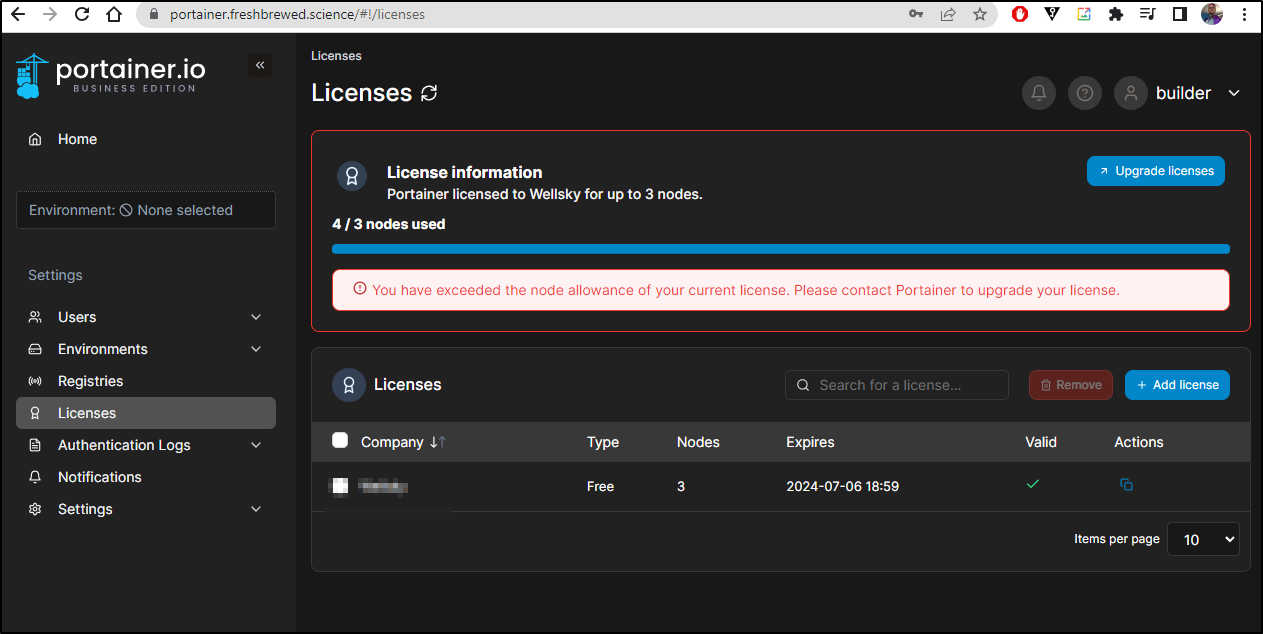
This essentially means I have to drop a node or accept in 10 days it blows up
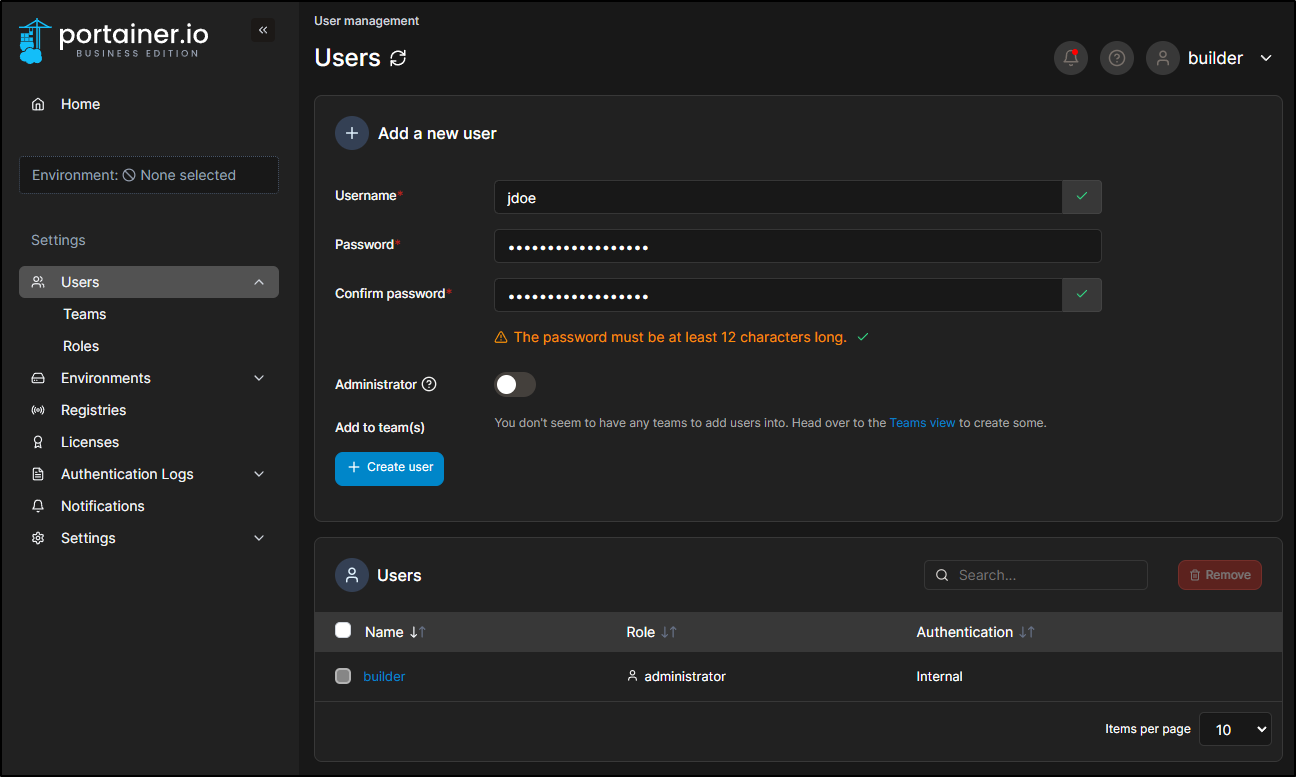
User Management
Let’s decide to add a user. We would first setup a username and password for them
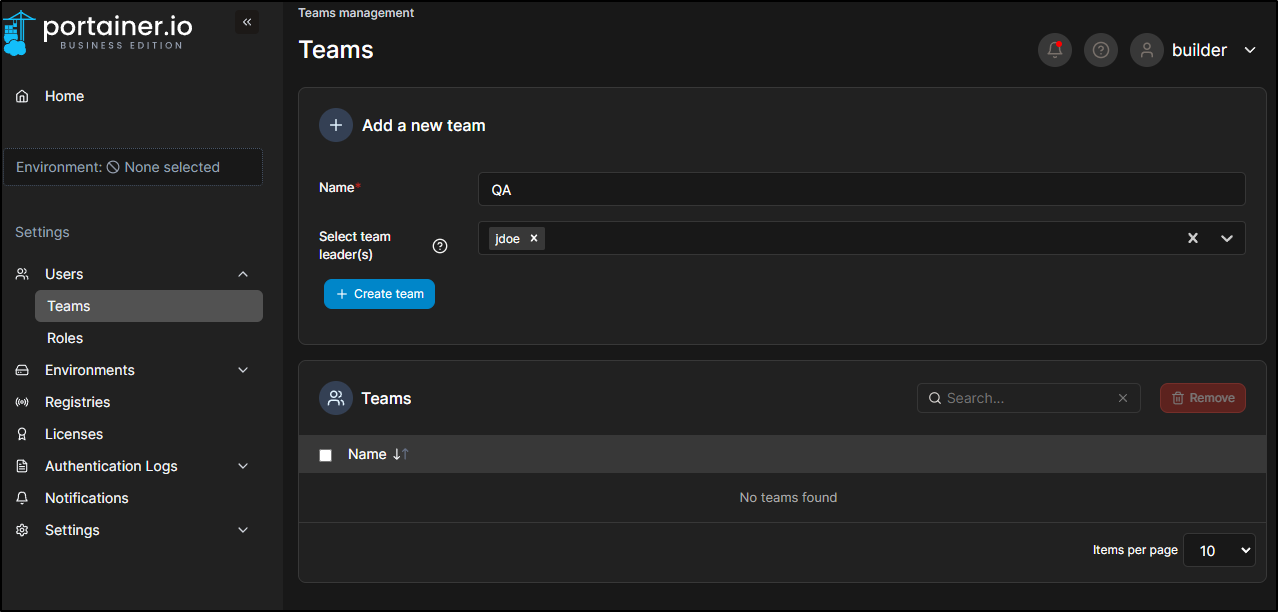
Next, we likely would want to add JDoe to a team. Let’s create a QA team as an example.
I’ll then select my “local” environment and grant the QA team read-only access
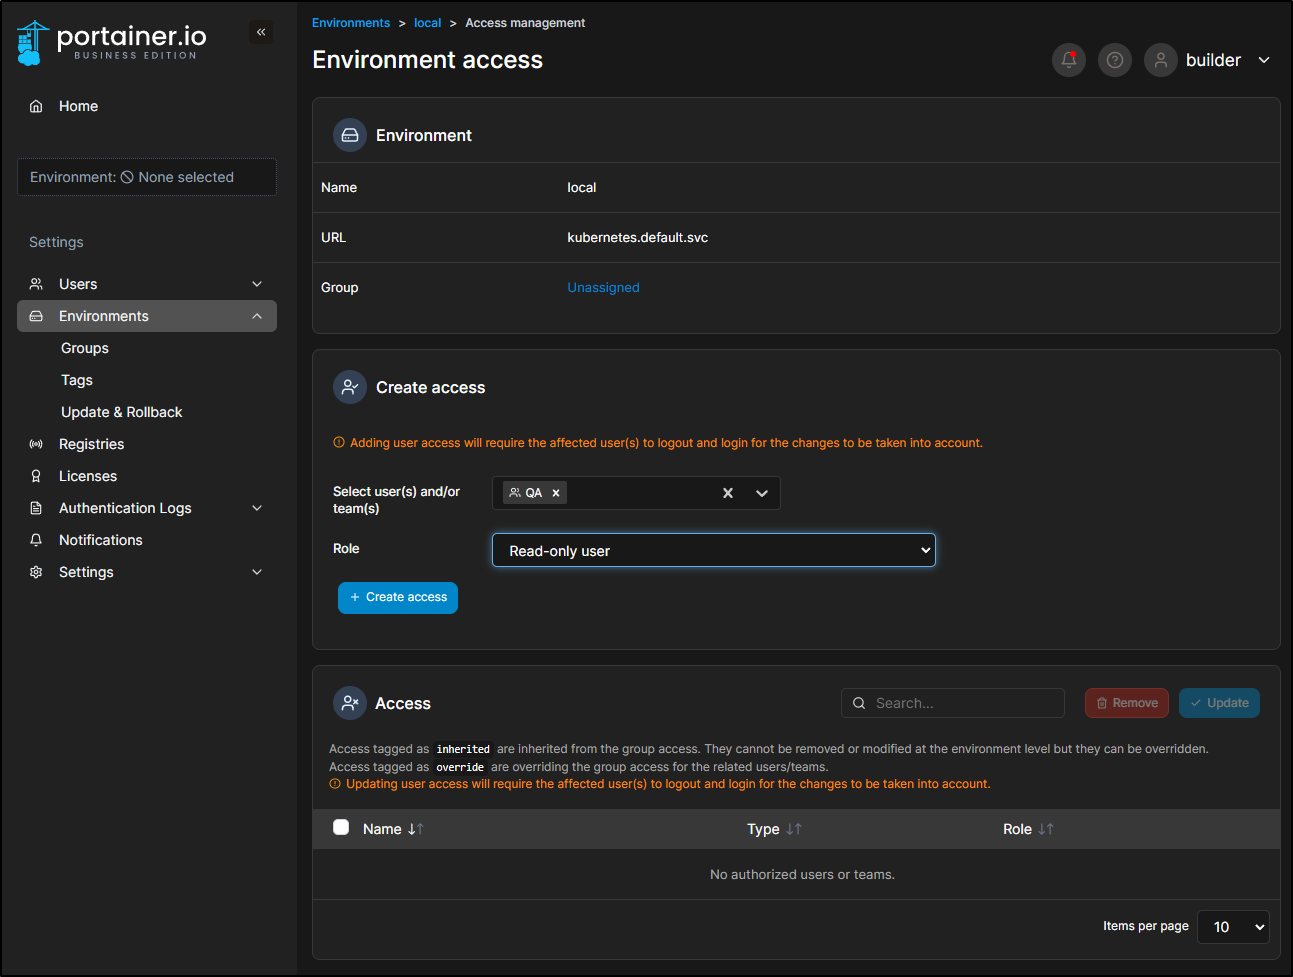
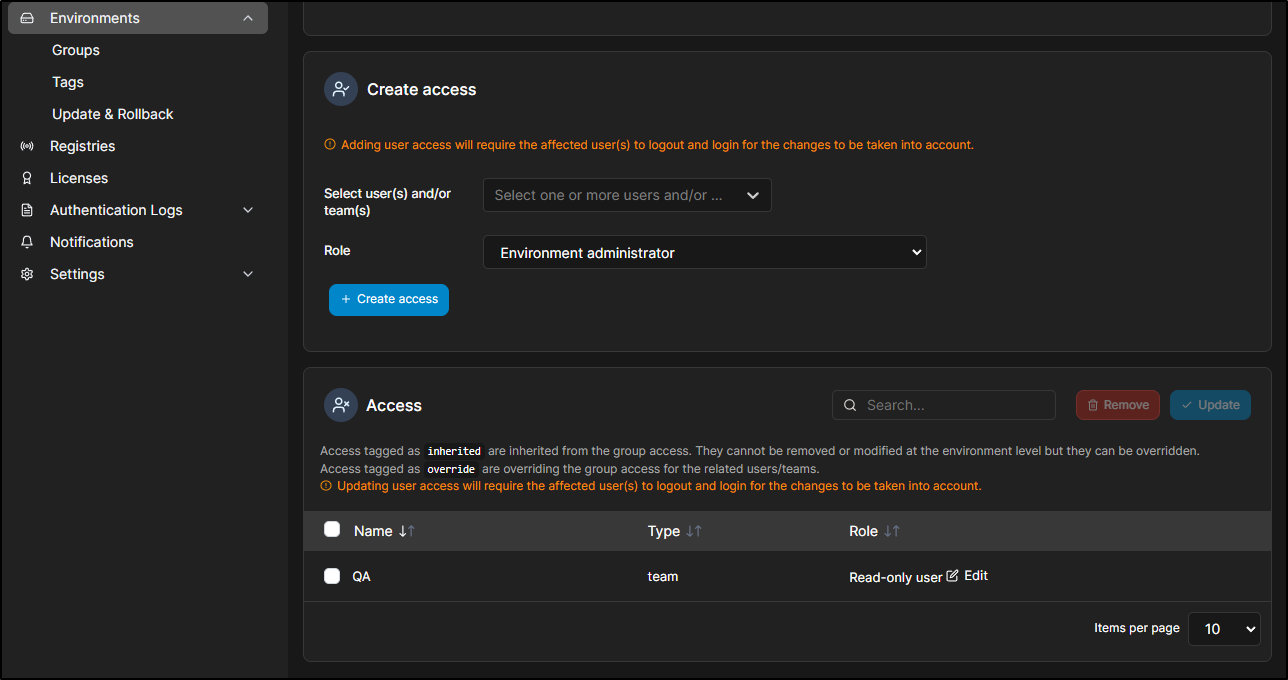
which we can now see
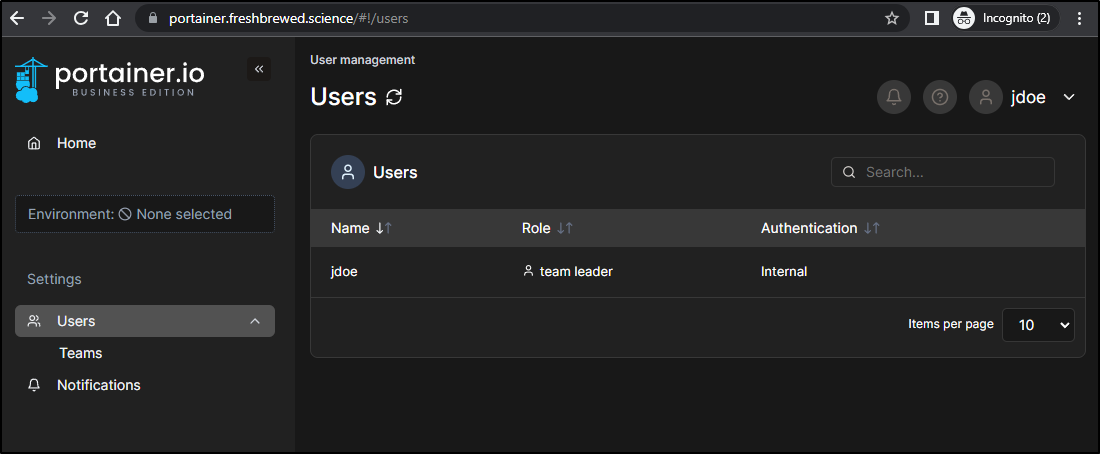
I’ll now login as JDoe and see I can only see the one environment of which QA was added. On the left there is only Users and Notifications
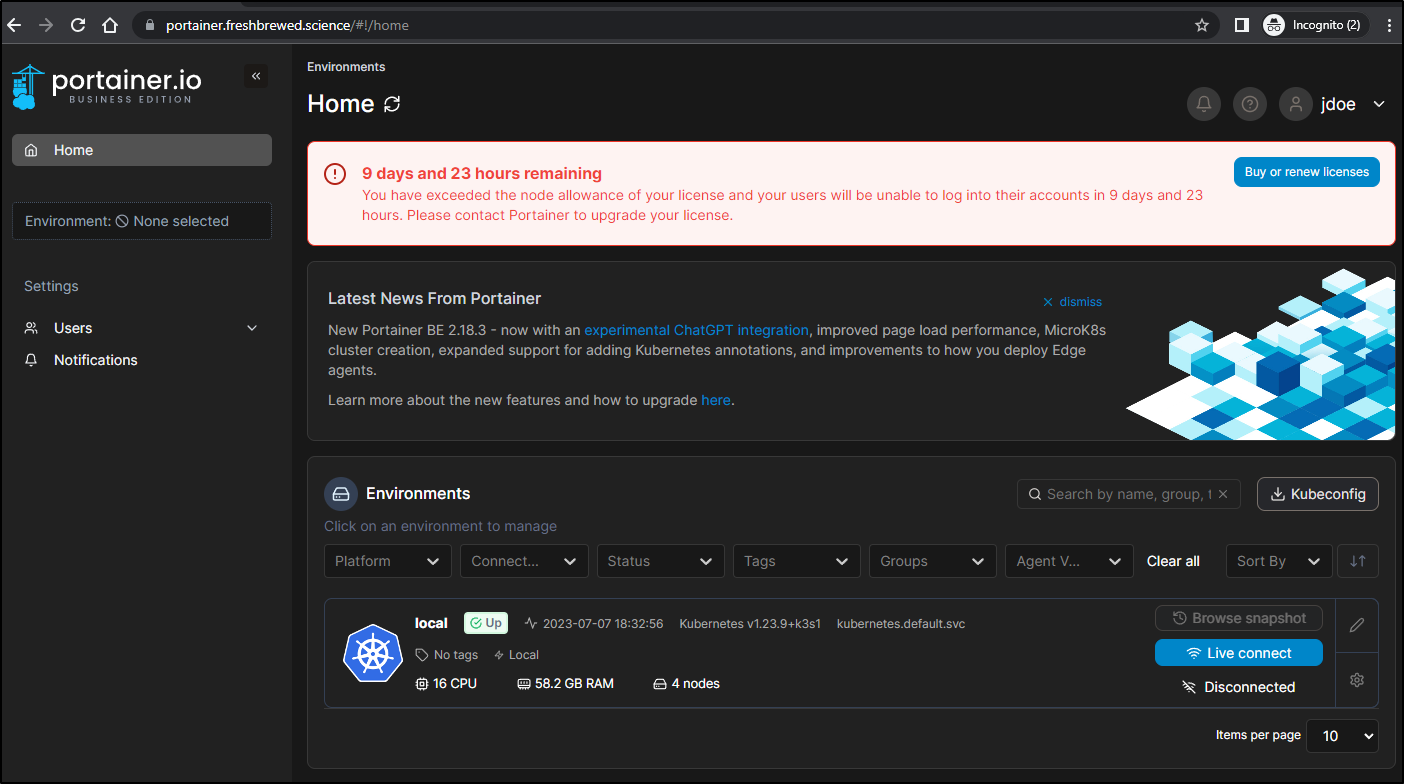
Users only shows me my user
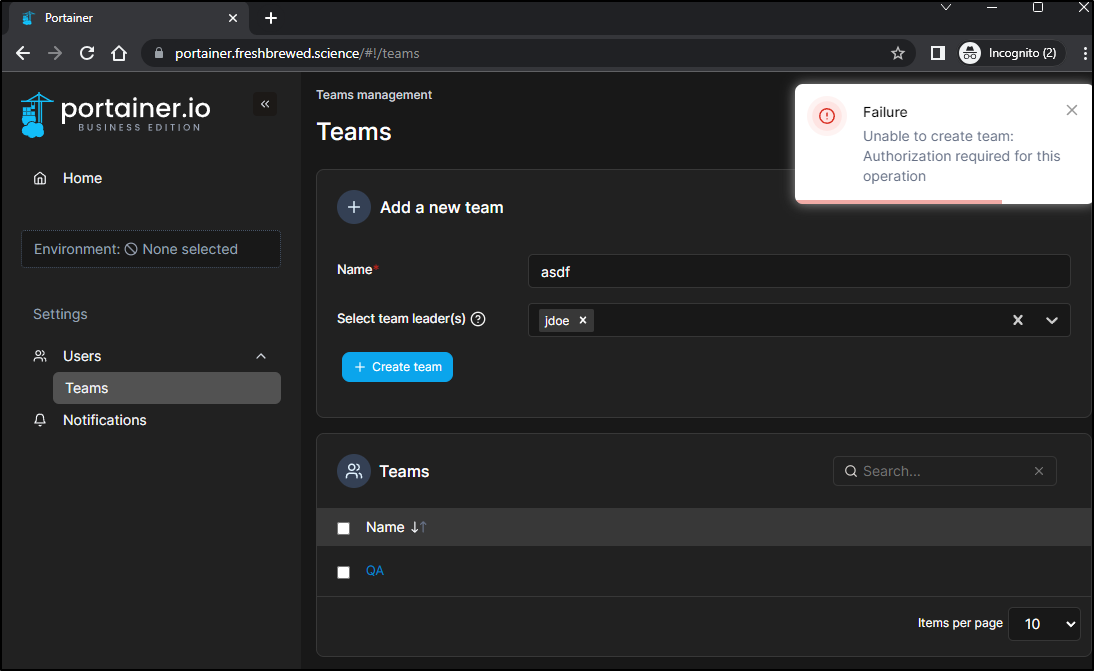
While the create team button was enabled, I couldn’t actually create a new team as JDoe
License Types
We can ask for a 30d unlimited license instead of 1y 3-node license. When applied, we can see it has a shorter duration but no node limits
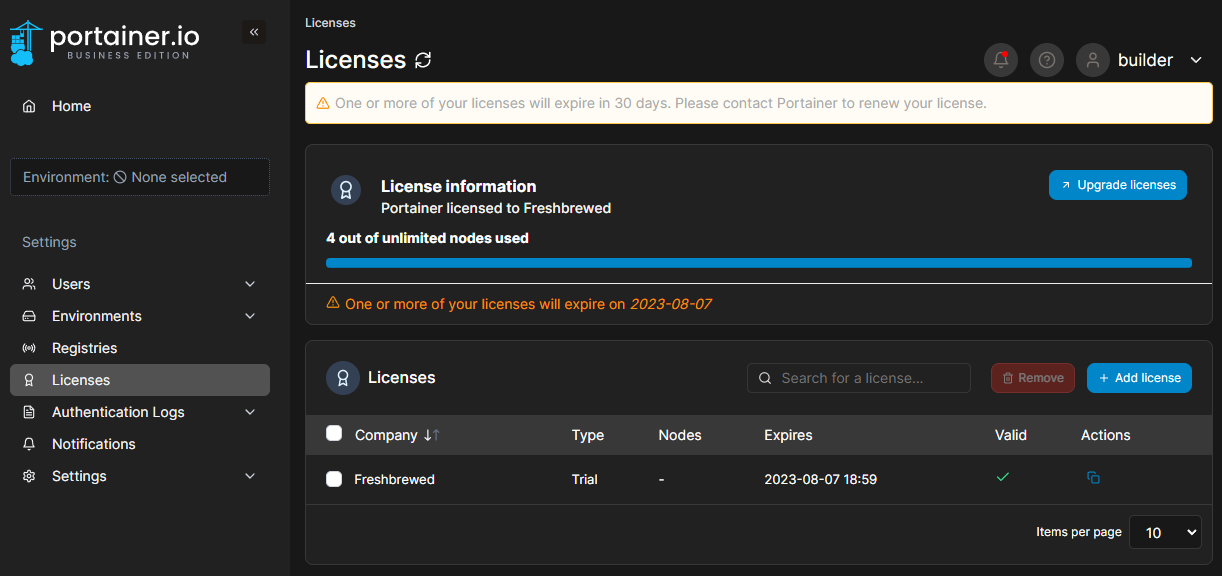
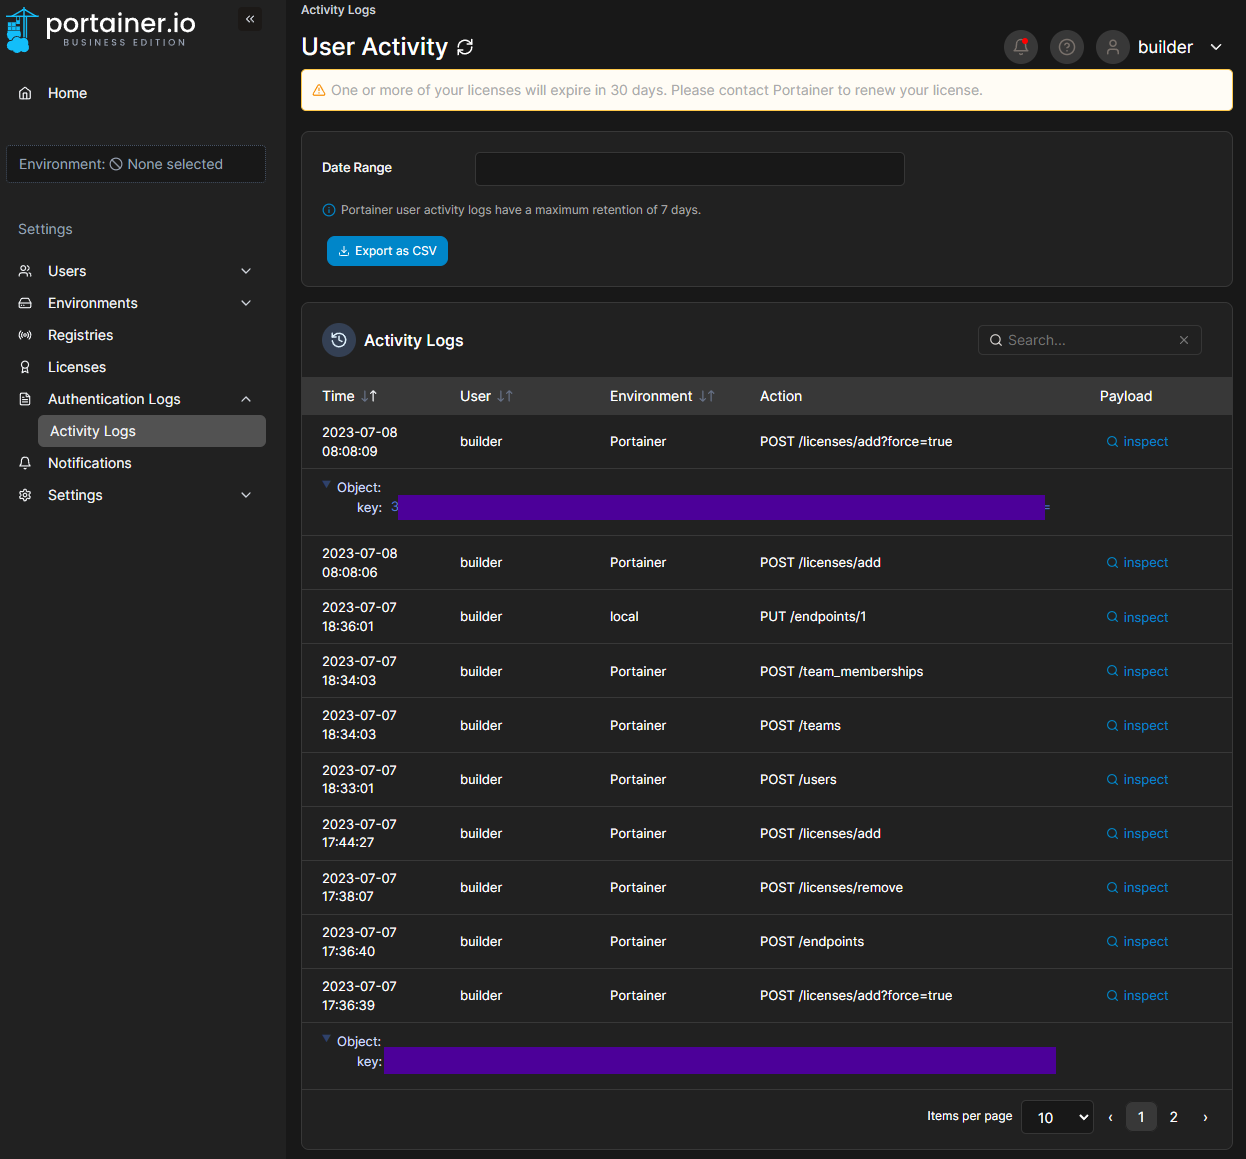
Be aware that the license operation will put the key in plain text in the Activity Logs
S3 backup in Linode
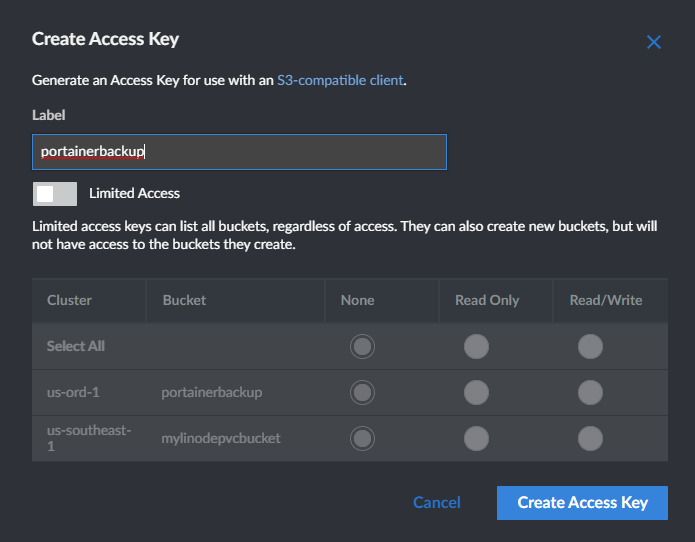
I’ll create a new Linode Object Store for backups

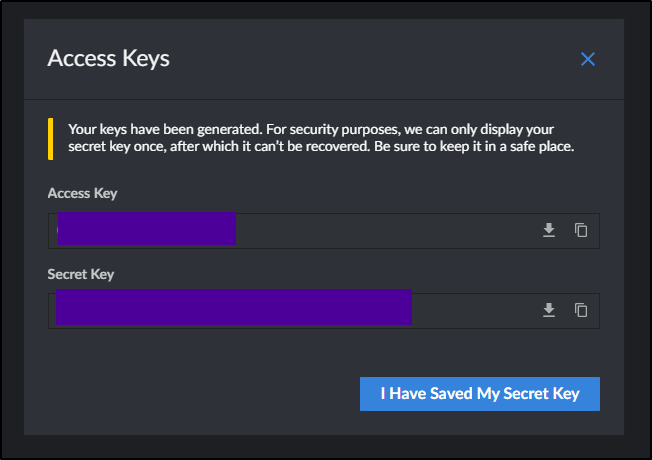
Next, I’ll create access keys to use with the bucket
Which will show me the keys one time
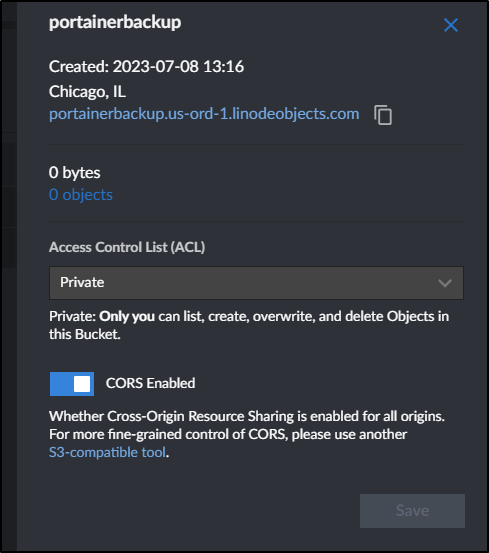
We can see the URL in the bucket details to use in Portainer
I then used the AWS CLI to create a bucket
$ aws s3 mb s3://portainerbackups --profile portainerinlinode --endpoint=https://portainerbackup.us-ord-1.linodeobjects.com
make_bucket: portainerbackups

$ aws s3 ls s3://portainerbackups --profile portainerinlinode --endpoint=https://portainerbackup.us-ord-1.linodeobjects.com
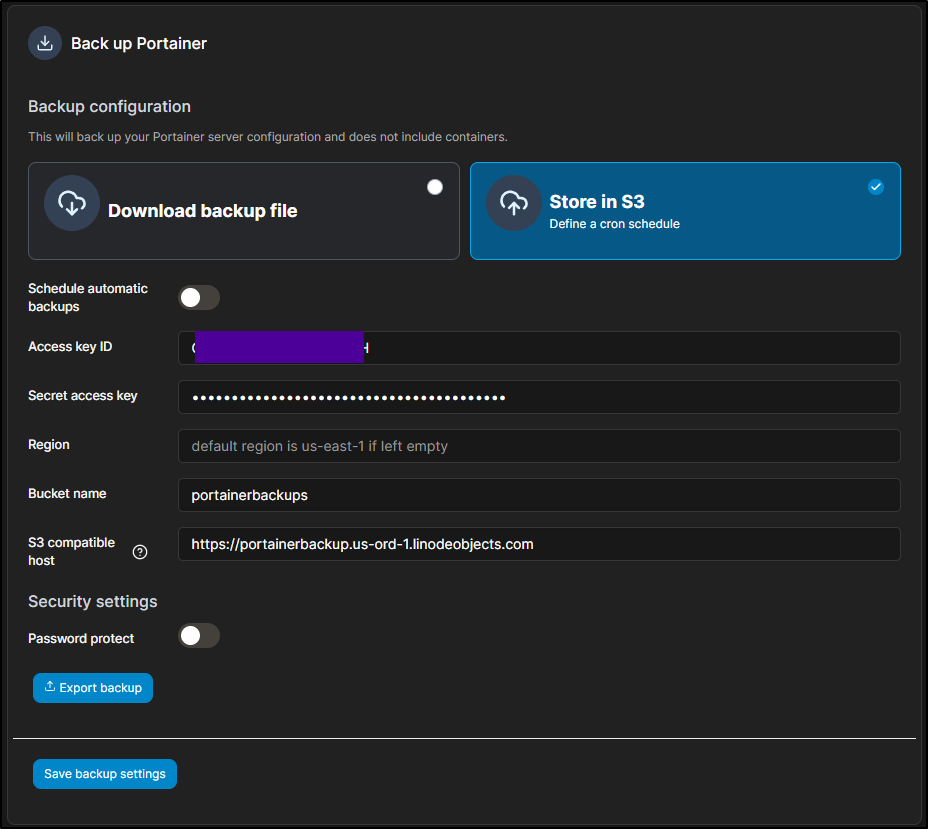
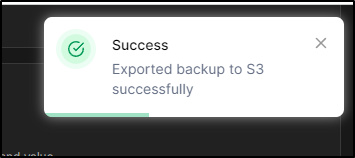
I can click export and see a notification
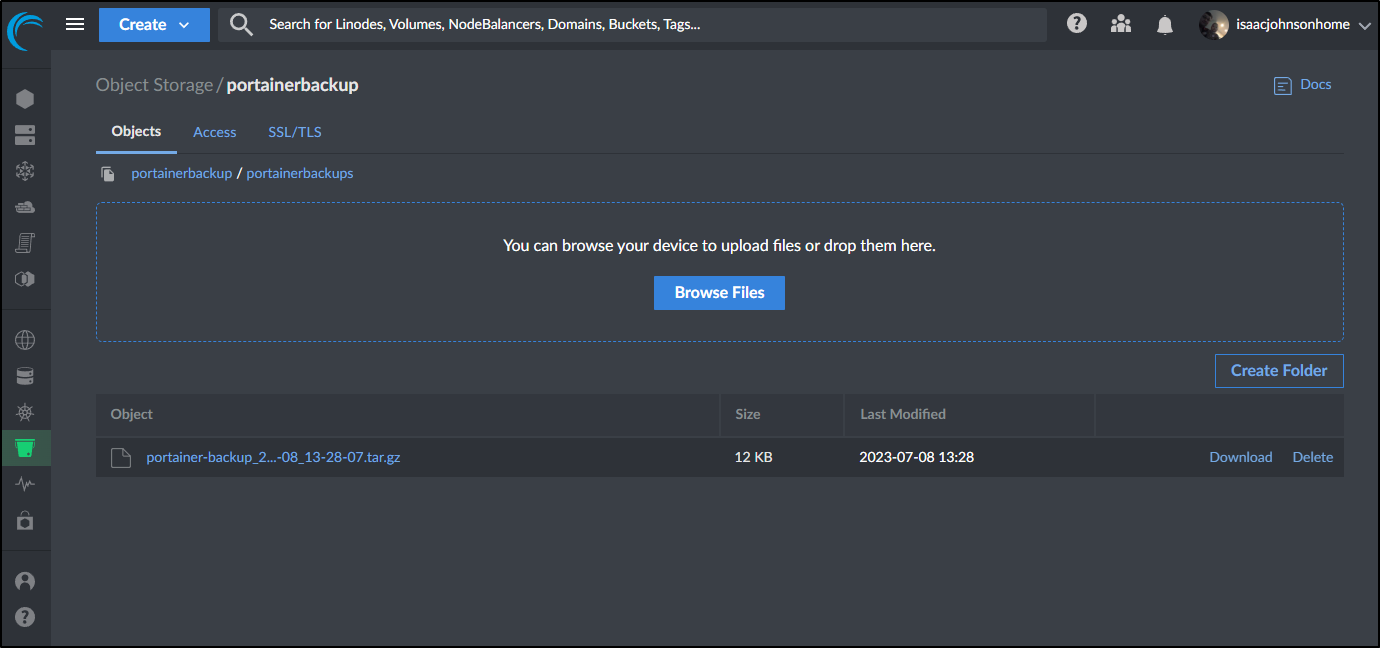
I can then see it listed in Akamai Linode
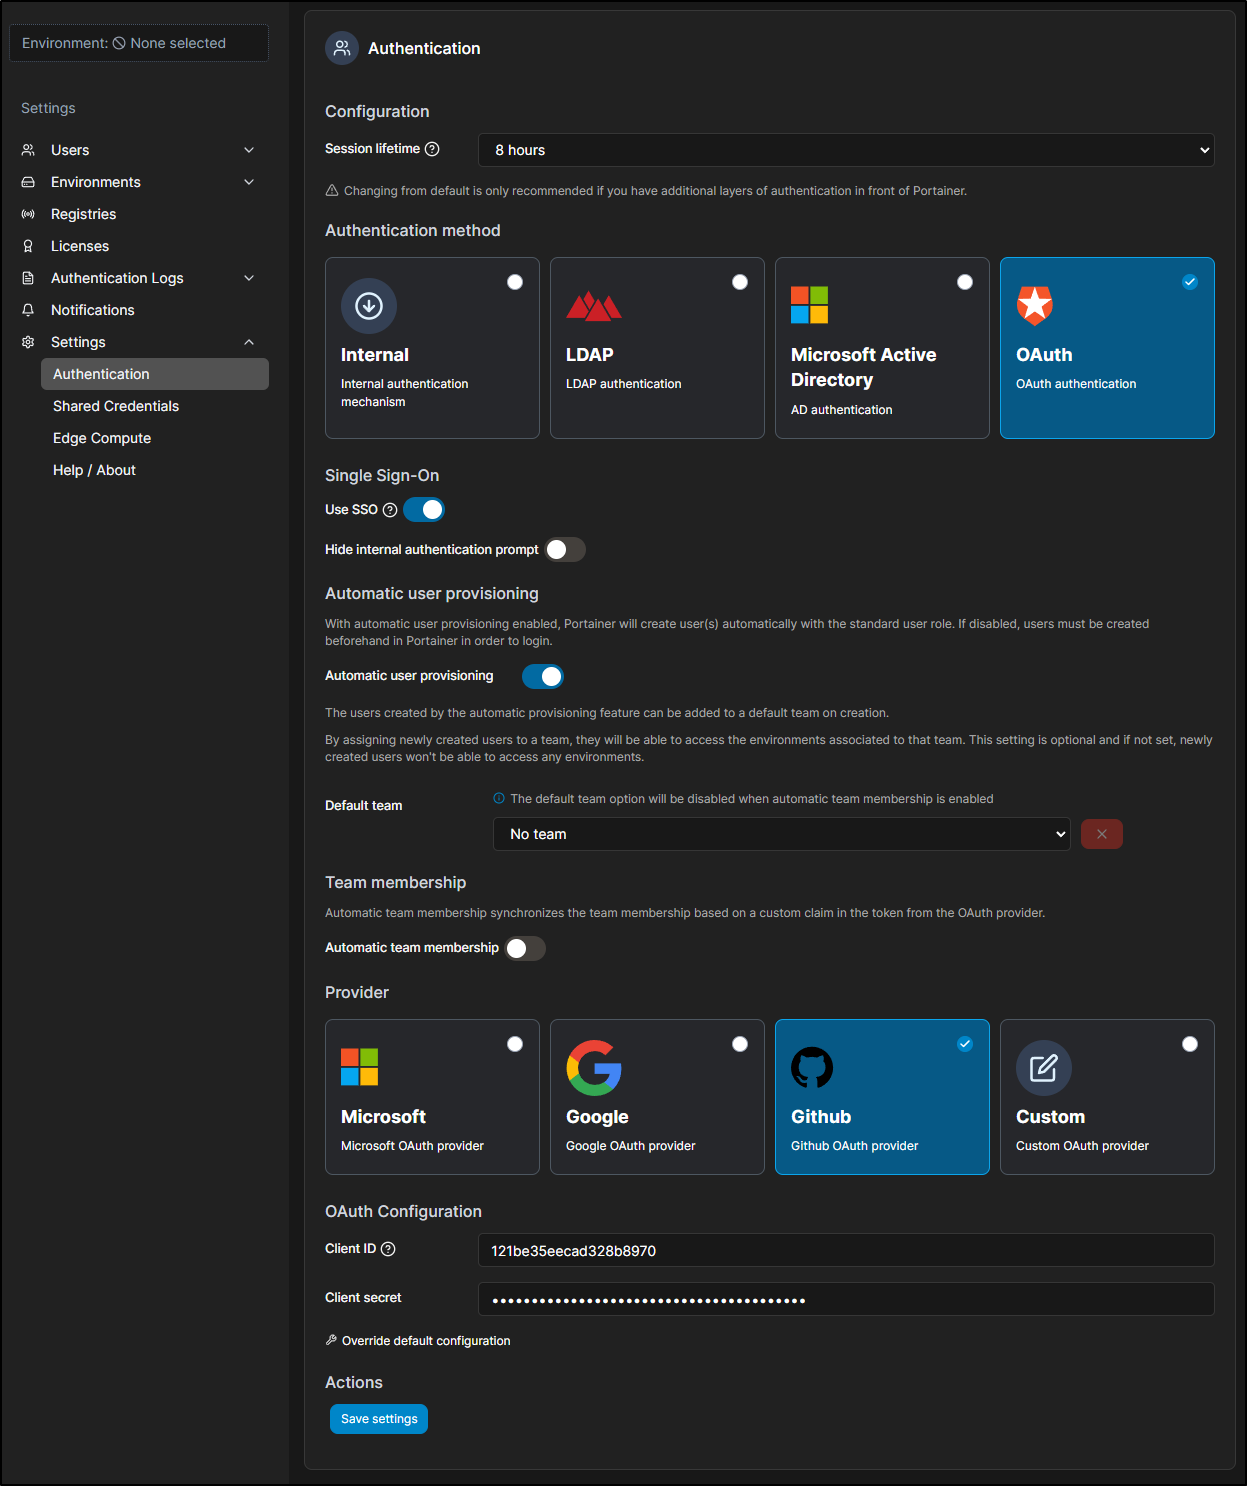
Federated Auth
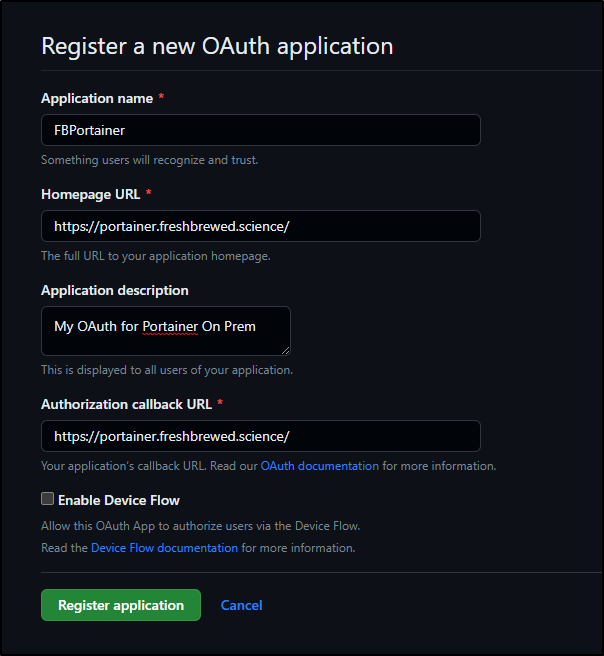
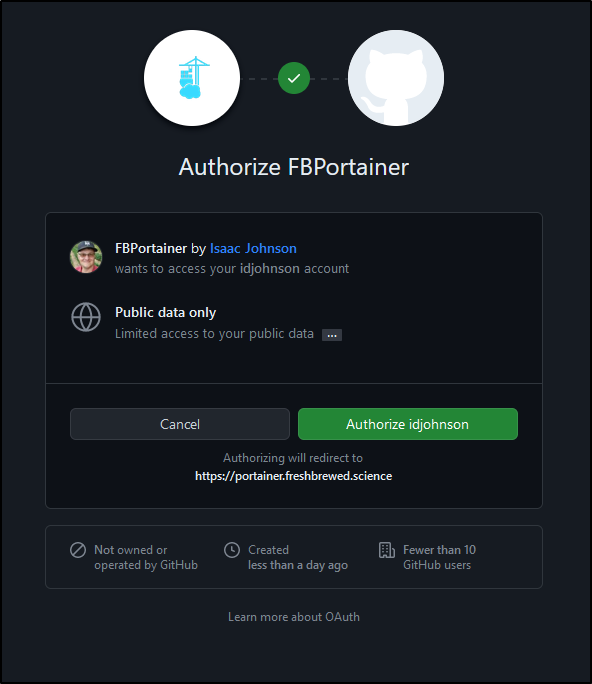
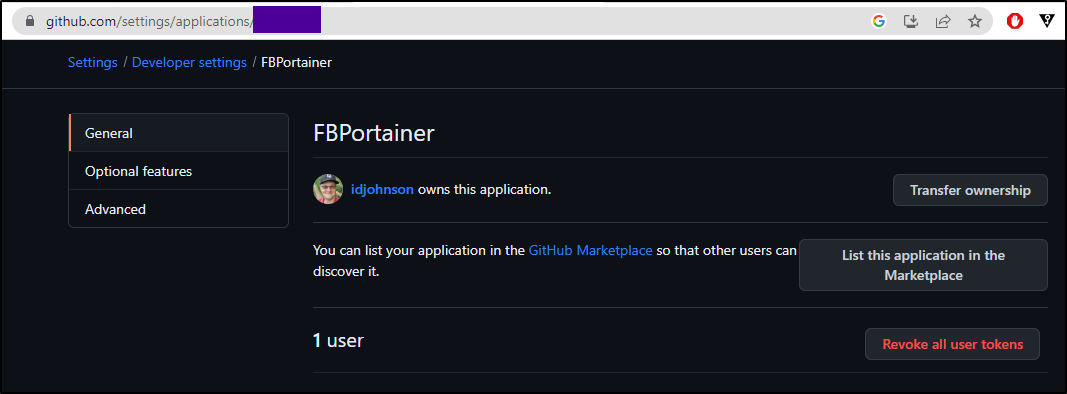
Let’s first create a new OAuth App in Github
We will want the callback to our login URL. This could be ‘https://your.url.here.com:9443’. Since I front my Cluster with an NGinx ingress controller, it’s just the URL.
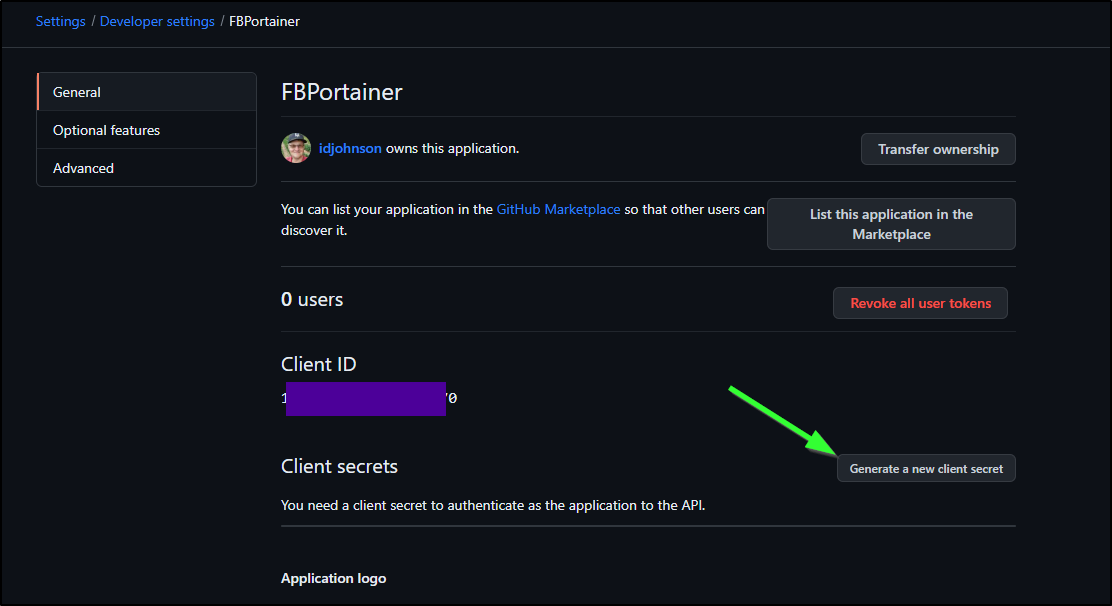
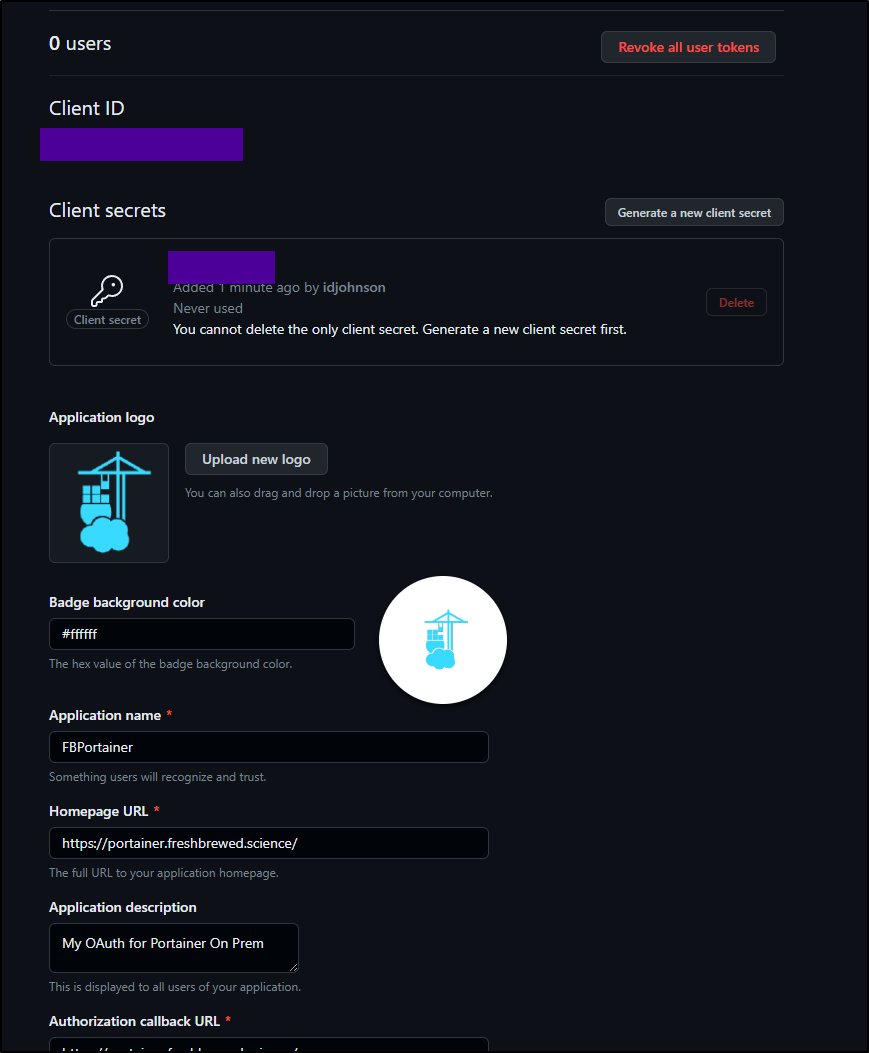
We then need to create a new Client Secret
I plan to use a decent icon in the GH Configuration page
Now we can use it in Portainer
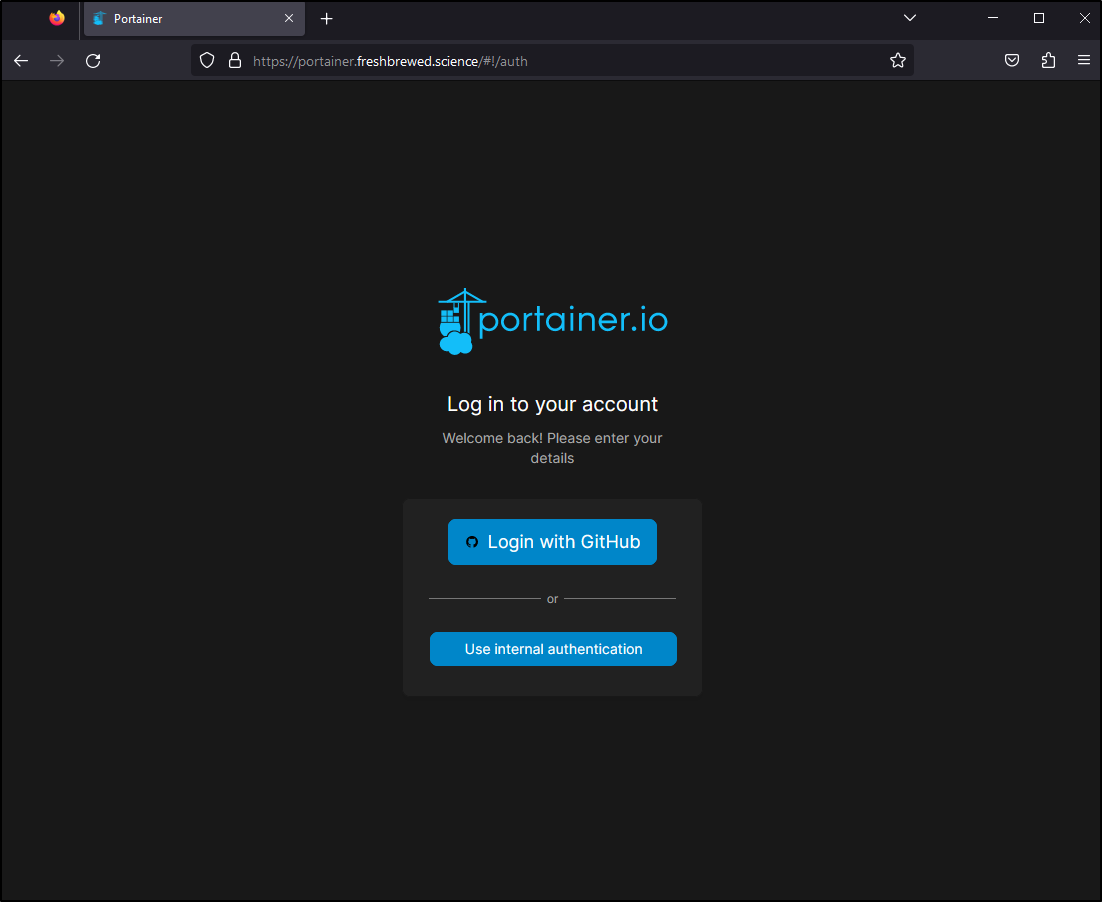
In using a new browser, I can see the Github login
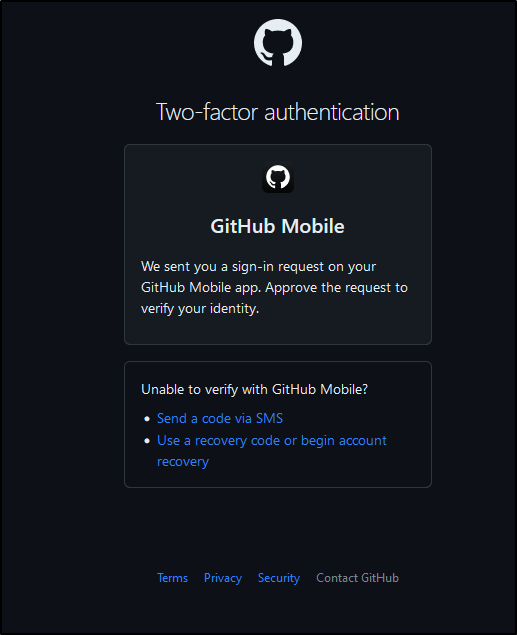
Since my GH has 2FA, I can get prompted as I would expect
I then can authorize or not access to my public data
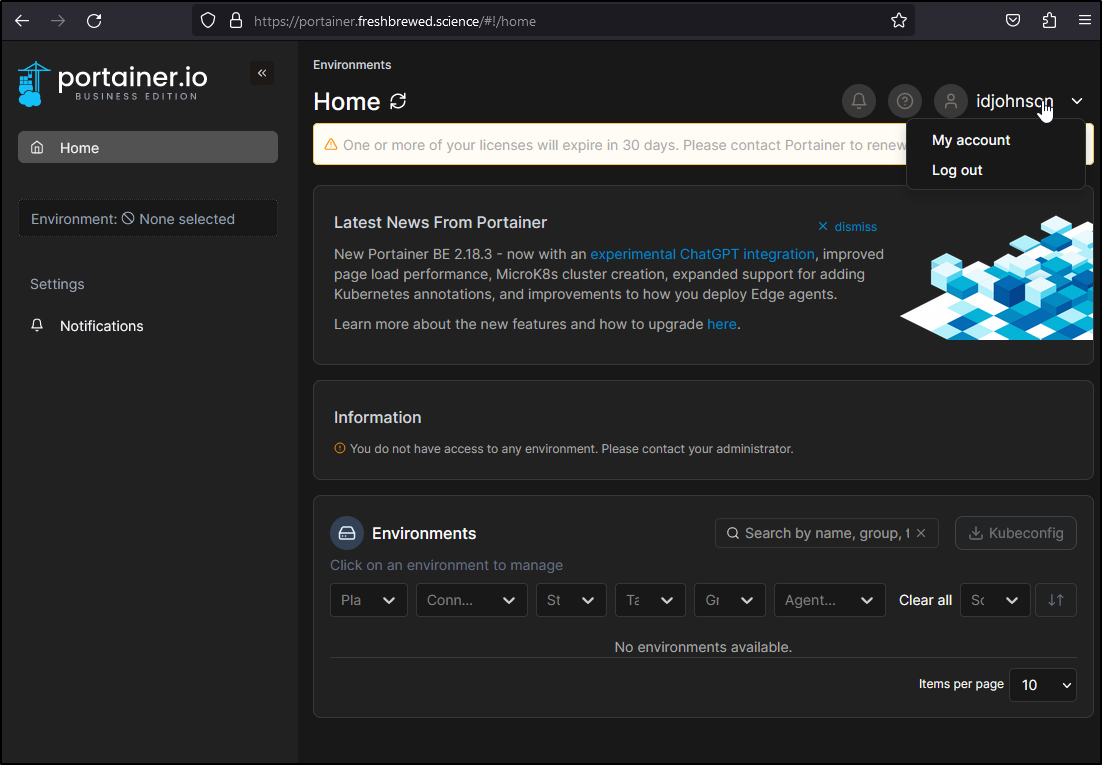
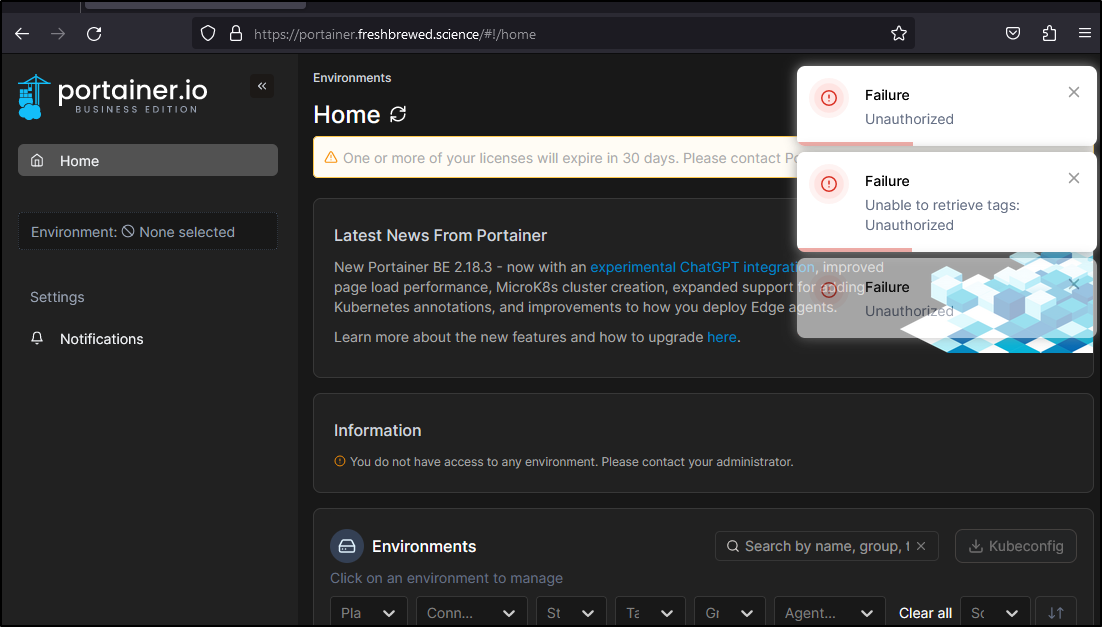
Once logged in, we can see that by default, we have no access to any environment
I do see a user has used it
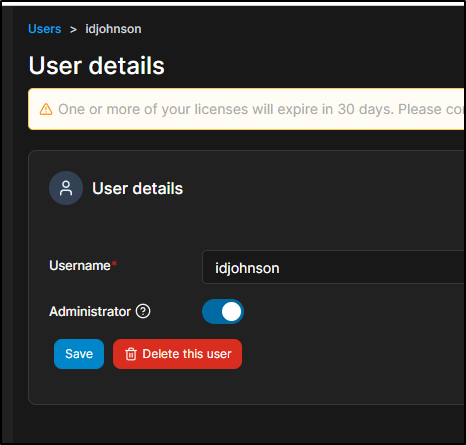
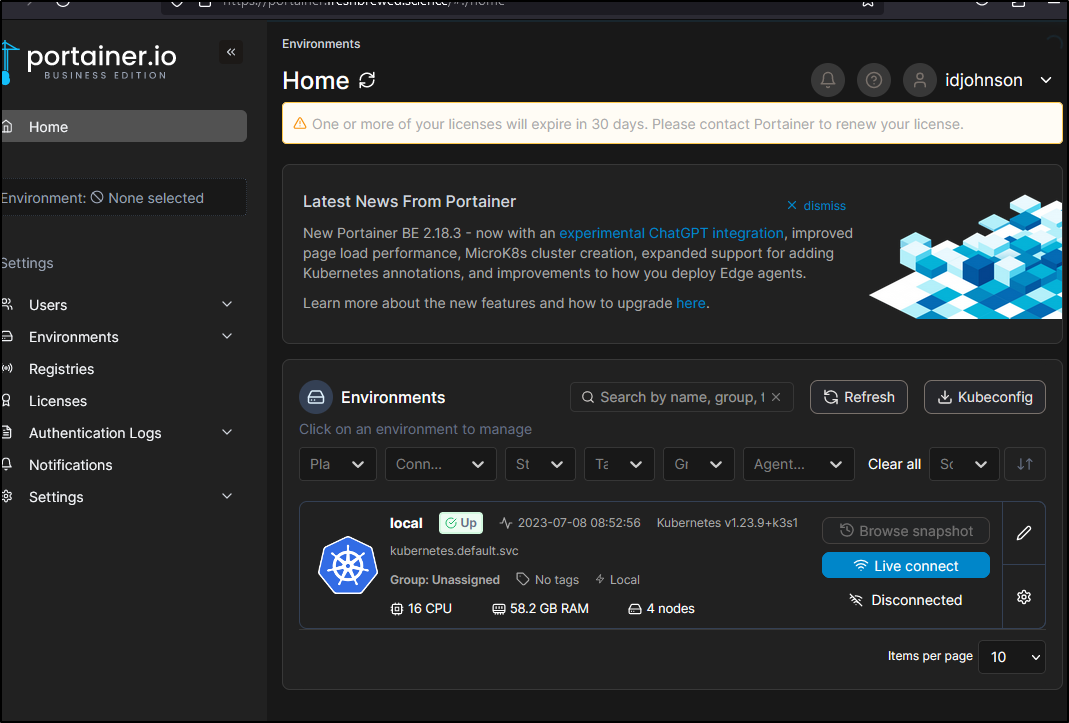
As admin, I can see the user now in users
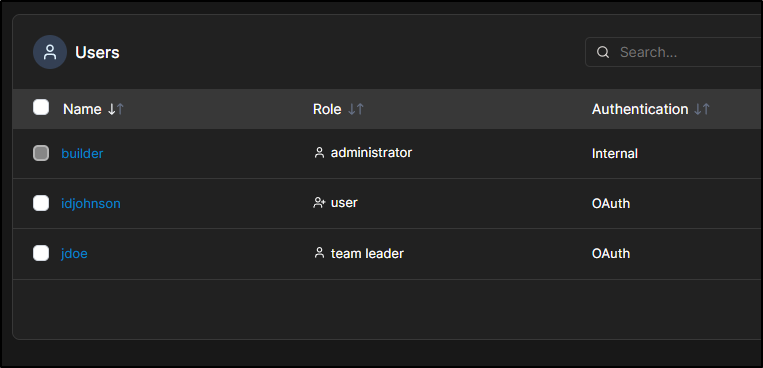
And of course, I can enable myself (as my Github Identity) as an Admin via user details
I noted that I started to get ‘Get Out’ notifications in my Github authed browser session
I found the browser (Firefox) had issues logging out and back again. I’ll try after 8 hours (which was my default session timeout). I managed to use a Private Browsing window just to get by for now
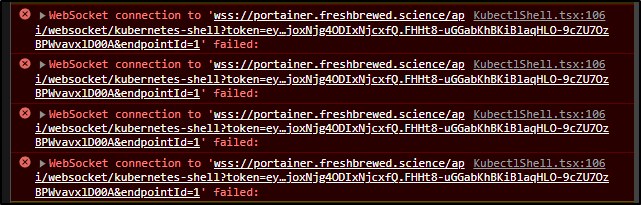
Consequence of Nginx Ingress
I was excited to use the Kubectl Shell, but the underlying problem as you can see below
Is that NGinx Ingress controllers really can’t forward wss (websockets).
However, I can if I so choose expose the NodePort via my Firewall
Then login with internal auth (OAuth will not work because of OAuth redirects)
And from here I can invoke a shell without issue
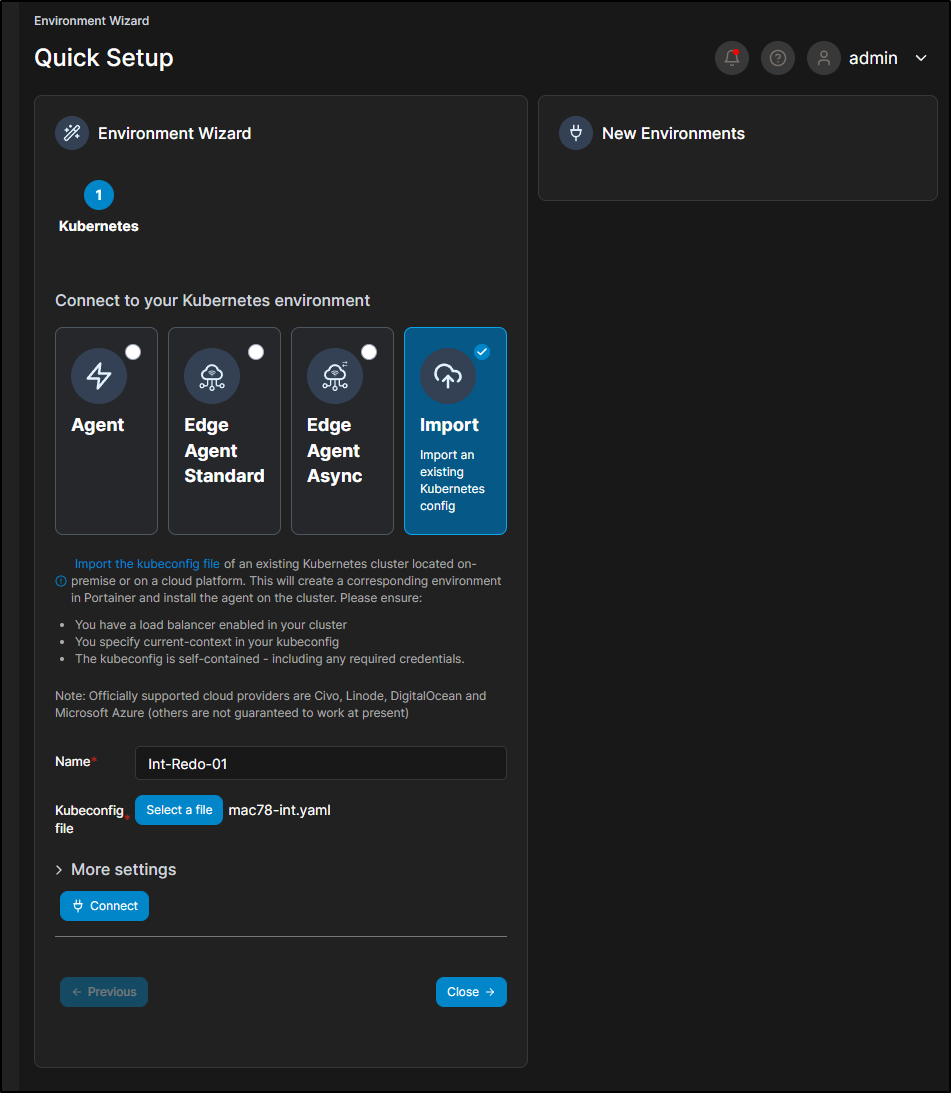
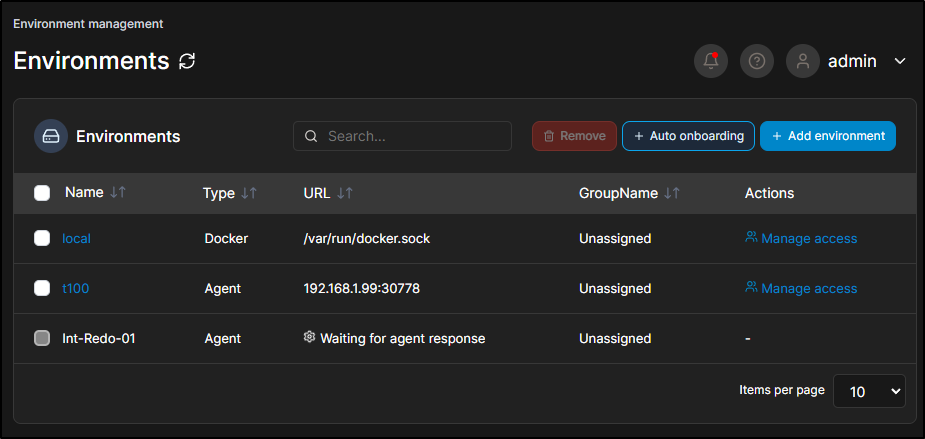
Adding via Kubeconfig
We can add a K8s host by importing a Kube config
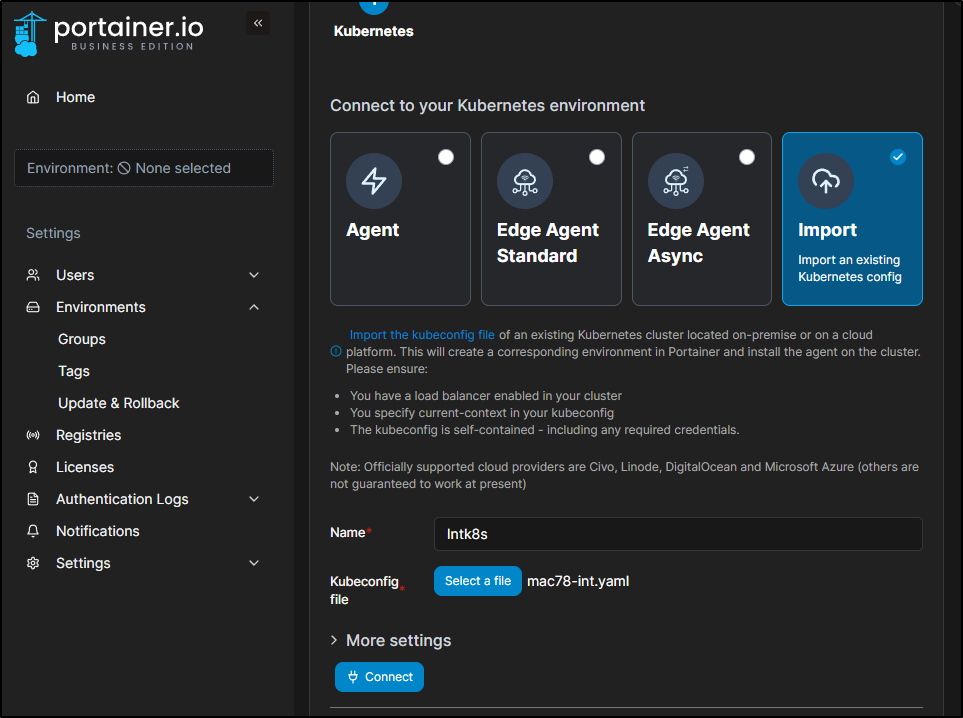
This will show as importing
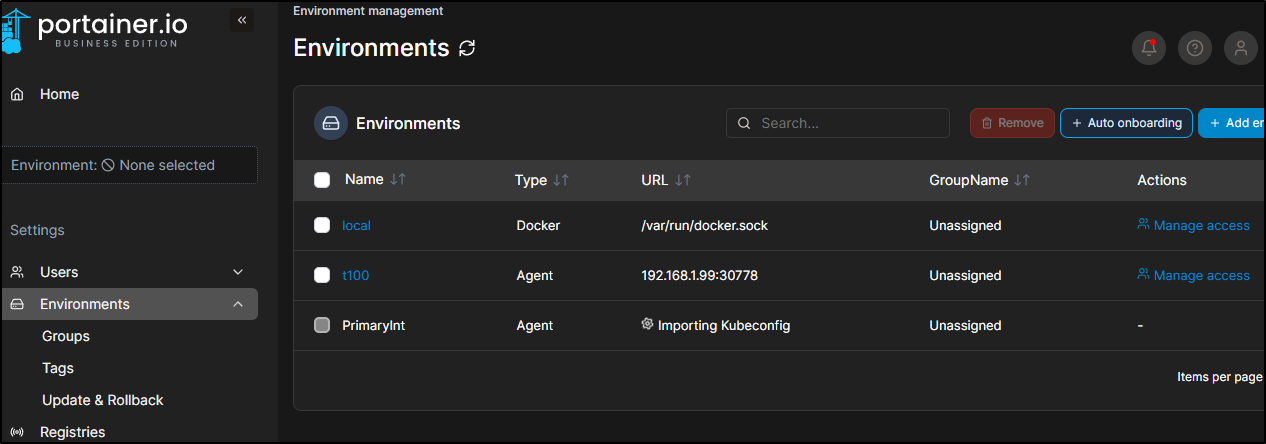
This can create a rather strange setup as I have Portainer already running in the cluster being added to this containerized portainer instance
$ kubectl get pods --all-namespaces | grep portainer
portainer                   portainer-fc58fcd97-sd9gb                                   1/1     Running            0                  16h
kube-system                 svclb-portainer-agent-4427bae0-wnm9w                        1/1     Running            0                  89s
kube-system                 svclb-portainer-agent-4427bae0-bzsj9                        1/1     Running            0                  89s
portainer                   portainer-agent-648df775c6-68p8c                            1/1     Running            0                  89s
kube-system                 svclb-portainer-agent-4427bae0-4865g                        1/1     Running            0                  89s
kube-system                 svclb-portainer-agent-4427bae0-dczlq                        1/1     Running            0                  89s
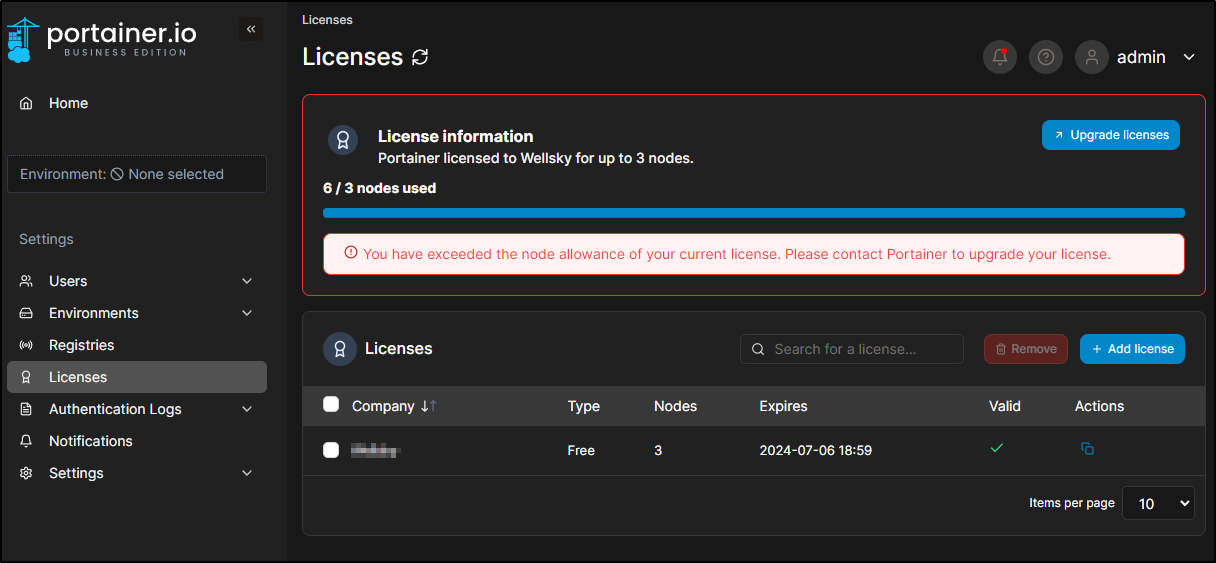
As soon as it went live, then I got my License notice
I was interested to find out if removing and re-adding would affect that window.
Later in the day I came back to see my 10d window was shorter

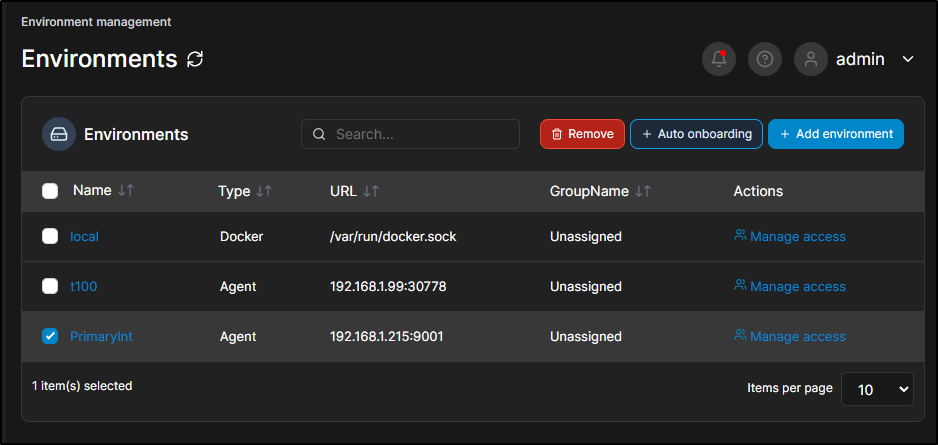
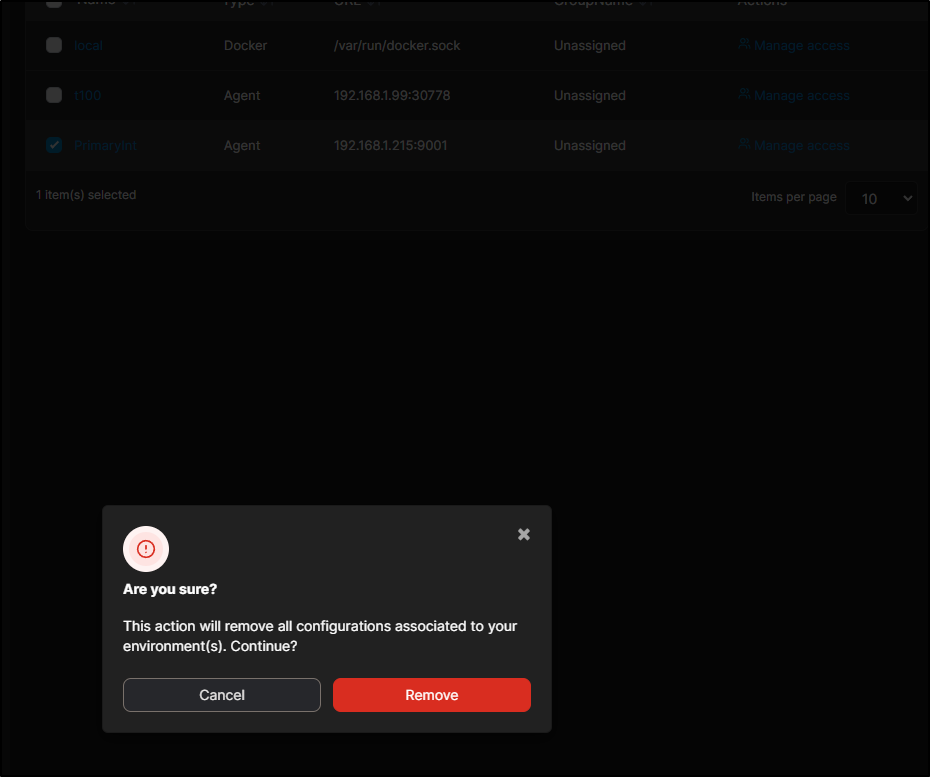
I selected the cluster and removed
I then went to import as a new name
As it rolled through the provisioning steps
I could see it go from the last run (which was still live)
$ kubectl get pods --all-namespaces | grep portainer
portainer                   portainer-fc58fcd97-sd9gb                                   1/1     Running            0                  23h
kube-system                 svclb-portainer-agent-4427bae0-wnm9w                        1/1     Running            0                  6h25m
kube-system                 svclb-portainer-agent-4427bae0-bzsj9                        1/1     Running            0                  6h25m
portainer                   portainer-agent-648df775c6-68p8c                            1/1     Running            0                  6h25m
kube-system                 svclb-portainer-agent-4427bae0-4865g                        1/1     Running            0                  6h25m
kube-system                 svclb-portainer-agent-4427bae0-dczlq                        1/1     Running            0                  6h25m
To a new agent
$ kubectl get pods --all-namespaces | grep portainer
portainer                   portainer-fc58fcd97-sd9gb                                   1/1     Running             0                  23h
kube-system                 svclb-portainer-agent-4427bae0-wnm9w                        1/1     Running             0                  6h25m
kube-system                 svclb-portainer-agent-4427bae0-bzsj9                        1/1     Running             0                  6h25m
kube-system                 svclb-portainer-agent-4427bae0-4865g                        1/1     Running             0                  6h25m
kube-system                 svclb-portainer-agent-4427bae0-dczlq                        1/1     Running             0                  6h25m
portainer                   portainer-agent-648df775c6-68p8c                            1/1     Terminating         0                  6h25m
portainer                   portainer-agent-648df775c6-tfsg7                            0/1     ContainerCreating   0                  1s

$ kubectl get pods --all-namespaces | grep portainer
portainer                   portainer-fc58fcd97-sd9gb                                   1/1     Running            0                  23h
kube-system                 svclb-portainer-agent-4427bae0-wnm9w                        1/1     Running            0                  6h27m
kube-system                 svclb-portainer-agent-4427bae0-bzsj9                        1/1     Running            0                  6h27m
kube-system                 svclb-portainer-agent-4427bae0-4865g                        1/1     Running            0                  6h27m
kube-system                 svclb-portainer-agent-4427bae0-dczlq                        1/1     Running            0                  6h27m
portainer                   portainer-agent-648df775c6-tfsg7                            1/1     Running            0                  112s
Back in Home, I saw it reset to 10 days
Now I recommend paying for products you use. Let me be clear on that. But it does seem that one could just drop and re-add a large cluster on a weekly basis to keep a node limited Portainer working, provided it wasn’t too much of a chore.
Summary
We created a couple of helm installations of Portainer.io then exposed one of them with TLS. We looked into OAuth and setup Github federated authentication. We looked at backups using Akamai Linode and sorted out a path around WebSockets issues and NGinx. Lastly, We spoke briefly on licenses and some limitations and caveats of the node limitations.